
| |
This is the Add icon. |
The Permission Group screen lists all of the Permission Groups that have been added. For each of these Permission Groups, Orchid Fusion/Hybrid VMS displays a description of the Permission Group. If the Fusion/Hybrid configuration file has been modified to add an external authentication provider (such as Active Directory, Azure Active Directory, FreeIPA, or SAML), you may add Permission Groups that pull users from those providers.
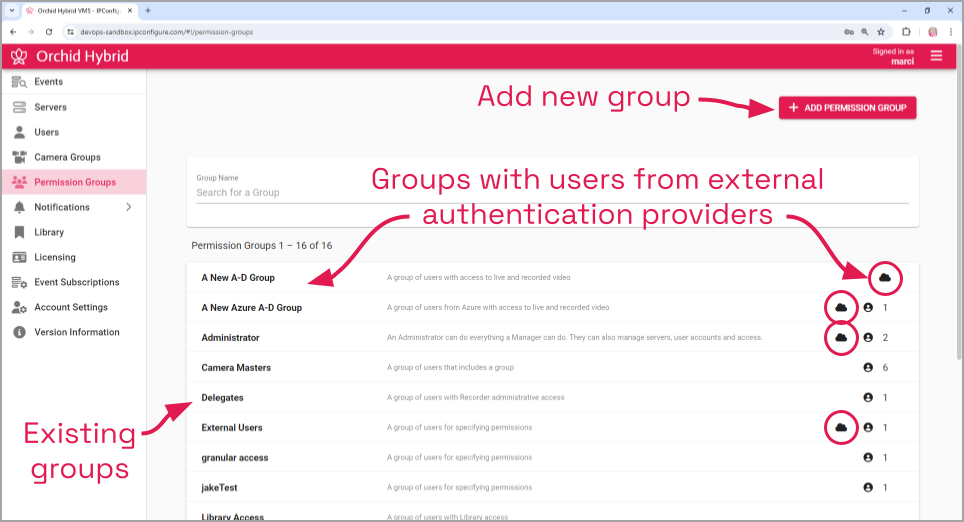
- Click the Add Permission Group button in the top-right corner of the Permission Groups list. A New Permission Group screen will open.
The General Settings Tab
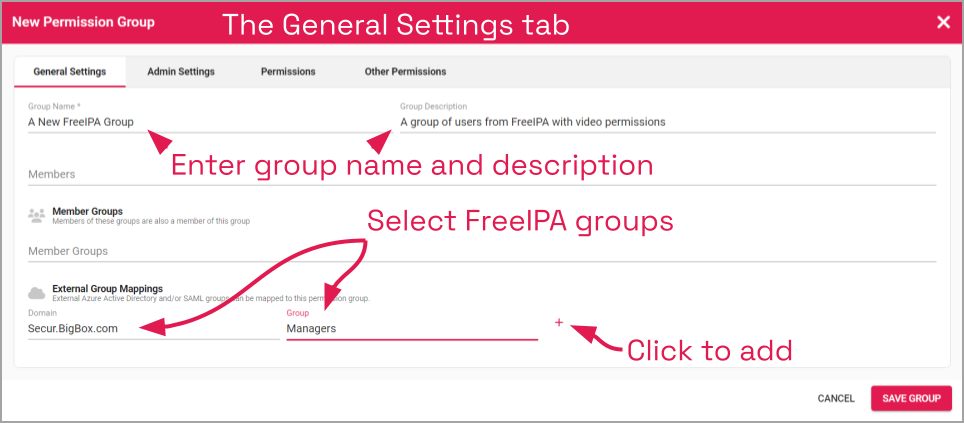
- On the General Settings tab, enter a name and a description for the new Permission Group in the Group Name and Group Description fields.
- Use the Members and Member Groups fields if you need to add local users and groups to this Permission Group.
- Go to the External Group Mappings section.
- Click in the Domain field and enter the name of the domain in which your external users exist. (This domain is defined in the fusion configuration file.)
- Click in the Group field and enter the name of the group in which your external users exist. (This group exists in one of your external authentication provider systems, such as Active Directory or Ping.)
- Click the Add icon to add this new external group. As soon as you add the new external group, another prompt will appear so you can enter another group (if needed).
- If you don’t have any additional external groups to add, simply click in the white space to the right of the Domain and Group fields.
- To remove an external group mapping, click the X to the right of the group name.
- Click on the Admin Settings tab to continue configuring this group.
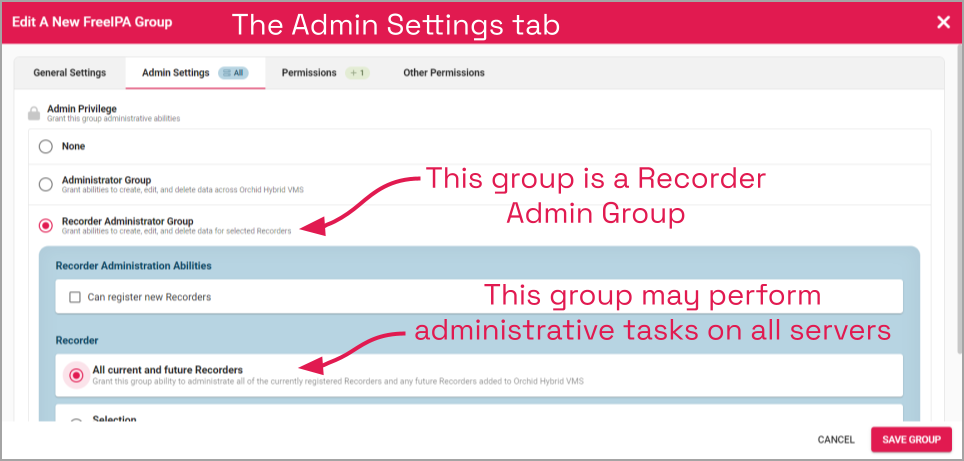
The Admin Settings Tab
- If this Permission Group is not going to have any Admin permissions, mark the None radio button and proceed to the Permissions tab.
- If this Permission Group is going to have all of the permissions that an Administrator has (like adding and deleting Orchid Recorders, Users, and Permission Groups), mark the Administrator Group radio button. (If marked, no other settings will be required.)
- If this Permission Group is going to have Recorder Administrator permissions, mark the Recorder Administrator Group radio button.
- If you want this group to be able to add and remove Orchid Recorders, mark the Can register new Recorders checkbox. (If this is not marked, system Administrators will continue to be the only users who can add and delete Recorders.)
- If you want this group to be able to perform administrative tasks on all current and future Recorders, mark the All current and future Recorders radio button. (Administrative tasks include things such as camera configuration, working with the Retention Policy, checking the Audit Logs, and activation/upgrades.)
- If you want this group to be able to perform administrative tasks only on selected Recorders, mark the Selection radio button.
- You may search for servers and cameras using the Search field.
- Mark the Select all checkbox if you want to select all of the servers listed.
- To grant administrator access to specific Recorders, mark the checkboxes next to those Recorders.
- If you don’t want to grant administrator access to any of the Recorders, do not make any specific selections.
- Click on the Permissions tab to continue configuring this group.
The Permissions Tab
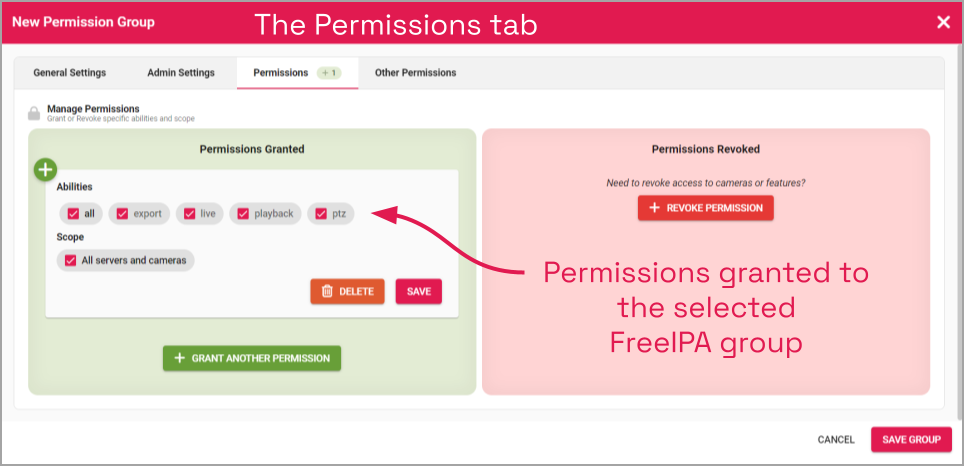
- If this Permission Group is going to have access to specific cameras and video, use the Permissions Granted and Permissions Revoked features. (For more details on granting and revoking permissions, please refer to the Add a Permission Group with Individual Members topic.)
- Click on the Other Permissions tab to continue configuring this group.
The Other Permissions Tab
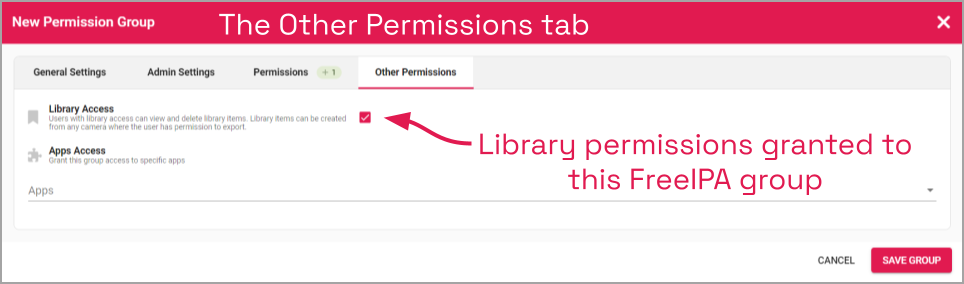
- If you want this group to have access to the Library, mark the Library Access checkbox. (Users in this group will be able to view and delete Library items. Users will also have the ability to create Library items for any camera to which they have export permissions.)
- If you want this group to have access to some or all Apps, go to the Apps Access field.
- Click in the Apps field to select the Apps to which you are granting access.
- Select individual Apps by marking the box next to one or more App names.
- Select all available Apps by marking the All Apps checkbox.
Finalizing the Permission Group
- After all of the permissions are set, press the Save Group button.
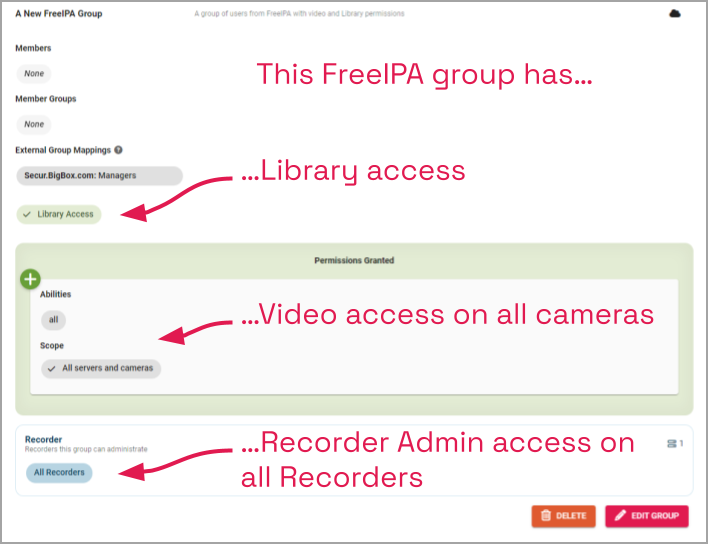
Here is a view of the new Permission Group once it has been saved.
Post your comment on this topic.