
After an item has been exported to the Library, you may review the details by accessing the Library screen.
- From the list of items on the Library screen, click the name of the one you want to review. (The list will expand to display all of the information for the selected item.)
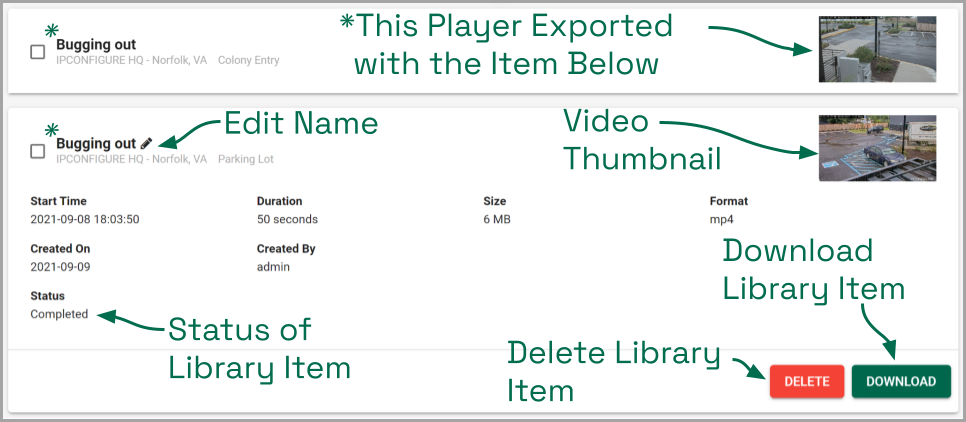
This summary should provide all of the information you need to know about the Library item. The Recording server name and the camera name are listed just below the item name. The summary also includes a thumbnail image from the camera.
Additional item details include the following:
- Start Time: This represents the requested start time for the clip. (This may not necessarily reflect the actual start time for the video because there may be missing video. For example, the camera may have been down, or the camera is recording only when motion is detected.)
- Duration: The duration represents the length of the exported clip.
- Size: This is the size of the exported clip.
- Format: The format field displays the file type of the exported clip.
- Created On: This is the date on which the clip was exported.
- Created By: This shows the Alto username of the Administrator responsible for the export.
- Status: This indicates the status of the export process. Possible status messages include the following:
- Pending: Indicates that the export process is getting ready to begin.
- Started: Indicates the item is being exported to the Library.
- Completed: Indicates that the item has been exported successfully.
- Failed: Indicates that the export process was not successful.
- Cancelled: Indicates that the export process was cancelled by the user.
Edit the Item Name
| |
This is the Edit pencil icon. |
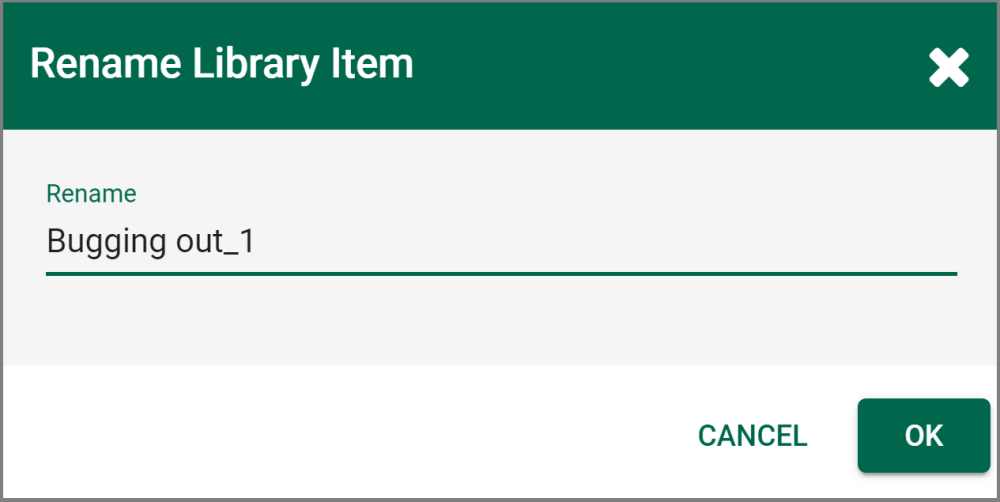
- To change the item name, click the Edit pencil icon to the right of the item name.
- Enter a new name in the Rename field, then click the OK button.
Download the Library Item
- To download the Library item to your local hard drive, click the Download button. Orchid Alto VMS will begin downloading the file.
- Go to your Downloads folder to find and play the downloaded video.
Open a Library Item
When Library items are being stored in an external cloud storage location, you’ll notice that the Download button is replaced by an Open button.
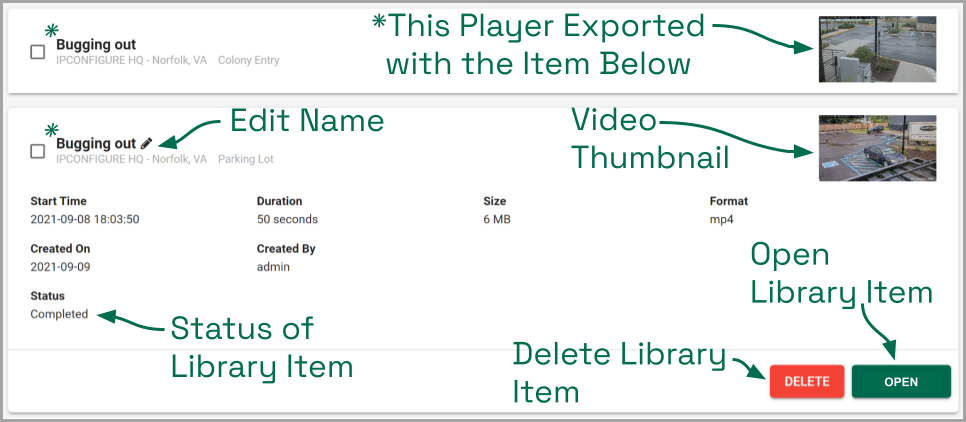
- To open the Library item, click the Open button.
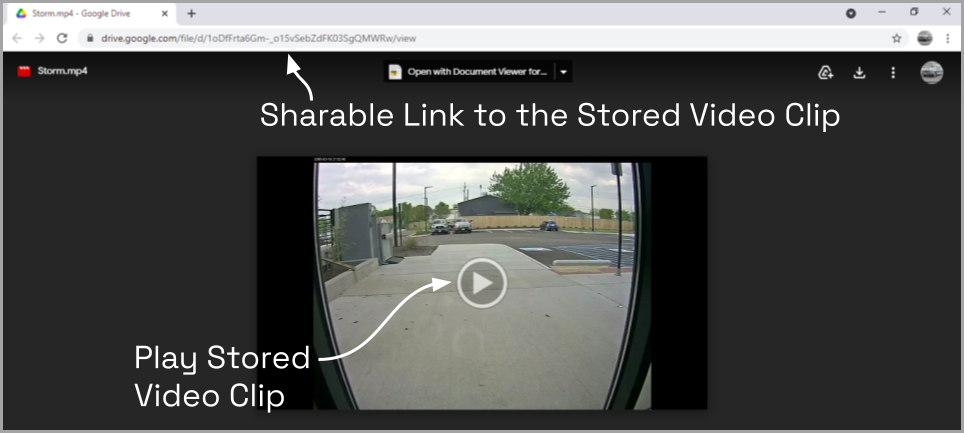
The clip will open in a browser tab provided by the external cloud storage application. (In this example, the chosen application is Google Drive.) Options provided by the cloud storage application may vary, but you will typically be able to view the video, share a link to the video, or download the video to a local storage location.
- Use the on-screen controls to play or pause the video clip.
- Copy the link to the video clip to share it with someone else. The recipient will be able to view the clip directly without requiring Alto or any special permissions.
- Close the browser tab to close the video clip.
Post your comment on this topic.