
| |
This is the Add icon. |
| |
This is the X icon (used to remove a time slot from the Schedule). |
The Schedules tab is the second tab associated with the Motion Alerts feature. Use this tab to define the intervals during which the system will monitor the Motion Alerts you have configured. (You may apply any Schedule to multiple Recording servers. This comes in handy when you have multiple locations with similar security needs.)
As you prepare to configure a Schedule for each Recording server (as needed), you’ll need to consider which time lots might need extra security monitoring (such as after hours, at night, or maybe on the weekend).
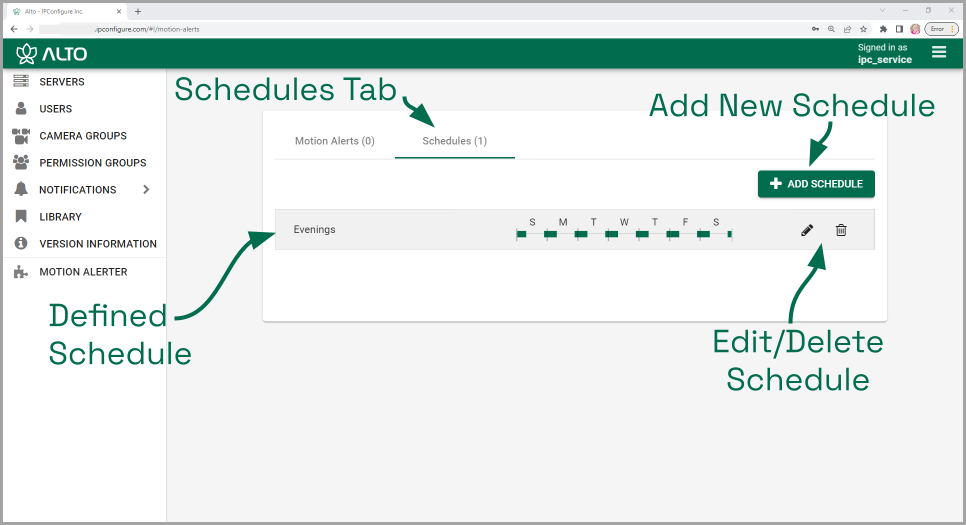
- To create a new Schedule, click the Add Schedule button.
- First, enter a name for the Schedule.
Under the Name field, you’ll notice that there is a weekly timeline. This timeline graphic will update as you make changes to the Schedule.
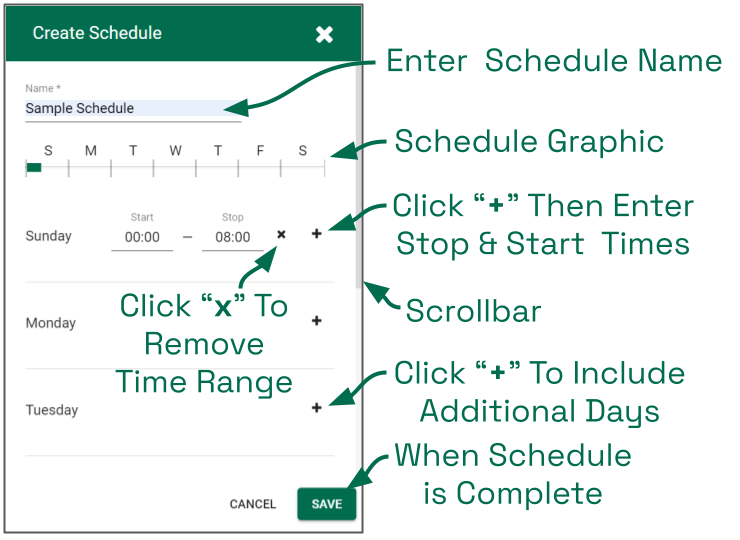
- For each day of the week that you want the system to monitor for motion events, do the following:
- Click the + icon to the right of the day of the week.
- Click in the Start field to select the time the system should start monitoring. Scroll up and down the list until you find the start time you want, then click on it to select it. (Times will be listed using a 24-hour clock.)
- Click in the Stop field to select the time the system should stop monitoring. Scroll up and down the list until you find the end time you want, then click on it to select it.
- If you want to select another time period for the same day, click the + icon again. Then select the start and end times.
- After you have selected all of the monitoring periods, click the Save button to save the Schedule. The new Schedule will appear in the list.
Post your comment on this topic.