
In this section, instructors can access their list of assigned trainings as well as develop their course plans.
Training Definitions Assigned to Me
In this section, users can access the list of trainings to which they have been assigned as instructor.
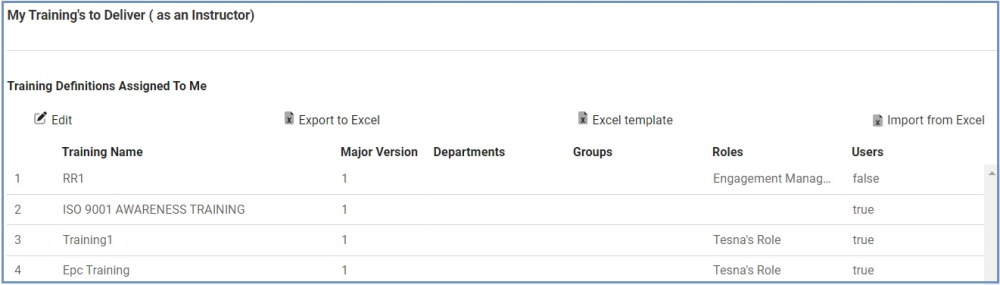
- Edit: This button allows users to edit a training definition.
- To edit, select the training that you want to edit from the grid and click on the Edit button. It will direct you to the Plan Courses form.
![]()
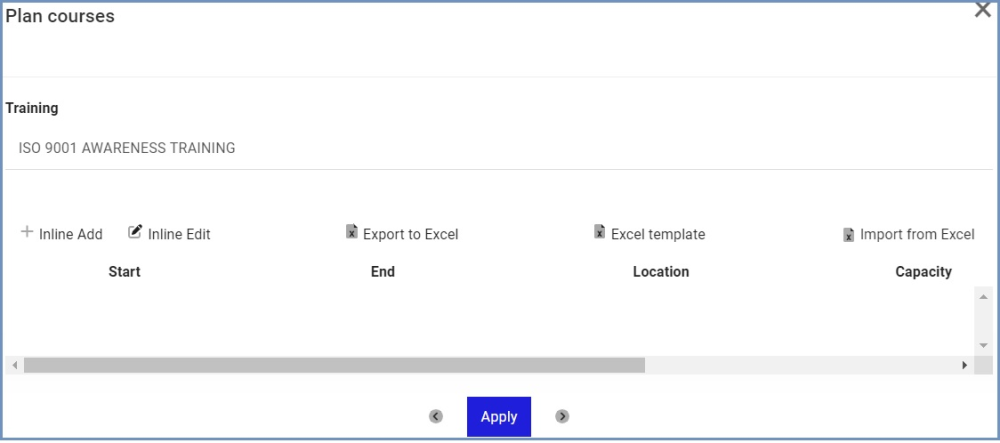
- Inline Add: This button allows users to add and plan a new course.
![]()
- Start: This is a date field that allows users to input the start date for the course.
- End: This is a date field that allows users to input the end date for the course.
- Location: This is a text field that allows users to input the location of the course.
- Capacity: This is a numeric input field that allows users to input the course capacity. Users can enter this number either manually or by clicking the increment/decrement arrows.
- Save: This button allows users to save the information inputted.
- Cancel: This button allows users to cancel the information inputted.
- Inline Edit: This button allows users to edit an existing course plan.
- All the Inline Add fields will reappear and users can make, save, or cancel changes as desired.
- Export to Excel: This button allows users to export selected columns from the grid to Excel.
- Excel Template: This button allows users to generate an Excel template of the grid—that is, an Excel sheet with the column headers Start, End, Location, and Capacity.
- Import from Excel: This button allows users to import data from an Excel sheet into the grid.
- Apply: This button allows users to save their work.
- Inline Add: This button allows users to add and plan a new course.
- To edit, select the training that you want to edit from the grid and click on the Edit button. It will direct you to the Plan Courses form.
- Export to Excel: This button allows users to export selected columns from the grid to Excel.
- Excel Template: This button allows users to generate an Excel template of the grid—that is, an Excel sheet with the column headers Training Name, Major Version, Departments, Groups, Roles, and Users.
- Import from Excel: This button allows users to import data from an Excel sheet into the grid.

Courses Planned
In this section, users can access the grid displaying the list of courses that have been created using the Plan Courses form.
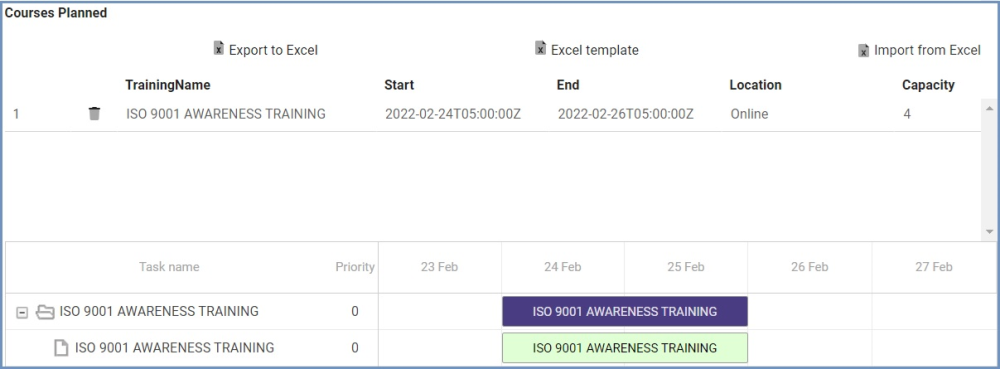
- Export to Excel: This button allows users to export selected columns from the grid to Excel.
- Excel Template: This button allows users to generate an Excel template of the grid—that is, an Excel sheet with the column headers Training Name, Start, End, Location, and Capacity.
- Import from Excel: This button allows users to import data from an Excel sheet into the grid.
Training Details
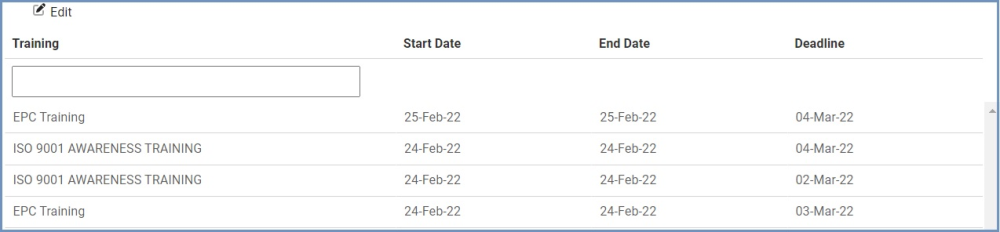
- Edit: This button allows users to edit the training details.
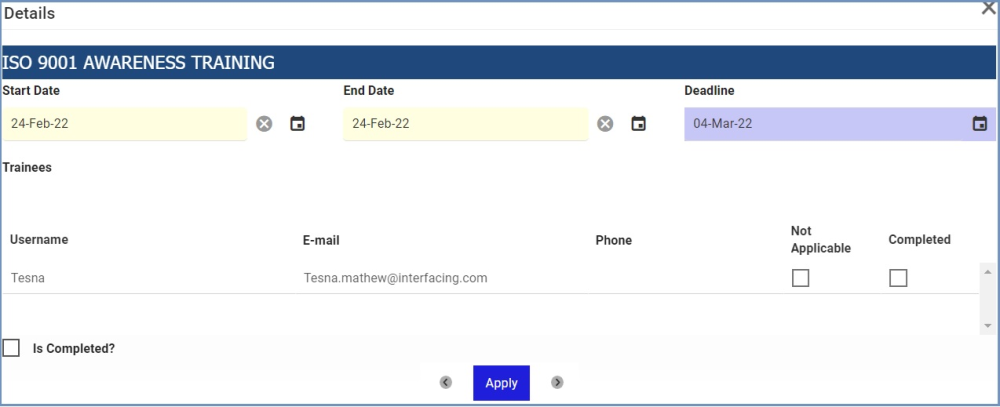
- To edit, select the training that you want to edit from the grid and click on the Edit button. It will direct you to the Details form.
![]()
- Users are not allowed to modify any of the fields in the Details form except for “Start Date,” “End Date,” and “Is Completed” (as shown in the image below).
- Start Date: This is a date field that allows users to input the start date of the training.
- End Date: This is a date field that allows users to input the end date of the training.
- Is Completed: This is a checkbox which, if enabled, allows users to declare the training as completed.
- Apply: This button allows users to save the details inputted.
- To edit, select the training that you want to edit from the grid and click on the Edit button. It will direct you to the Details form.
Post your comment on this topic.