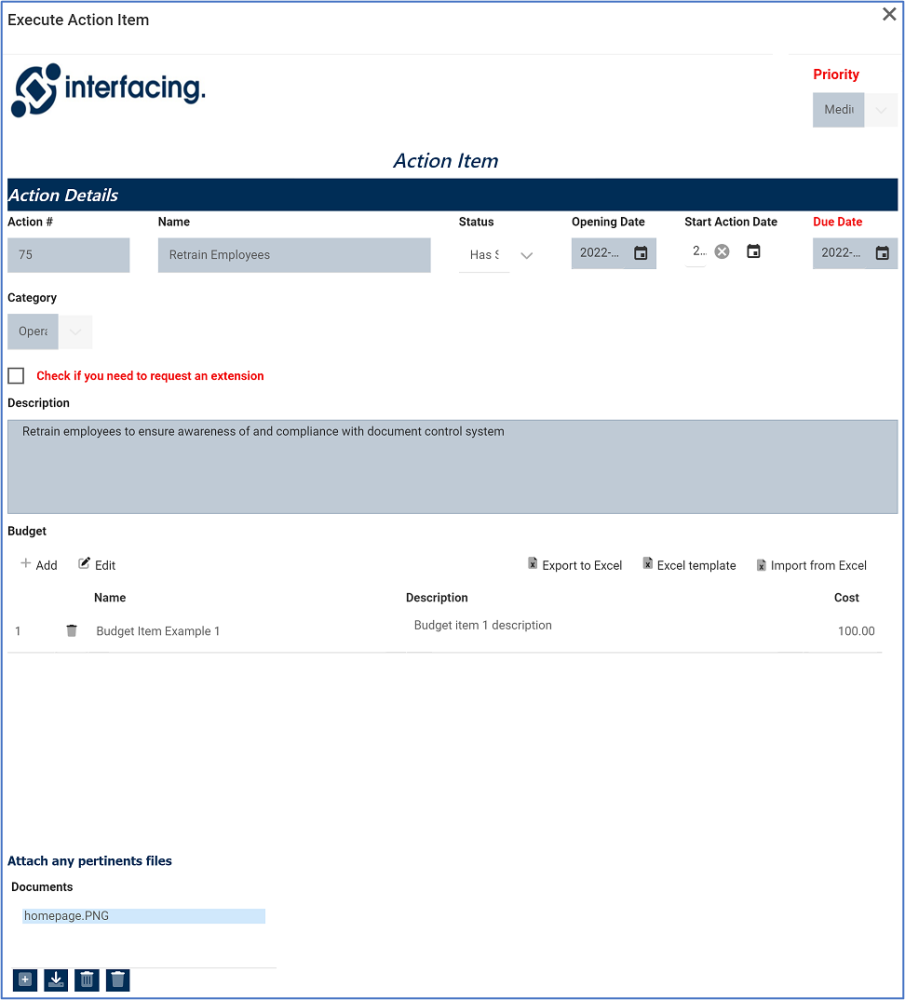
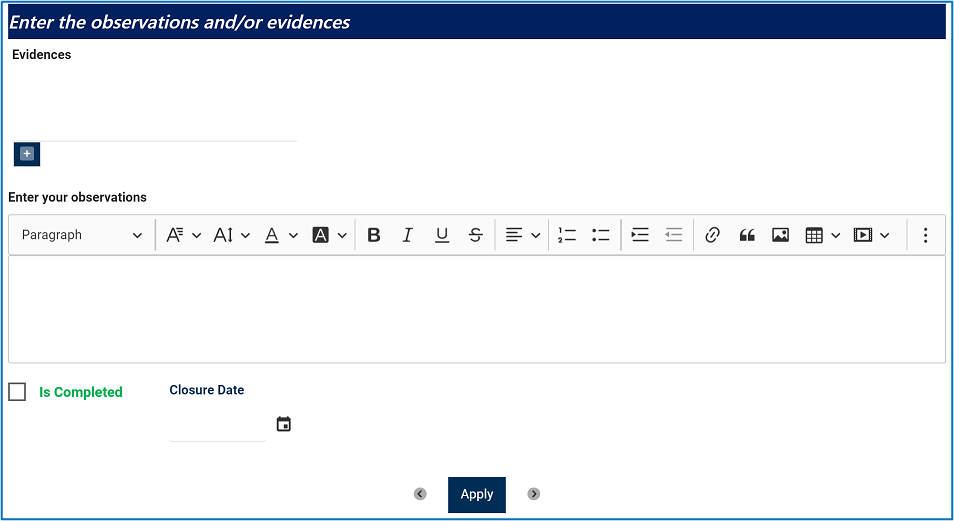
This form is composed of 3 main sections: (1) Action Details, (2) Action Type Details, (3) Enter the Observations and/or Evidences.
1. Action Details
Users cannot make any direct modifications in this section of the form. They can, however, add to, delete, or download existing files in the attachment field.

- Action #/Name/Opening Date/Due Date/Priority/Category/Description: These fields are all disabled in editing mode. They are automatically populated with the details inputted in the Gather Details form.
- Opening Date: This is a date field that displays the date that the action item was opened.
- Status: This is a single-select dropdown field that displays a list of statuses. It allows users to select only one value at a time from the dropdown.
- Statuses: Not Started, Has Started, In Progress, Completed.
- Start Action Date: This is a date picker that allows users to input/select the start date for the action item.
- Check . . . extension: This is a checkbox which, if enabled, allows users to send an extension request.
- For more details on this option, click here.
- Add: This button allows users to add a new budget item (see previous instance).
- Edit: This button allows users to edit an existing budget item (see previous instance).
- Export to Excel: This button allows users to export selected columns from the grid to Excel.
- Documents: This is an attachment field that allows users to attach any files related to the action item.
- Users can also download or delete existing files.
2. Action Type Details
Below the attachment field, the page display will vary depending on which internal action type was selected in the Add Action Item to Quality Event form.

3. Enter the Observations and/or Evidences

- Evidences: This is an attachment field that allows users to attach files as evidence.
- Enter your observations: This is a description box that allows users to input their observations. In this field users can insert headings, bullets, images, tables, links, and media files (as well as change font colors, font sizes, background colors and more).
- Is Completed: This is a checkbox which, if completed, allows users to mark the action item as completed.
- If selected, it will cause for the Closure Date field to become mandatory.
- It will also switch the Status to Completed.
- If selected, it will cause for the Closure Date field to become mandatory.
- Closure Date: This is a date picker that allows users to input/select the closure date for the action item.
- If the Is Completed checkbox is selected, the Closure Date will automatically input itself as today’s date. This entry, however, can be manually modified.
- Apply: This button allows users to save their changes.
- Users can navigate between action items by using the arrows on either side of the Apply button.


Post your comment on this topic.