
The Roles tab contains two sub-tabs:
1. Roles List
In this tab, you can create, edit, and delete roles.
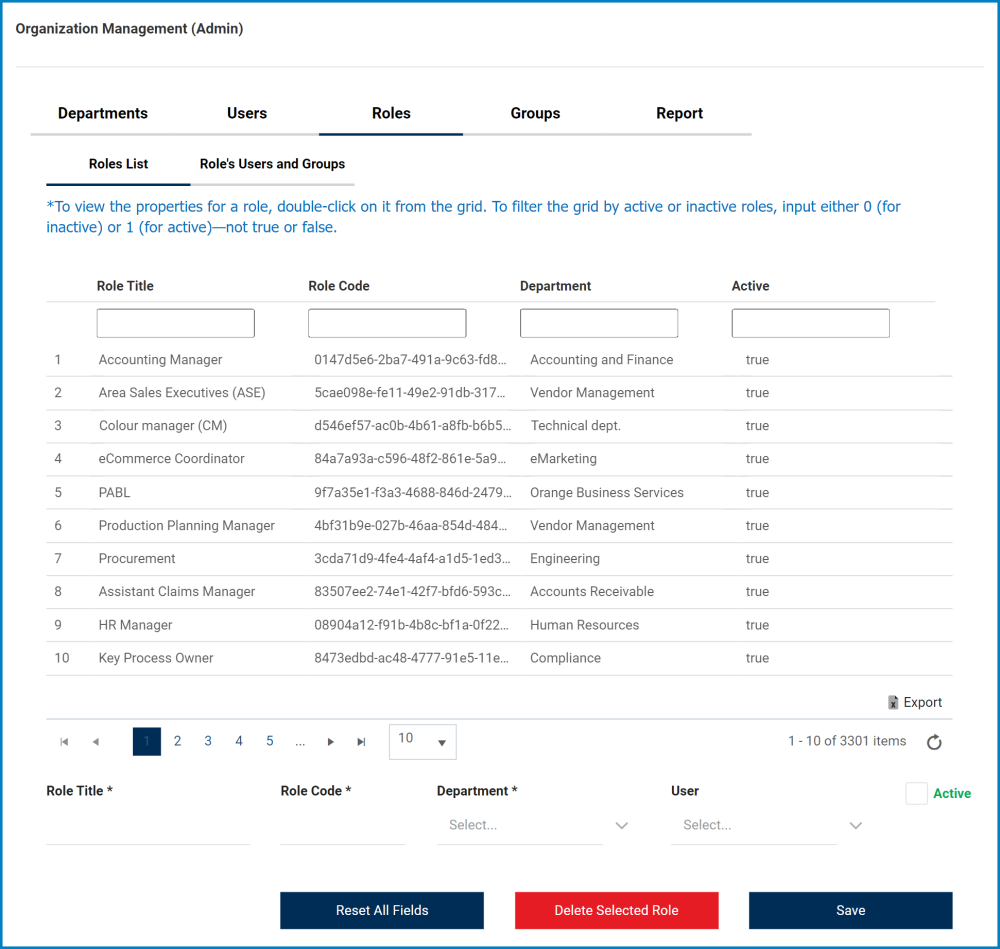
- Export: This button allows you to export the grid and save it either as an Excel file, a Word file, an HTML file, or a CSV file.
- For more details on this function, click here.
- Role Title: This is a text field that allows you to input the role title. It is a mandatory field.
- Role Code: This is a text field that allows you to input the role code. It is a mandatory field.
- Department: This is a single-select dropdown field that retrieves the list of departments. It allows you to select only one value at a time from the dropdown. It is a mandatory field.
- User: This is a single-select dropdown field that retrieves the list of users. It allows you to select only one value at a time from the dropdown.
- By selecting a user in this field, you are essentially assigning the role to a single user. To assign the role to multiple users, you will need to switch from the Roles List tab to the Role’s Users and Groups tab.
- Before switching between tabs, make sure that the role you are creating has been saved.
- There are two different ways to transfer information between tabs:
- In the Roles List tab, select the desired role from the grid (by double-clicking on it) and then click on the adjacent tab.
- In the Role’s Users and Groups tab, select the role using the single-select dropdown field (to be explained below).
- By selecting a user in this field, you are essentially assigning the role to a single user. To assign the role to multiple users, you will need to switch from the Roles List tab to the Role’s Users and Groups tab.
- Active: This is a checkbox which, if enabled, allows you to mark the role as active.
- Reset All Fields: This button allows you to reset all fields, clearing them of content.**
- Delete Selected Role: This button allows you to delete a selected role from the grid.**
- To delete, select the role from the grid (by double-clicking) and then click on the Delete Selected Role button. Once this button has been selected, a confirmation message will appear at the bottom of the page to inform you that the role has been deleted successfully.
- Save: This button allows you to save the role.**
- If all mandatory fields have been filled and this button is selected, a confirmation message will appear at the bottom of the page to inform you that the role has been added successfully.
- If mandatory fields have not all been filled and this button is selected, an error message will instead appear at the bottom of the page to inform you of the fields that still need to be filled.
** In the Organization Management version of the application, these fields are not available, preventing unauthorized users from creating, editing, or deleting roles.
2. Role’s Users and Groups
In this tab, you can assign a role to multiple users and/or groups. You can also remove users and/or groups assigned to a role.
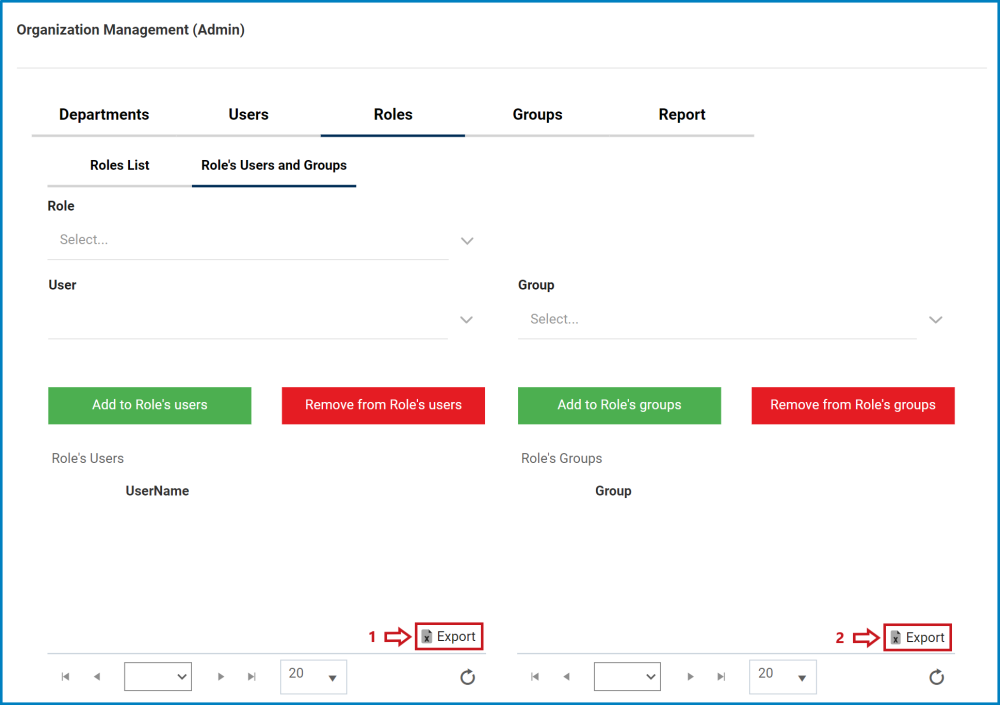
- Role: This is a single-select dropdown field that retrieves the list of roles.
- If users have not already selected a role prior to switching tabs, they can select one using this field.
- User: This is a single-select dropdown field that retrieves the list of users.
- Add to Role’s Users: This button allows you to add the selected user to the selected role’s list of users.
- The selected user will then populate the Role’s Users grid.
- Remove from Role’s Users: This button allows you to remove from the selected role’s list of users.
- To remove, select the user from the grid (by double-clicking) and then click on the Remove from Role’s Users button.
- Group: This is a single-select dropdown field that retrieves the list of groups.
- Add to Role’s Groups: This button allows you to add the selected group to the selected role’s list of groups.
- The selected group will then populate the Role’s Groups grid.
- Remove from Role’s Groups: This button allows you to remove from the selected role’s list of groups.
- To remove, select the group from the grid (by double-clicking) and click on the Remove from Role’s Groups button.
- Role’s Users: This field is automatically populated once a role has been selected. It lists the users of the selected role.
- Role’s Groups: This field is automatically populated once a role has been selected. It lists the groups of the selected role.
- Export 1: This button allows you to export the Role’s Users grid and save it either as an Excel file, a Word file, an HTML file, or a CSV file.
- Export 2: This button allows you to export the Role’s Groups grid and save it either as an Excel file, a Word file, an HTML file, or a CSV file.
Post your comment on this topic.