
This section provides the information regarding Celiveo 365 interface with Xerox ConnectKey printers prerequisites, specific settings.
System Requirements
- Xerox ConnectKey Altalink/Versalink devices support the Celiveo 365 with a printer agent and Universal Printer Endpoint for Celiveo 365 cloud services.
- You need a Xerox printer that support solutions, you can check the list here
- Supported Firmware: 68.81.41. Later versions have a rendering issue with application icons. Celiveo will update the information once the firmware problem is resolved.
Firmware Notes
Ensure that Xerox devices are using the latest ConnectKey firmware.
1. Global Settings
1.1 Install Universal Printer Endpoint (UPE)
- UPE installation is mandatory in order to operate the Xerox devices.
- Ensure that UPE is properly installed your infrastructure (on-prem or private cloud) and that network on which UPE is installed is able to reach the target printers local network/VLAN.
1.2 Enabling Password for EIP App
- On the printer EWS navigate to Apps.
- Click on EIP Settings.
- Enable Export Password to EIP Apps.
1.3 Set SSL/TLS
- On the printer EWS navigate to System
- Click on Security.
- Click on SSL/TLS.
- Check the Protocol Version (TLS 1.2).
1.4 Printer DNS Settings
Ensure that the printer network DNS settings are properly configured to you local network in order to access Celiveo 365 cloud services.
2. Card Reader
The latest Xerox ConnectKey firmware already includes the Xerox USB Card Reader plugin, in case your device doesn’t have the latest firmware download the Xerox USB Card Reader plugin on the Xerox web site.
Example: https://www.support.xerox.com/en-us/product/versalink-c7100-series/downloads.
2.1 Install / Enable Xerox USB Card Reader Plugin
- On the printer webpage navigate to System.
- Click on Plug-in Settings.
- If the plugin already exists check step 5.
- Add “Xerox_USB_Card Reader_v3.0.11_sig.jar” to the printer.
- Deactivate all other USB Card Reader related plugins.
- Navigate to Connectivity.
- Click on Ethernet.
- Click on Common (Edit) and change IP Mode to IPv4.
- Navigate to Connectivity.
- Click on HTTP and disable Proxy Server.
2.2 Disable Xerox USB Card Reader Plugin
- On the printer webpage navigate to Apps.
- Click on EIP Settings.
- Click on EIP Web Services .
- Disable Card Reader Access.
3 Granting access to MFP features, guest access
On Xerox printers the granular access control needs to be configured on the printer web page or through a Xerox configuration profile. It is not possible to configure that from the Celiveo 365 WebAdmin portal due to technical limitations on the printer side.
You can activate a Celiveo lock screen that blocks the access to any printer function, or leave some functions available for guests (i.e. copy).
3.1 Activating the Celiveo lock screen on a Xerox printer:
When in the authentication profile all MFP functions are locked by default then the lock screen is activated on the Xerox.
Upon login from the lock screen all functions are available to the end-user.
3.2 Activating the guest mode on a Xerox printer using the Xerox printer web page:
At least one MFP function needs to be unlocked in the Celiveo 365 access control profile for that printer.
Access the printer’s Embedded Web Server and log in as a System Administrator.
Select “Device User Role”, choose Guest then set “Custom permissions” to edit permissions for users who walk up to the printer but do not log in.
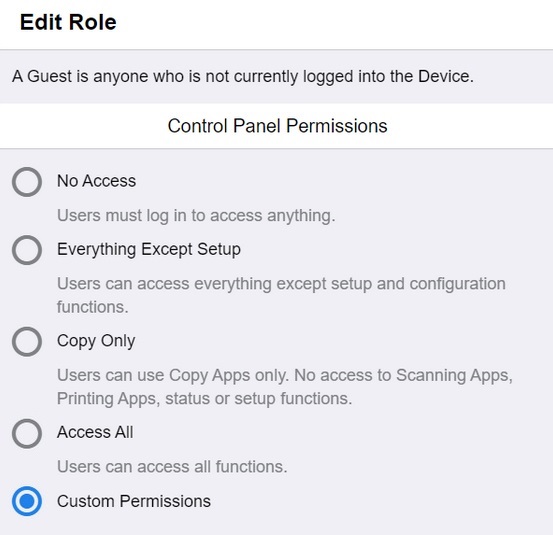
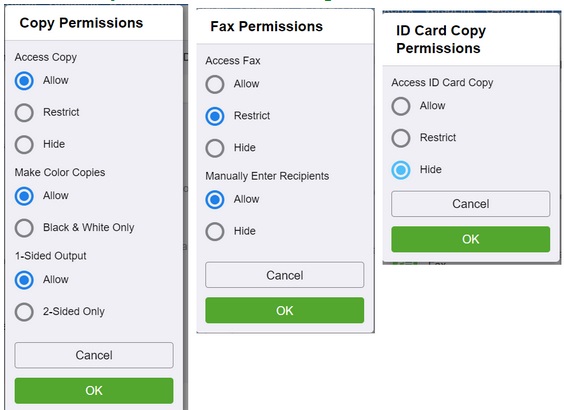
Select the required permissions for the Guest User, and then click OK to save changes.
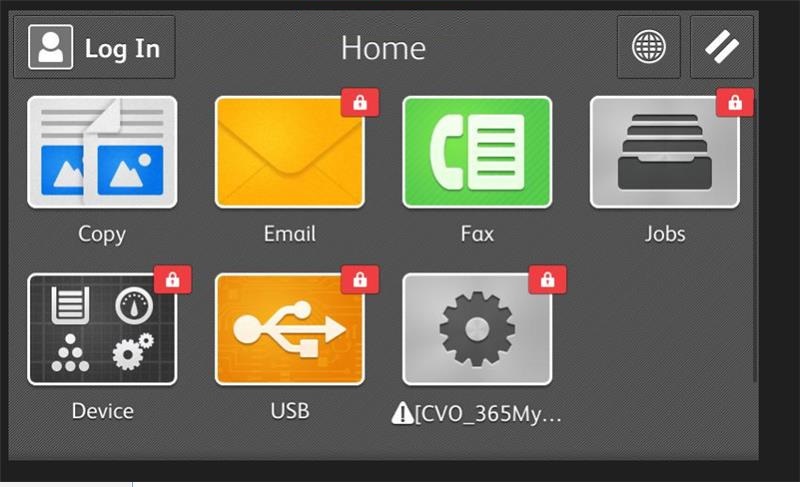
On the home screen those functions that are not available to guest show a red lock on their top left corner.
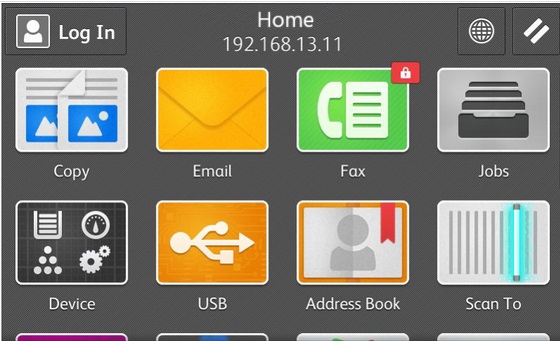
That will invoke the login screen for card or PIN authentication.
3.3 Activating the guest mode on a Xerox printer using the Celiveo 365 WebAdmin:
It is also possible to unlock some icons on the Xerox printer UI using the Celiveo Web Admin, so that you don’t have to configure each printer manually
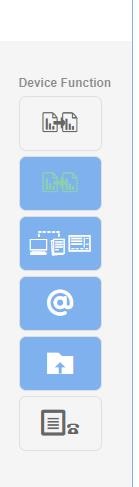
Such configuration is possible only for the following icons: COPY, SCAN, EMAIL, FAX.
It is not possible to differentiate color copy from B&W copy since the lock is at the button level and the copy/color property is selected after the button press. If any of the copy buttons (B&W or color) is active in the authentication profile the MFP copy button is locked.
To make such buttons unlocked on the home screen you need to unselect them from the authentication profile as shown below:
When the printer authentication profile contains an unlocked button, that button won’t need authentication on the printer UI as shown below tor EMAIL, COPY, SCAN, FAX.
If you need more granularity or unlock/lock more functions you can do so through the printer embedded web page (read above, 3.2).
4. Uninstalling the On-Screen Application
- Access the Celiveo 365 Web Admin interface.
- Navigate to the Printers page.
- From the device list, select the Xerox printer(s) you wish to unregister.
- Click the trash can icon in the action bar to remove the printer(s) from the system.
Note: Uninstalling the Celiveo 365 application from a Xerox device has the following impact on its accounting configuration:
- All existing accounting settings are removed.
- The device’s native accounting feature is disabled.
- The Accounting Method setting within the Xerox device’s web interface is reverted to “No Accounting”.
Post your comment on this topic.