
Contents ![]()
![]()
- About Authentication Profiles
- How to…
About Authentication Profiles
What are Authentication Profiles?
Authentication Profiles contain the settings that Celiveo 365 uses to query an Authentication source and retrieve a list of users (who typically are authorized to access Celiveo 365-enabled printers). Celiveo 365 works with Microsoft’s Azure Active Directory (AAD), the directory service used by Microsoft Universal Print for identity management.
Settings Specified in an Authentication Profile
The basic settings of an authentication profile specify:
- Settings to open a connection to an Authentication source.
- AAD search parameters that result in a shortlist of authorized users.
Authentication Profiles in Access Control Rules
Access Control Rules connect to Authentication Profiles through Authentication Source Profiles.
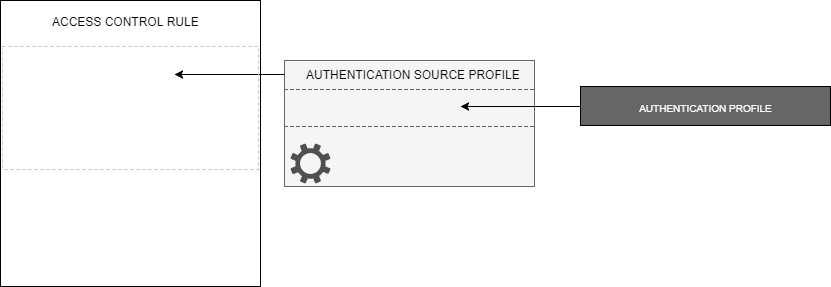
An Authentication Source Profile supplements the Authentication Profile by carrying additional information that may be required by an Authentication Profile. For example, the mask is used to extract the employee id from an employee card.
Optimizing Authentication for Large Organizations
In large organizations, where the number of users is considerably high or is geographically distributed, authentication may take time. Celiveo 365 provides a workaround for this bottleneck. It supports the ability for an Authentication Source Profile to contain multiple Authentication Profiles.
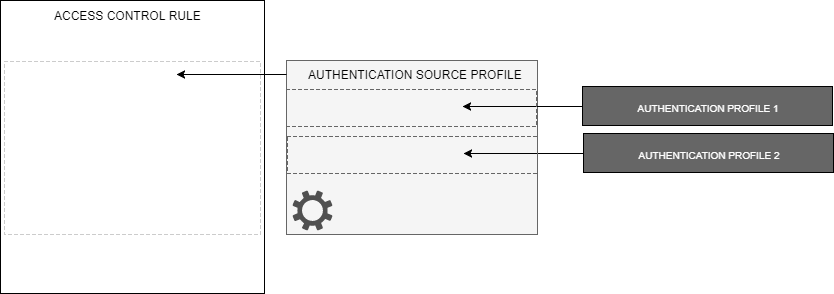
If authentication fails on the first Authentication Profile, the system automatically falls back onto the next profile. By setting up more restrictive but faster Authentication Profiles to be processed before the less restrictive but larger ones, you can speed up authentication for regular users.
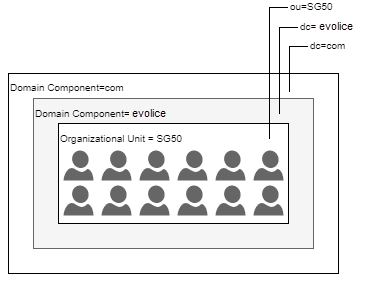
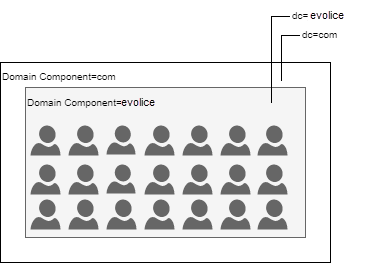
For example, suppose a large company has offices distributed across the globe, you can set up one authentication profile exclusively for employees of one office (OU=SG50 in the illustration below) and another less restrictive one for the entire company. Both Authentication Profiles are then assigned to the printers in that office.
 |
 |
| Authentication Profile 1 | Authentication Profile 2 |
|---|
When SG50 employees authenticate at a printer, Authentication Profile 1 is able to handle their authentication. Supposing a visitor from another office of the same organization visits the SG50 office, Authentication Profile 2 is able to handle their Authentication. SG50 employees are able to authenticate faster than the visiting employee because Authentication Profile 1 ensures that the system has to deal only with the SG50 employees. The visiting employee will take longer to authenticate because Authentication Profile 2 results in a larger number of users to look up. This technique (of falling back on a secondary authentication profile when authentication against the main profile is unsuccessful) helps to cover all of the company’s employees while allowing the SG50 office employees to enjoy faster authentication.
How to…
Create a New Authentication Source Profile
New Authentication Profiles are created while binding Access Control Rules to printers.
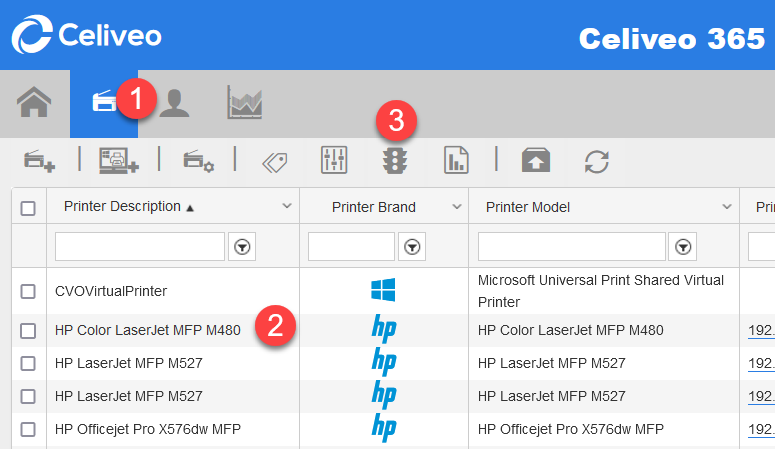
- On the Celiveo 365 Web Admin, at the main menu, click
![]() . The Printer List displays.
. The Printer List displays. - Select the Printer you want to add the new Access & Rules Profile to.
- On the printer menu, click
![]() . Access and Rules is displayed.
. Access and Rules is displayed.
![]()
- Select an Access & Rules Profile from the [Access & Rules Profile] drop down and click
![]() . The Access & Rules Profile displays.
. The Access & Rules Profile displays.
![]()

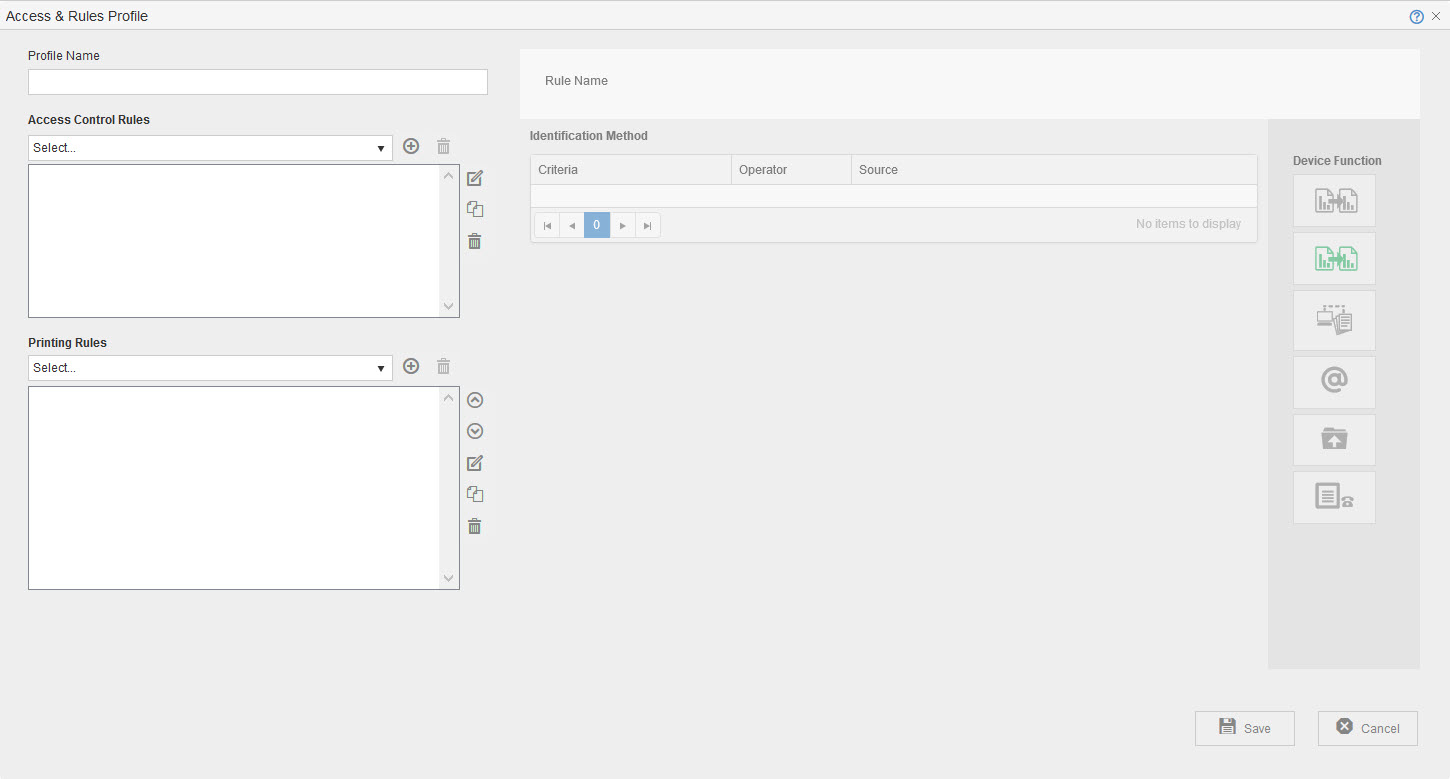
- In the [Profile Name] box, specify a unique name for the Access & Rules Profile.
- Click
![]() adjacent to the [Access Control Rules] drop-down. A new rule displays.
adjacent to the [Access Control Rules] drop-down. A new rule displays.
![]()
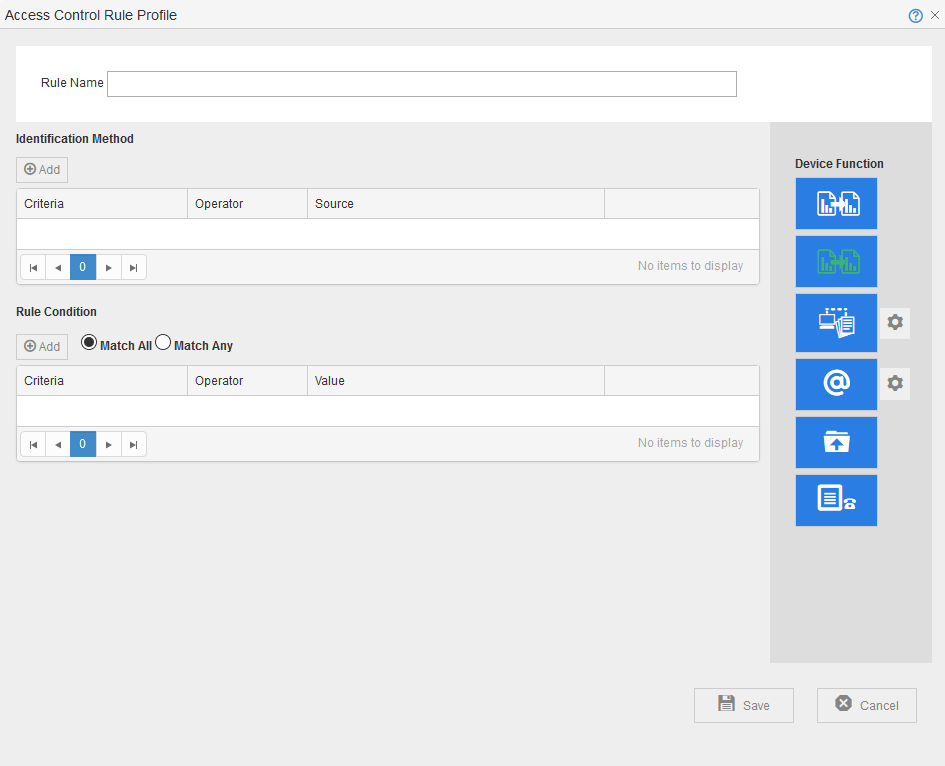
- At [Rule Name] specify a name for the rule.
- In the Access Control Rule Profile, In the [Identification Method] section, click
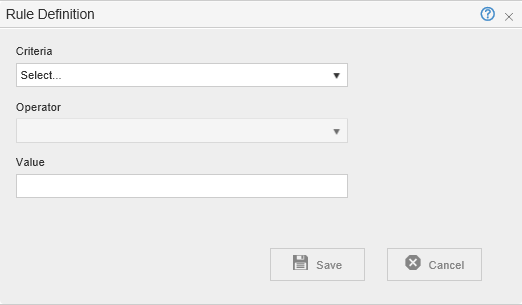
![]() . The Rule Definition is displayed.
. The Rule Definition is displayed. - In the [Criteria] drop-down, select [Card Number] or [PIN Code] for PIN Authentication.
![]()
- Click
![]() , which is located next to the [Source] drop-down. A new Authentication Source Profile displays.
, which is located next to the [Source] drop-down. A new Authentication Source Profile displays.
![]()

- At [Profile Name], specify a name for the Authentication Source Profile.
Create and Add an Authentication Profile to an Authentication Source Profile
- Click
![]() , which is located next to the [Authentication Profile] drop-down. A new Authentication Source Profile displays.
, which is located next to the [Authentication Profile] drop-down. A new Authentication Source Profile displays.
- To specify authentication against your company authentication source:
- Ensure that the Authentication Method is set to [Azure AD Open ID – (ROPC)].
- Enter your Application and your tenant IDs. To obtain your tenant ID, please read this article.
- A tenant ID is necessary to access the directory and update the SQL enrollment table with the latest AAD information for each user. Enter the UPN and Password and click [Test] to check the configuration. If required, adjust the settings.
Configure advanced settings
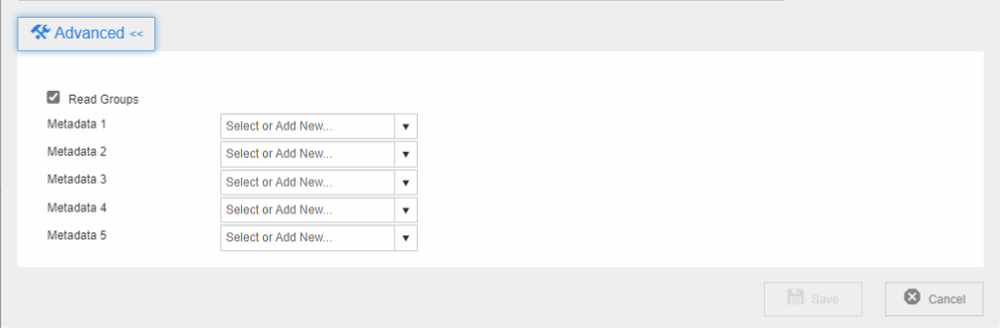
- Check the [Read Groups] box to enable the printer to read the list of groups for the user to determine what group the user is a member of, for enrollment. This can take some time.
- Enter up to 5 user metadata (optional). Metadata are injected into Tracking data and will then be visible in the Tracking Reports.
- Once settings are complete, click [Save].
Post your comment on this topic.