
Setting up Time & Attendance
Setting up Time & Attendance requires 3 steps to be taken.
Initially answering the setup display:

The system has got the following setup fields:
List Absence Codes
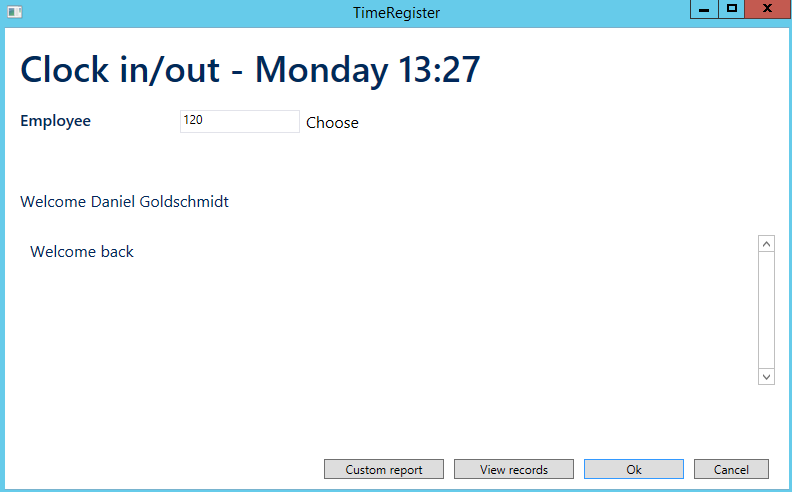
If this code is active, you have to specify a code when clocking in, in case you do not arrive and leave at normal work start/end. Please see further details regarding conditions for absence codes under “Absence code setting.”
Auto-start Job on Clock In
Autostart means that a previous running job was paused when the operator left. Now it automatically turns the job active again by clocking in.
Auto-End Jobs on Clock Out
This field has 3 settings:
- Yes
- No
- Select
If you select Yes, the employee’s active job is ended, when clocking out.
If you select No, the employee’s active job continues to run, when clocking out.
Chosing Select, the employee is asked to decide, whether active jobs must be stopped.
Days shown in overview
When clocking in and out, the employee can see an overview of his clocking in and clocking out hours, for all the number of days specified in the field.
Payroll file Format
According to the options that are possible and have to be transferred to the payroll system as standard.
Payroll code default
Payroll code that specifies normal office hours in the payroll system.
Absence Code Settings
- Margin before work shift start, where the absence code is not requested
- Margin after work shift start, where the absence code is not requested
- Margin before work shift end, where the absence code is not requested
- Margin after work shift end, where the absence code is not requested
- Margin before work shift start, where the absence code is required
- Margin after work shift start, where the absence code is required
Many companies work with flexible working hours, where the employees can decide within a certain time interval, when they come or go adding or subtracting time to their flex account.
If the working hours are usually from 7 am. to 15 p.m., but the employees have the opportunity to flex, between 6 am and 8 am and 14 and 16 p.m., they do not want to be prompted for an absence code within this interval.
Therefore, it is possible, in the time and attendance setup, to select that the employee will not be prompted for an absence code, if he for instance arrives between 6 am and 8 am, and leaves between 14 and 16 pm. In this case, the value in these fields is set to 60 minutes in the setup if the company defined working hours is 7:00 to 15:00.
The system needs to get information about, whether an employee arrives too late compared to previous work shift start, or arrives too early in relation to the next work shift start.
Conversely, at the end, whether the employee leaves too early, or too late. It is possible to specify this in these fields, as the content herein determines, whether you consider an employee being late or too early or leave too soon or too early. If you always want an employee to enter an absence code, if he arrives or leaves between a work shift end or a work shift start, you have to enter the number of total minutes, covering the period from end to start.
If the working hours end at 15 pm. and start at 7.pm the next day, you have to allocate 16 hours, corresponding to 960 minutes in these two fields.
However, the content in the previous fields prevail this setup, so that there is no absence code required within an hour before the start and after the end.
Show I/O on ShopFloor
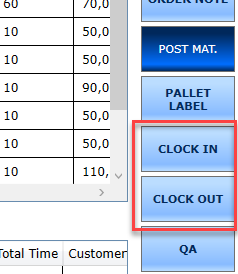
If this field has not been activated it is not possible to perform clock in / clock out stampings in ShopFloor
Show NAV Custom Report button
Nav Print Report no.
It is possible to create a customized report in order to print the time attendance stampings from the time attendance screen in SHOPFLOOR.
The report is not a part of the standard solution in ShopFloor, but has to be created in a customized version and select it in this field.
Use Lessor / TA Lessor Journal Draft Name
If you use Lessor Payroll, these fields have to be filled in, in order to transfer time attendance stampings for time registration in Lessor. Lessor is only available in certain countries as an add-on for Navision.

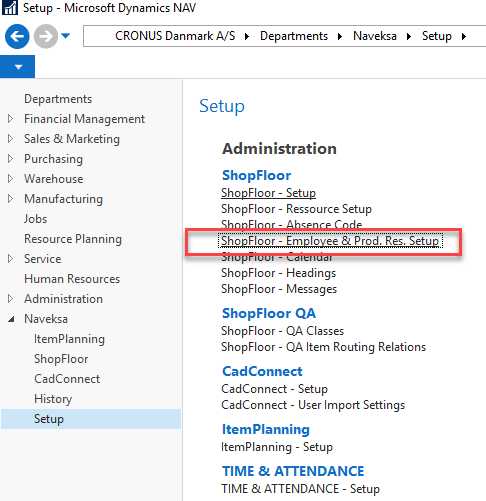
SHOPFLOOR – Employee and Production Resource Setup
You have to select, which production resources /employees will be shown in ShopFloor, and who/which can be clocked in on jobs.
This is done in NAVEKSA setup:
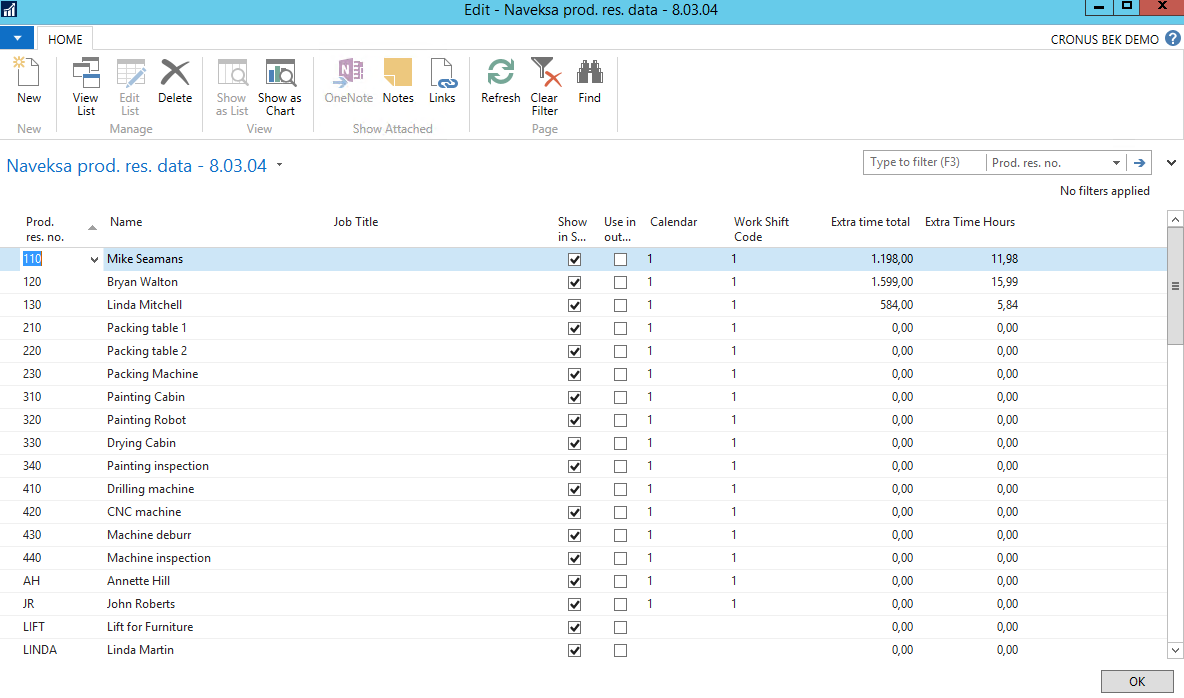
Calendar and Work shift have to be selected and assigned when selecting an operator or resource for ShopFloor.
If you want the certain employee and his cost price (rate) to be displayed instead of Work center, the field “Use in output journal”, has to be marked.
Use absence codes
In case absence codes are used, absence codes must be created.
This is done in NAVEKSA setup:

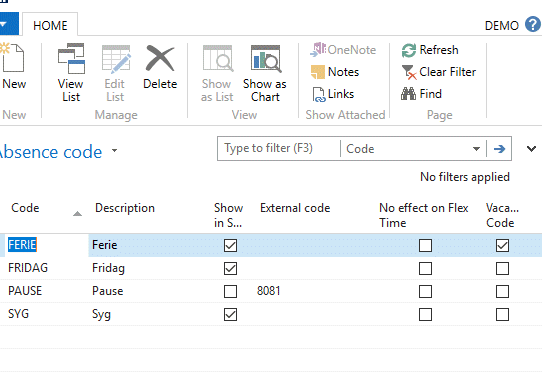
Code = Code for absence – holiday, day off, sick, doctor visit, misc. non-paid etc.
Description = Description of the absence.
Show in ShopFloor = Shall this absence code be shown in the ShopFloor operator client.
No effect on flex time= The transactions with this code will not be a part of an operators flex balance.
Vacancy code = Is this a non-payable/non-flex emplyee absence code?
Read more about flex calculations “
Production Calendar / Working day Definitions
The employees and or resources need to be assigned to production calendars, which are the basis for the all time calculations.
The start and end times for breaks, which the employees pay themselves, have to be created.

Need more help with this?
Visit our support site