
When your project is completed, you will want to export it to create a new image that can be viewed outside of Imerge. If you think of your project file like a recipe, storing a list of all the ingredients and instructions to construct your composite, exporting is like actually baking the cake, and renders all the layers in your project, with all adjustments applied, to create a new image.
How to export
There are several ways to export images from Imerge.
- Export canvas: Immediately exports a single image of what you are currently seeing on the canvas.
- Batch export: Allows you to export large batches of images all at once, or to queue multiple images or multiple projects for later export.
- Hot folder export: When working with hot folder import in a live event settings, you can also set up hot folder export, for a fully automated workflow.
Export Canvas
The most common method of exporting is to render a single image of the what you currently see on the canvas. This is accomplished using the export canvas function. There are multiple ways to access this function, so you can use whichever is most convenient for your current situation.
![]() Export canvas button: In the top toolbar, click the export canvas button to export the current canvas.
Export canvas button: In the top toolbar, click the export canvas button to export the current canvas.- Keyboard shortcut: Press CTRL+E on your keyboard (CMD+E on Mac) to export the current canvas.
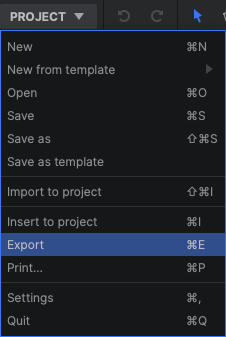
- Project menu: Open the Project menu and select Export to export the current canvas.
![]()
Selecting any of these options will open the Export canvas dialog.
The Export canvas dialog
The details used for your exported image are selected here.

- Format: Choose a format for your exported image.
- JPEG: A universally compatible 8-bit format which combines small file sizes with acceptable image quality.
- PNG: A widely compatible format which supports alpha channels and transparency. PNG supports 8-bit or 16-bit color.
- TIFF: A high quality format which is popular for image editing. TIFF supports alpha channel transparency, and 8-bit or 16-bit color.
- EXR: A high quality intermediate format, which supports 16-bit or 32-bit color.
- HDR: A high quality 32-bit format designed specifically for storing images with high dynamic range.
- HitFilm Comp: Exports the project for use within HitFilm. Rather than creating an image, this image converts the project to a HitFilm comp, allowing you to retain all layers and adjustments for further editing in HitFilm Express or HitFilm Pro.
- Export mode: Determines how the layers in the project are handled.
- All (individually): All layers in the project are included as HitFilm layers in the exported HitFilm composite shot.
- Selected layer(s): Only the selected layers are included in the exported HitFilm composite shot.
- Use canvas size: Enable this option to export all layers at the canvas size. Layers smaller than the canvas will be filled with transparency around the image, so they match the canvas size. Layers larger than the canvas will be trimmed, and any area outside the canvas will be removed. When this option is disabled, each layer will use its original size.
- Full composite: Enable this option to include a rendering of the complete Imerge project, in addition to the individual layers.
- Flatten groups: Enable this option to flatten all groups in the Imerge project into single layers in the exported HitFilm composite shot.
- Export mode: Determines how the layers in the project are handled.
- PSD/PSB: The Photoshop Document format is based on the TIFF format. It supports alpha channels, and 8-bit or 16-bit color. For images over 2GB in size, or greater than 30,000 pixels in either dimension, the PSB (Photoshop Big) format is used.
- Preset: The preset menu to the right of the format lists presets for specific quality and compression settings within that format.
- … (Settings): The settings menu provides full access to the settings for the chosen format, and allows you to create your own presets for future use.
- Export layers(s): Toggle this control to specify whether the layers of your project are exported individually.
- Disabled: The project is flattened into a single layer for export, so you get a single image containing the entirety of your canvas as it is shown in Imerge Pro.
- Enabled: Each layer of your project is exported as a separate image.
- Resize: Define the size of your exported image.
- None: The canvas size is used, without modification.
- Width & Height: Specify an exact width and height for the exported image. This works best for batches where all images use a single orientation (portrait or landscape).
- Megapixels: Specify a total image resolution in megapixels. The aspect ratio of the canvas will be used.
- Percentage: Define the export size as a percentage of the canvas size.
- Long edge: Define the length, in pixels, of the longer edge of the image. This is useful for batch exports which include images in both portrait and landscape orientation.
- Short edge: Define the length, in pixels, of the shorter edge of the image. This is useful for batch exports which include images in both portrait and landscape orientation.
- Metadata: For formats which support metadata, use this option to select what metadata is included in the export.
- None: All metadata from the original images is excluded.
- Use overrides from settings: The metadata specified in your Imerge settings is added to the exported image.
- Image: The original metadata from the imported image is used.
Batch Export
Batch export is useful for any situation where you want to export more than one image. Applying a specific set of adjustments to a large number of images, exporting a single composite to multiple image formats, Or compositing multiple greenscreen images onto preselected backgrounds, are a few instances of situations where batch processing is useful.
All batch export controls are accessed in the batch tab. The batch tab is accessed by clicking the Batch button at the top right of the Edit screen: ![]() When you click the batch button, the layer sidebar will be replaced by the batch tab, which displays all the controls used to define the format, compression, and naming used when images are exported.
When you click the batch button, the layer sidebar will be replaced by the batch tab, which displays all the controls used to define the format, compression, and naming used when images are exported.

The batch tab is divided into three sections, each of which can be opened by clicking on its title bar:
- Export Queue: The export queue lists all export jobs, both pending and completed, and the images included in each. The queue can be set to start exporting as soon as they are queued, or you can add multiple jobs and products to the queue and export them all at a later time of your choosing.
- Outputs: The Outputs section lists the specific formatting options which will be used for export. Multiple outputs can be configured, to create multiple versions of each image in the job.
- Batch: Here is where you manage which images or layer combinations from your project are included in the export batch.
Need more help with this?
Don’t hesitate to contact us here.