
The viewer shows the composited result of all your layers, masks and effects as you edit. The viewer tools assist with the editing process.
Viewer Tools Bar ![]()

The tools in the top bar of the Viewer control how your image is displayed.
Selection ![]()

The Select tool is the most commonly used tool in the Viewer Toolbar. When it is active, you can click any layer of your composite to select it, and you can directly interact with each layer on the Viewer to adjust its position, scale, and other properties.
Panning ![]()

The Pan tool repositions your composite within the viewer, without altering the contents. When the viewer is zoomed in so the entire composite is not visible, you can use the Pan tool to shift the visible portion and view any area of your composite.
The View Menu
Imerge offers several options for viewing your image to evaluate its content in various ways. The View Menu is where you access them.

Overlays
The Overlays section of the menu contains options that are rendered over the top of your viewer image. Open the menu and select any item to toggle it on or off.
- Highlight warnings – fills all pixels that contain pure white with a solid color. By default the highlight warning color is red, but you can edit the color in the options screen.
- Shadow warnings – fills all pixels that contain pure black with a solid color. By default the shadow warning color is blue, but you can edit the color in the options screen.
- Grid (rule of thirds) – adds an overlay dividing the image into thirds, both horizontally and vertically. If you need help with laying out your image, you can place the focal points of your composite on the intersections of these lines and ensure a pleasing composite.
- Grid (crosshair) – adds center lines to your image, both horizontally and vertically. Especially for graphic design, being able to quickly reference the center for layout is useful.
Channel views
You can also control what channel or channels of the image are displayed through this menu. Individual color channels are displayed as grayscale images.
- All – The standard view, which combines the red, green, and blue channels to create a full color image.
- Red – Shows the values of red in each pixel, from no red (which displays as black) to pure red (which displays as white).
- Green – Shows the values of green in each pixel, from no green (which displays as black) to pure green (which displays as white).
- Blue – Shows the values of blue in each pixel, from no blue (which displays as black) to pure blue (which displays as white).
- Alpha – Displays the transparency data of the image in grayscale. Black areas are completely transparent. White areas are completely opaque. Gray areas indicate partial transparency, with darker grays being more transparent.
- Luminance – Shows the luminance values of the image, in grayscale.
Second monitor
If you wish to display the Viewer contents on a second display, for your clients to preview or any other reason, you can enable the second monitor option. This will open a new window showing only the Viewer, which you can then place on your secondary display.
Zoom menu ![]()
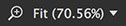
Select the size at which the viewer is rendered. Reduce the scale to see the entire image, or increase the scale to focus on a specific portion of the image. Select Scale to fit to auto-fit the image into the available space.
Canvas controls
The images and layers contained in your project can be directly manipulated using the controls displayed on the canvas. This allows you to view the changes as they are made, and dial in the exact results you want. The controls displayed on the canvas will vary based on the current selection. Different kinds of layers, masks, and effects each have their own controls, specific to the adjustments available for the selection.
- Transform: Canvas controls can be used to adjust the position, rotation, and scale of the layer.
- Masks: Canvas controls can be used to edit the position, rotation, corner radius, scale, and edge feather of a mask. The direction of linear gradient masks can also be adjusted on the canvas.
- Effects: Some effects benefit from canvas controls. Distortion effects, zoom blur, and gradients, for example, provide intuitive controls on the canvas to dial in the exact results you require.
Need more help with this?
Don’t hesitate to contact us here.