
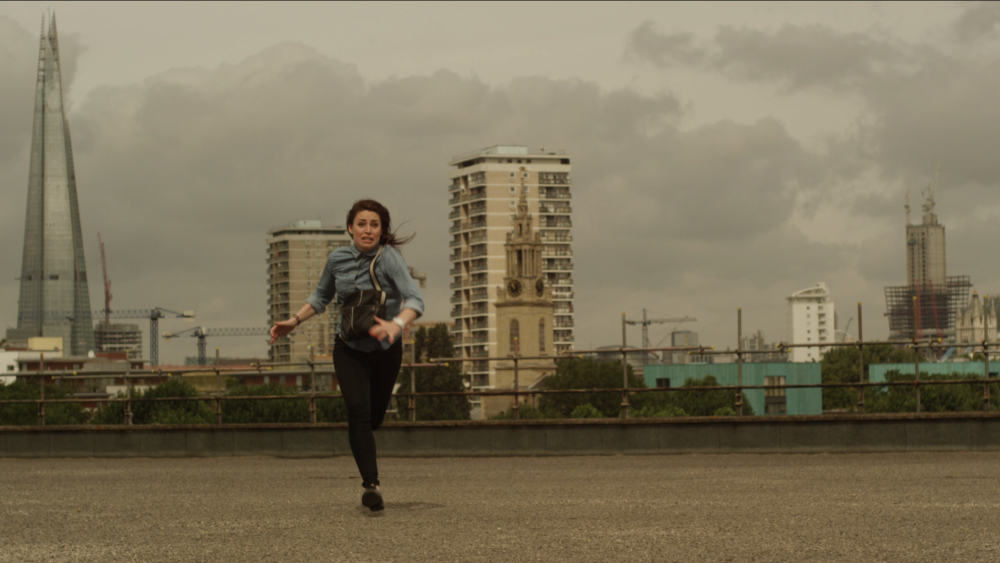
Using an s-curve shift, cine style creates a cinematic, Hollywood-style look. It is a fast method for achieving a professional, high quality finish. While it offers rapid results, it still provides controls for fine tuning the appearance. Cine style includes built-in Grain, Vignette and Letterboxing features. These can be turned on or off independently, to create your desired final look.
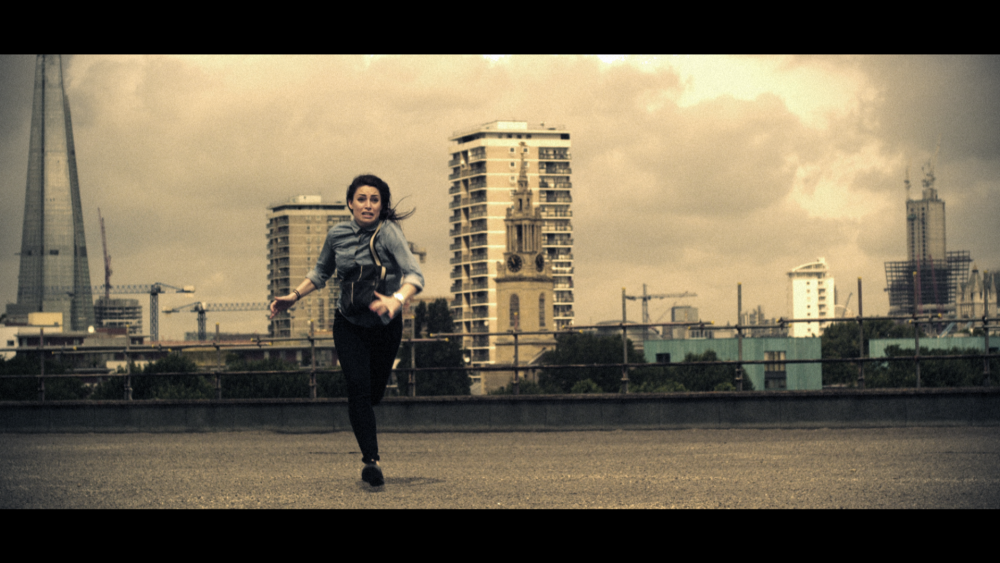
- S-Curve: Adjusts the contrast of the image, by applying an s-curve based on the Curves effect.
- Color Adjustment: Controls the color shift applied to the image, which boosts contrasting colors, By default, it pushed toward the teal and orange palette popular in Hollywood blockbusters, but this can be changed using the Color Adjustment Settings below.
Color Adjustment Settings
- Shift: Adjusts the midpoint of the map used to apply the colors to the image.
- Hue: The primary hue toward which the color will be shifted.
- Exposure: Adjust the exposure of the image. Use this control and the S-Curve control to find the balance of contrast and brightness that you need.
- Saturation: Increases the color intensity within the image.
2.35:1 Letterbox
Cinematic films often use a wider aspect ratio than standard 16:9 video cameras. You can add a letterbox to your video to give it a more cinematic look.
- Enabled: Toggles the letterbox on and off.
- Offset: Adjusts the vertical position of the video, so you can ensure the most important elements of the frame are visible within the letterbox.
Grain
The film stock which was used traditionally on Hollywood films, and from which films take their designation, often has a characteristic grain which is often lacking in video. Adding subtle grain can help your video have a more filmic appearance.
- Enabled: Toggles the Grain on and off
- Amount: The intensity of the Grain effect.
- Size: The size of the grain. Grain is generally of a similar size, but its size relative to the frame will vary based on the size of the film. So grain in 8mm film will appear larger than grain in 35mm film. Adjust the size here to get the look you are after.
- Monochrome: Toggles between full color grain and grain that is black and gray only.
- Seed: Each seed gives a different random pattern to the grain.
Vignette
Some camera lenses cause a vignette distortion which darkens the corners of the frame. These controls can be used to simulate that look, or simply to bring more focus to the center of the frame by darkening the edges.
- Enabled: Toggles the Vignette on and off.
- Center: Controls the positioning of the vignette over the frame.
- Position: By default the vignette is centered on the frame, but you can reposition the center anywhere within the frame
- Use Layer: This menu allows you to select any other layer on the timeline, and use its position coordinates as the center of the vignette.
- Horizontal Stretch: Adjusts the width of the vignette.
- Vertical Stretch: Adjusts the height of the vignette.
- Softness: Controls the width of the feather applied to the edges of the vignette.
- Curvature: Changes the radius used in the corners of the vignette effect
- Opacity: Adjusts the transparency of the image within the vignette
- Background: These settings control the generation of the vignette itself.
- Opacity: Adjusts the opacity of the vignette color applied to the image.
- Color: Select the color which will be used by the vignette. Black is the default.