
The Timeline is where you can open Animations and edit their contents. You can add Recordings to the Animation, and to edit the Recordings’ length and properties. The contents of the timeline are displayed in the Viewer.
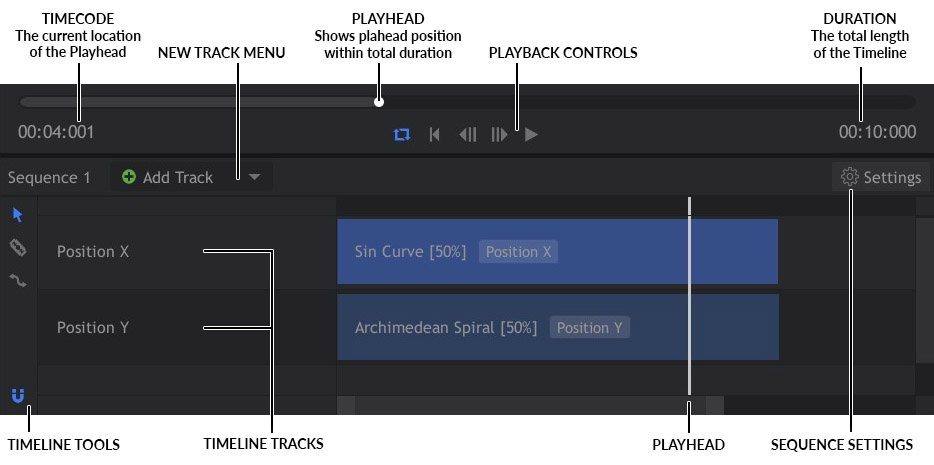
At the top of the timeline, next to the timecode, is the Playhead. This thin vertical line can be dragged left or right to move through the duration of the timeline. When the Zoom level of the timeline is increased, the Playhead will split. The top bar of the timeline always represents the entire duration of the timeline, and shows the playhead’s position in relation to the entire duration. It is never affected by changes to the zoom level. The timeline tracks, when zoomed, will be longer than the visible timeline, and the playhead line intersecting the tracks will be positioned based on the zoom level.
Timeline Tools
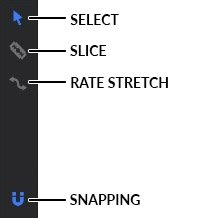
Down the left hand side of the timeline you can find the Timeline Tools.
![]() Select: The Select tool is the most commonly used timeline tool, and serves several purposes.
Select: The Select tool is the most commonly used timeline tool, and serves several purposes.
- Selection: Its primary use, and the one it is named for, is selecting individual elements on the timeline for manipulation.
- Move: When an item is selected, you can move the cursor to the middle of the object and move the object on the timeline.
- Trim: When the cursor is moved to the end of an object, you can drag to trim the end of the clip.
![]() Slice: The slice tool allows you to cut assets on the timeline into multiple sections. Click on any timeline asset to cut it at the cursor location.
Slice: The slice tool allows you to cut assets on the timeline into multiple sections. Click on any timeline asset to cut it at the cursor location.![]() Rate Stretch: Use the Rate Stretch tool to change the speed at which your recordings play back. With the Rate Stretch tool selected, drag the end of any recording to change its rate. the new rate will be displayed on the timeline object, as a percentage fo the original. Rates lower than 100% will play slower than the original, and rates higher than 100% will play faster than the original.
Rate Stretch: Use the Rate Stretch tool to change the speed at which your recordings play back. With the Rate Stretch tool selected, drag the end of any recording to change its rate. the new rate will be displayed on the timeline object, as a percentage fo the original. Rates lower than 100% will play slower than the original, and rates higher than 100% will play faster than the original.![]() Snapping: The Snap option makes it easy to align objects on the timeline. When snap is enabled, any object you move will detect when its end are approaching the end of any other object, and will automatically snap to align the ends. If you want full control of the exact positioning of an object, you can toggle snapping off.
Snapping: The Snap option makes it easy to align objects on the timeline. When snap is enabled, any object you move will detect when its end are approaching the end of any other object, and will automatically snap to align the ends. If you want full control of the exact positioning of an object, you can toggle snapping off.
Sequence Settings ![]()

The Settings for any individual Sequence can be accessed on the timeline, by clicking the Settings cog. If you do not see the Settings cog, open a Sequence onto the timeline. The default values for these properties are set in the main Application Settings window, but if you want to change the settings for a single animation file, you can do so here.
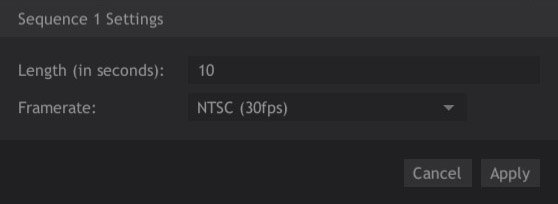
- Length (in seconds): Sets the overall length of the Animation in seconds.
- Framerate: The movement recorded by Action Pro is frame independent, but to be used in video editing programs it needs to be converted to frames on export. Framerate defines the frame rate that will be used to generate the keyframes in the exported file.
Navigating the Timeline
At the bottom of the timeline is the scroll bar.

Each end of the scroll bar handle has a square Zoom control. You can control the zoom level of the timeline by dragging these zoom controls. Dragging the scroll bar shorter will zoom in on the timeline, showing a smaller portion of the timeline in greater detail. Dragging the scroll bar longer will zoom out, showing more of the timeline.
Framerate Independence
Video typically runs at 24 or 30 frames per second (fps), and rarely exceeds 60 fps. Action Pro, in contrast, records your movements in a continuous stream, logging the position at thousands of points per second. This allows the motion data in your Recordings to be adapted to any video frame rate with smooth results. It also means that there is plenty of data available to work from when smoothing or otherwise manipulating the motion paths.
The Previous Frame and Next Frame buttons in the Viewer Transport controls therefore operate based on the Export Framerate of the current Animation.
Non-destructive Trimming
Whenever you edit or trim your recordings on the Timeline, the source files are not affected. So all your recorded motion data remains permanently available to you. Any portions that have been trimmed off of your recordings on the timeline can be reclaimed by adjusting the trim locations.
Reassigning Properties to Other Tracks
If you wish to reassign data from one property of a track to a different property, you can do so on the timeline.
Each recording can contain multiple properties. For example, the most basic recording you can create, using your mouse, contains data in two properties, Position X (left to right) and Position Y (top to bottom). When working in 3D, there is also a Position Z (front to back) property that can be used. Data in any property can be reassigned to a different track, though, giving you full control over how the recorded data is used and applied.
Let’s look at an example to better understand how this works.
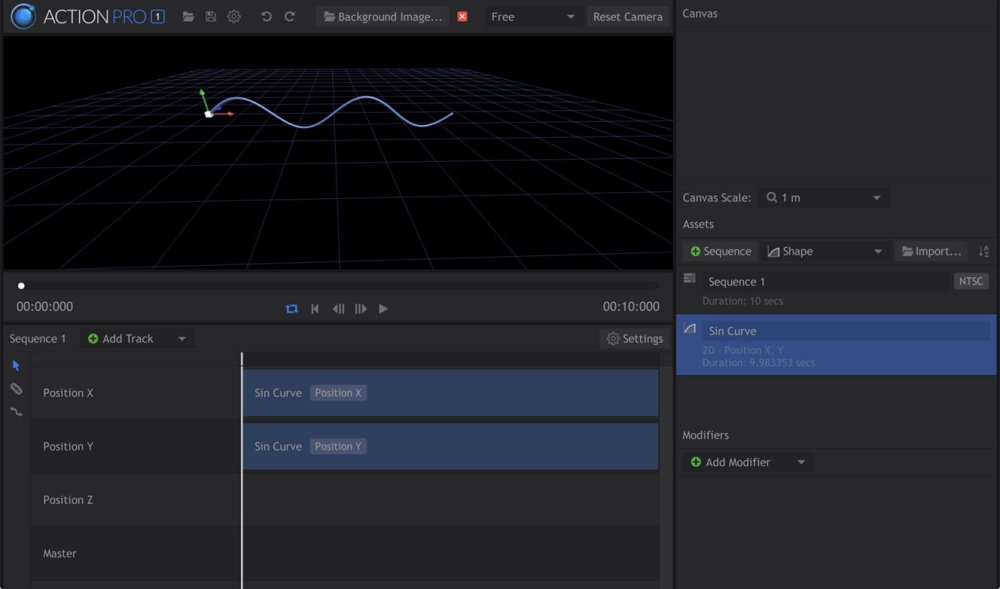
For this example, we will use the Sine Curve shape. This is a 2D shape, so the movement all occurs on the X axis (left to right) and Y axis (top to bottom). We can create a Position Z track on the timeline, but our shape contains no Z (front to back) movement. So if we drag the Sine Curve to the Z track, the X property is used. On the timeline, each track indicates which property and axis it currently uses. We can right-click and use the menu to reassign data from the X or Y tracks onto the Z axis.
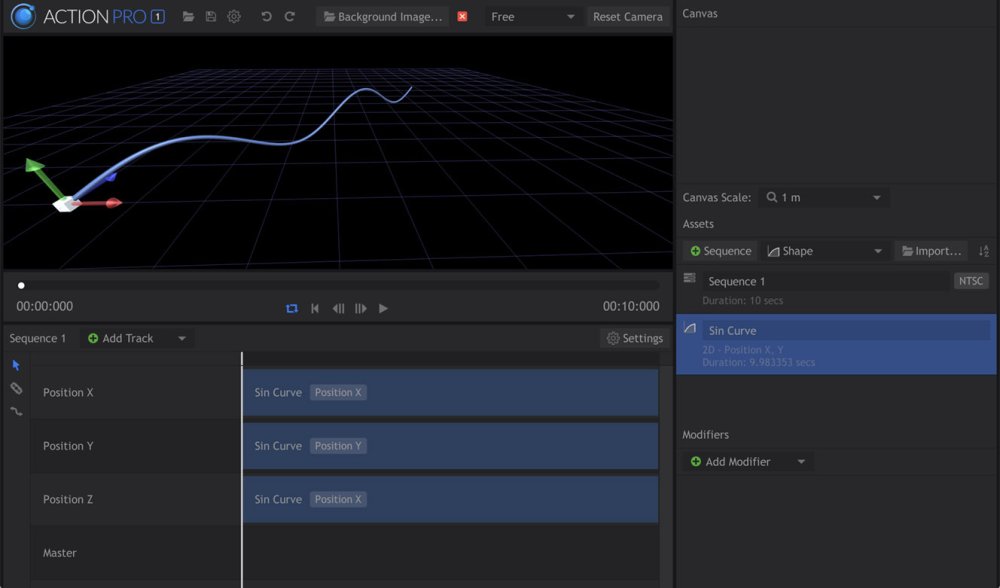
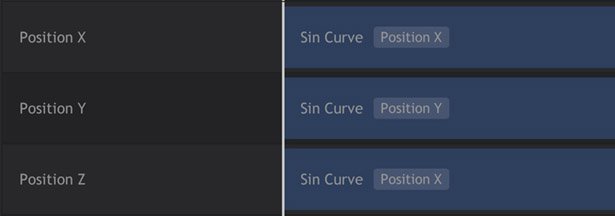
In this second image, the Sine Curve has been added to the Position Z track. Since there is no Z data in this recording, the Position X data is used. Now the curve starts near the camera on the left, and moves farther from the camera as it crosses the frame.
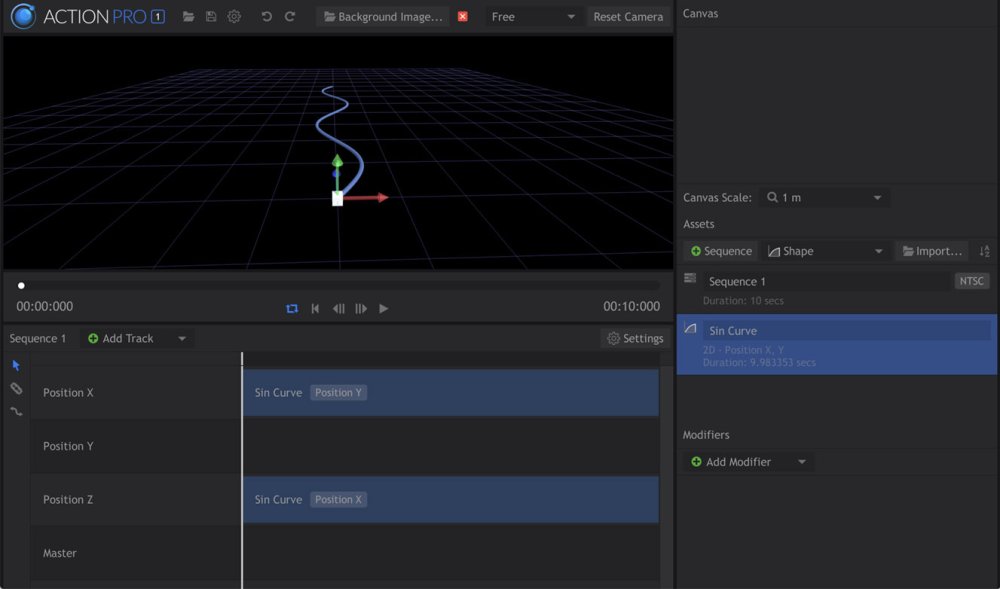
In this third image, we have deleted the contents of the Position Y track, and reassigned the Position X track to use the Position Y data. So now the Y channel is flat, but the X channel still contains the movement that was originally in the Y channel. So by reassigning these channels, we have converted the vertical Sine Curve shape to a horizontal sine curve, lying on the ground plane like a snake.
Using the same basic process, you can reassign data from any position axis to a different axis. And for recordings with both Position and Rotation data recorded, you can also move data from one type of property to another.