
Interface
The Action Pro interface is comprised of six main sections, as labeled in this image.
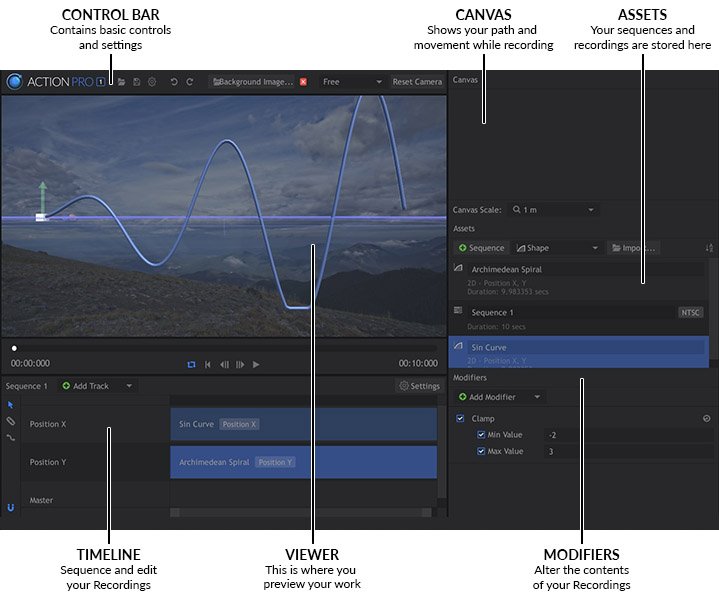
Each section of the interface is explained briefly below. For complete information on each section, please see All The Details
- Control Bar: The Control Bar is where you will find the primary file management buttons and controls. Use these buttons to Open or Save project files. You can also adjust the Application Settings here, and Undo or Redo past actions.
- Canvas: The Canvas controls let you monitor motion while recording. If you are using the mobile app, a preview of the app is displayed here. You can also adjust the scale of the recording, to define how it fits into the 3D work space.
- Assets: The Assets panel is where everything you create in Action Pro is stored and organized. Animations that can be edited and exported, and Recordings of specific movements that can be added into Animations will be listed here. You can create New assets, Import existing assets stored outside the software, and generate Primitives, predefined geometric paths which are useful in a variety of situations.
- Timeline: The Timeline is where you can open Animations and edit their contents. Add Recordings to your animation and manipulate their data to fine tune the results. Or combine multiple recordings to create a more complex animation.
- Viewer: The largest part of the interface is the Viewer, where you can see a visual representation of the movement you record. When editing on the timeline, the contents of the timeline is displayed in the Viewer. You can also load a background image for reference, to help with positioning and editing your recordings.
- Modifiers: You can add Modifiers to any asset selected on the timeline, to further manipulate its contents.