
![]()
![]()
![]()
Print Rules let you define the availability of a printer and how a print job should be handled, depending on:
- The day of week/time of day.
- Who the sender is
- The value of an attribute of the print job (For example, the page count of a print job)
Notes:
- For Print Direct, you create Print Rules on a Celiveo Virtual Printer. The Celiveo Virtual Printer is a module you deploy on a user’s workstation, in order to capture print jobs.
- For Pull Printing, if you want to apply a print rule universally for all printers, you place the rule on a Celiveo Virtual Printer. If you want to apply a rule to a specific printer only, you place the rule on that printer.
- Make sure that the maximum job file name size sent to a physical printer is 35 characters and 95 for a job sent to a virtual printer.
- IMPORTANT: Rules for a Celiveo Shared Virtual Printer must not have USER OU as a criteria.
Let’s create print rules for the following examples:
- Example 1 – Force behavior
- Example 2 – Control printer availability
- Example 3 – Override restrictions
- Example 4 – Deactivation of Print queues drivers based on group and settings
- Example 5 – Restrict Direct Printing to groups
Example 1:
Stage 1: Select Printer
- At the Main menu, click
![]() . The Printers List is displayed.
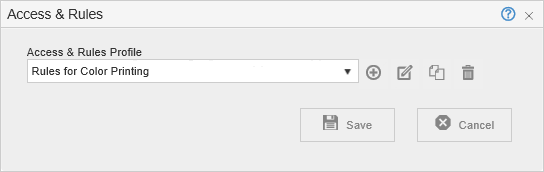
. The Printers List is displayed. - Select a Celiveo Virtual Printer you want to apply the rule to, and click
![]() . Access & Rules is displayed.
. Access & Rules is displayed.
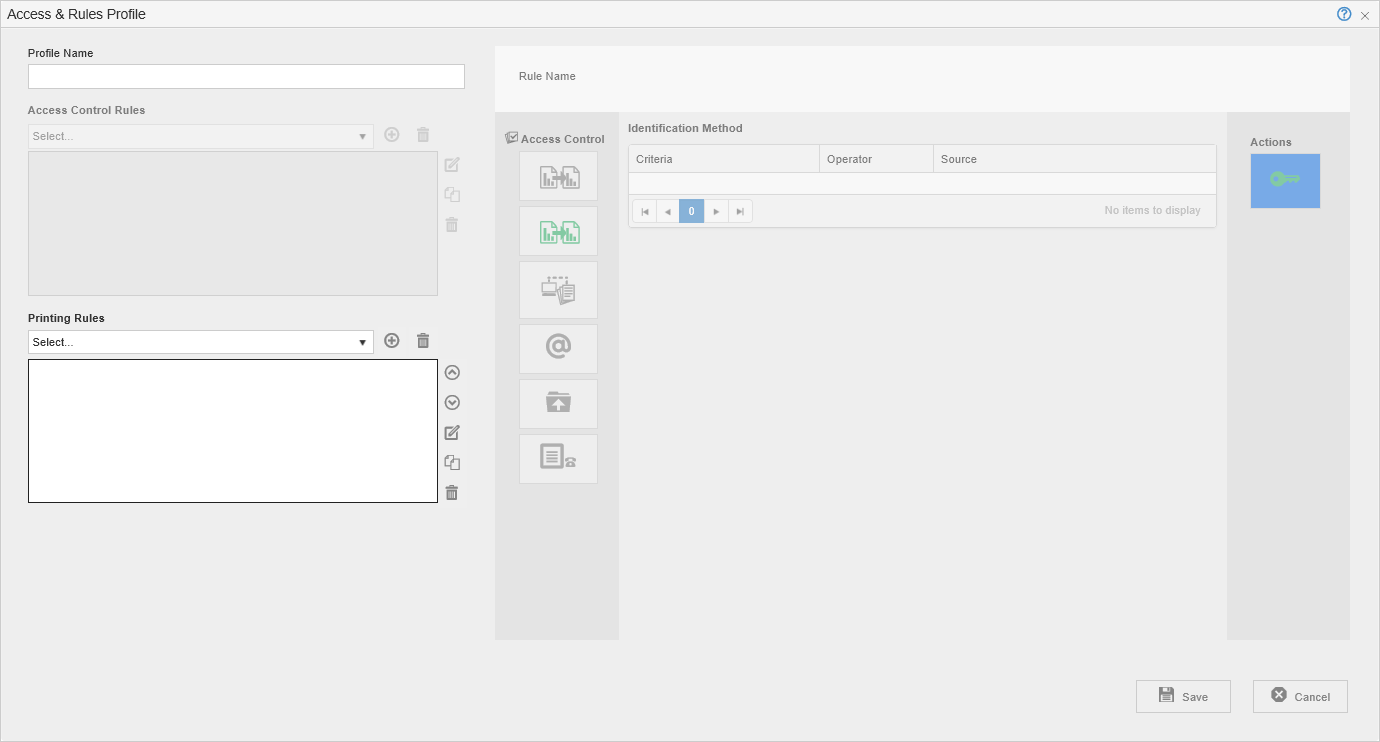
Stage 2: Create a New Access & Rules Profile
- Click
![]() . The Access & Rules Profile for the new rule is displayed.
. The Access & Rules Profile for the new rule is displayed.
![]()
- At [Profile Name] box, specify a unique name (for this example, we will use Rules for Color Printing as the name) for the Access & Rules Profile.
- Click
![]() , located next to the [Printing Rules] drop-down, to add a new rule.
, located next to the [Printing Rules] drop-down, to add a new rule.
Stage 3: Configure the New Rule
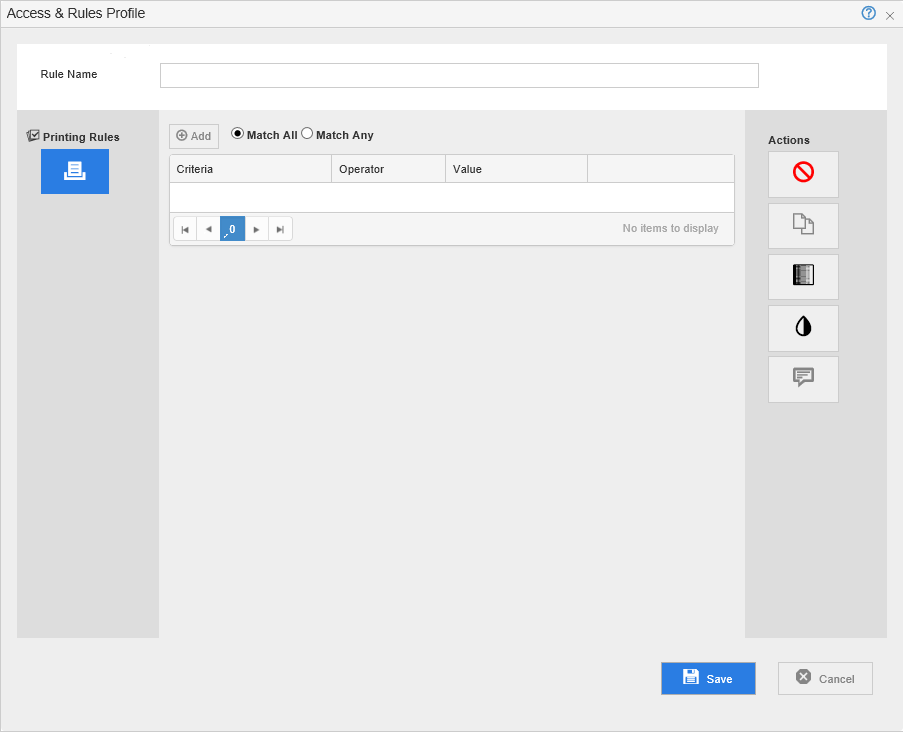
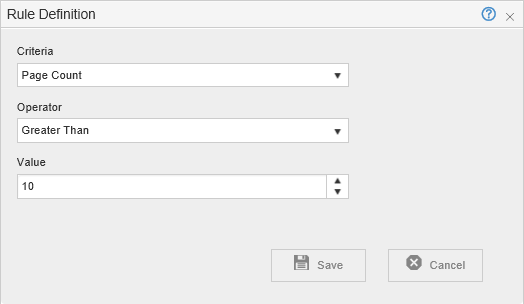
- At [Rule Name], specify a unique name for the rule (for the purpose of this example we will use Large color jobs as the name).
- Click
![]() , located next to [Add]. The Rule Definition displays.
, located next to [Add]. The Rule Definition displays.
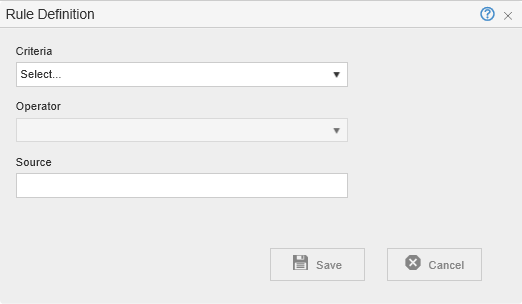
![]()
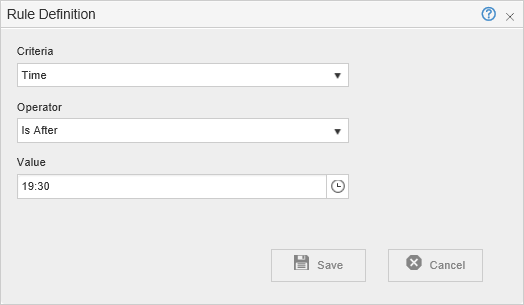
- From the drop-down lists in the Rule Definition, select options as shown below and click [Save].
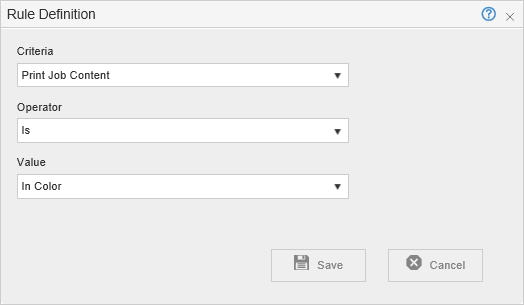
![]()
- Once again click
![]() , located next to [Add]. The Rule Definition displays.
, located next to [Add]. The Rule Definition displays. - Specify options as below and click [Save].
![]()
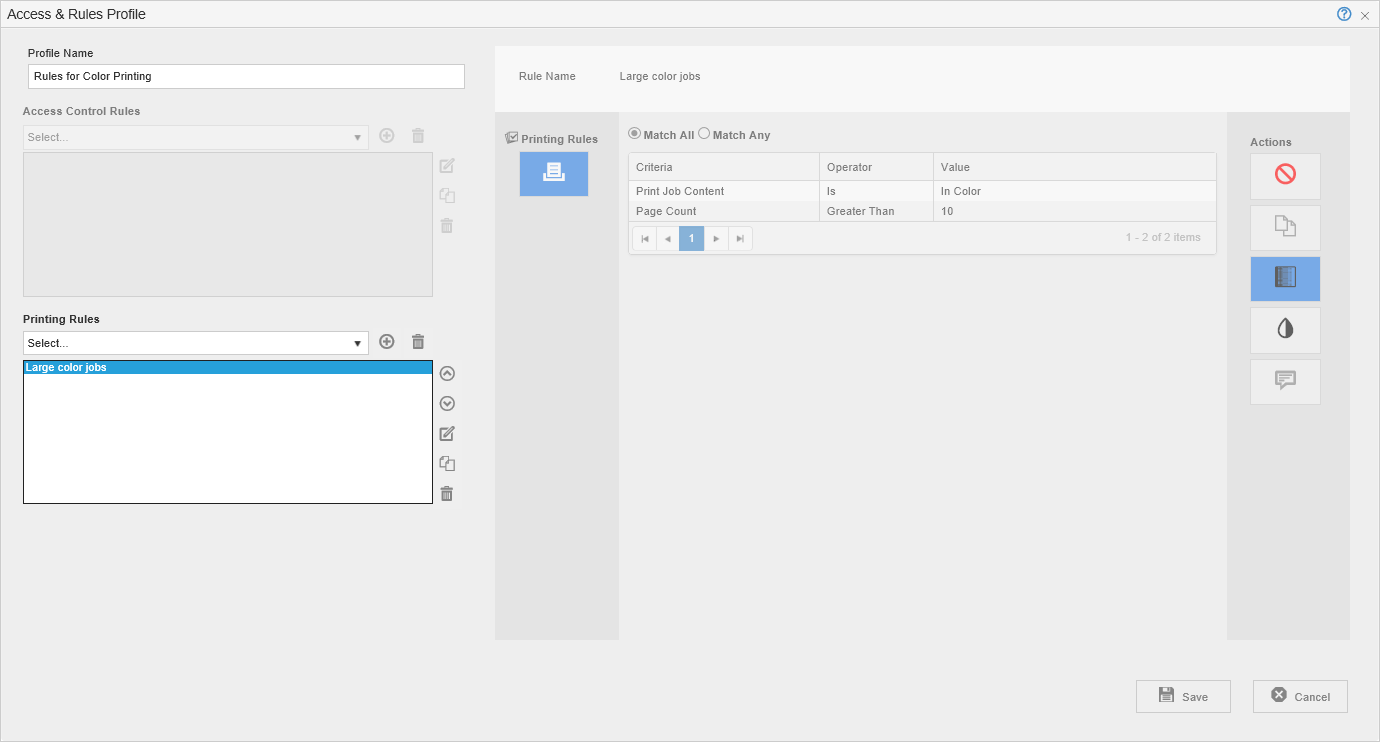
- In the [Actions] panel, click
![]() . The Access and Rules profile should now resemble the illustration below:
. The Access and Rules profile should now resemble the illustration below:
![]()
- Click [Save]. Large color jobs rule is now listed under [Printing Rules].

Example 2:
Stage 1: Load Access & Rules Profile
- From the Printer List, select the printer you modified in the last example and click
![]() . Access & Rules is displayed.
. Access & Rules is displayed.
![]()
- Click
![]() . The Access & Rules Profile displays.
. The Access & Rules Profile displays.
![]()
- Click
![]() , located next to the [Printing Rules] drop-down, to add a new rule.
, located next to the [Printing Rules] drop-down, to add a new rule.
Stage 2: Configure the New Rule
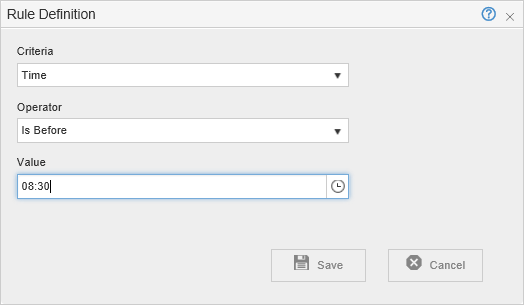
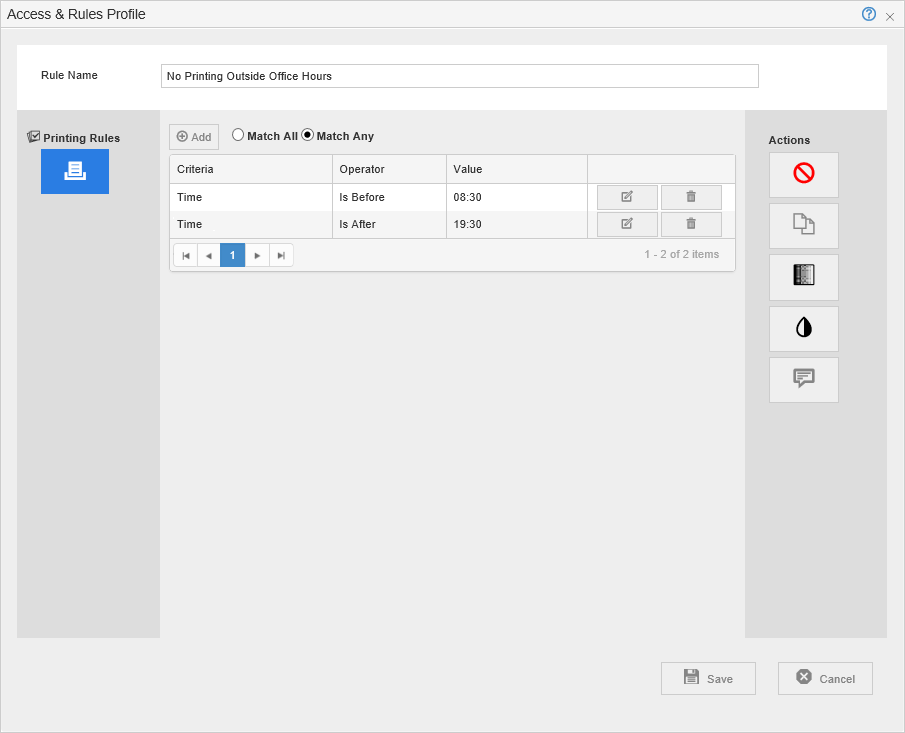
- At [Rule Name], specify a unique name for the rule (for the purpose of this example we will use No Printing Outside Office Hours as the name).
- Follow the workflow outlined in stage 3 of example 1 to create the two criteria shown below.
![]()
![]()
- Select [Match Any].
![]()
- Click
![]() .
. - Click
![]() . The
. The ![]() icon appears next to the button.
icon appears next to the button. - Click
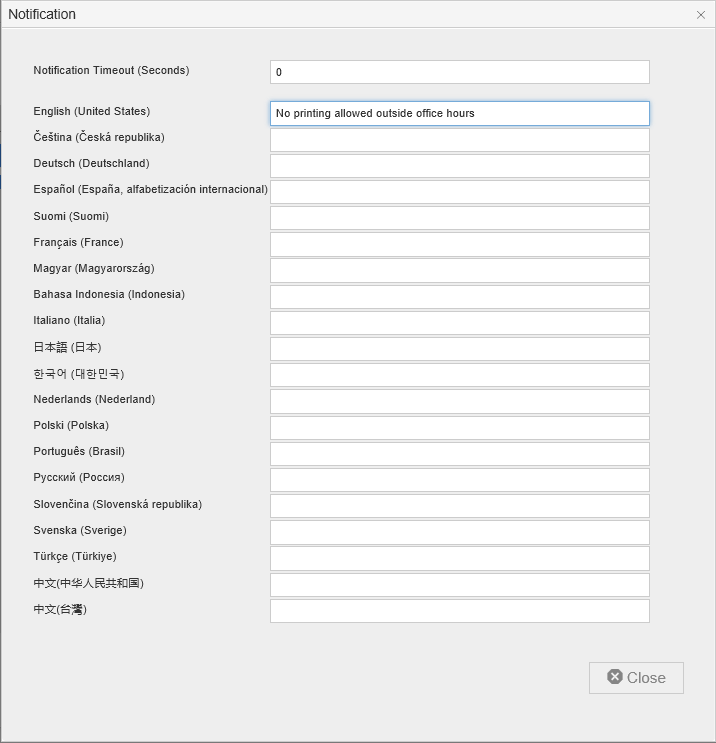
![]() . and specify the notification as shown below:
. and specify the notification as shown below:
![]()
- Click [Close].
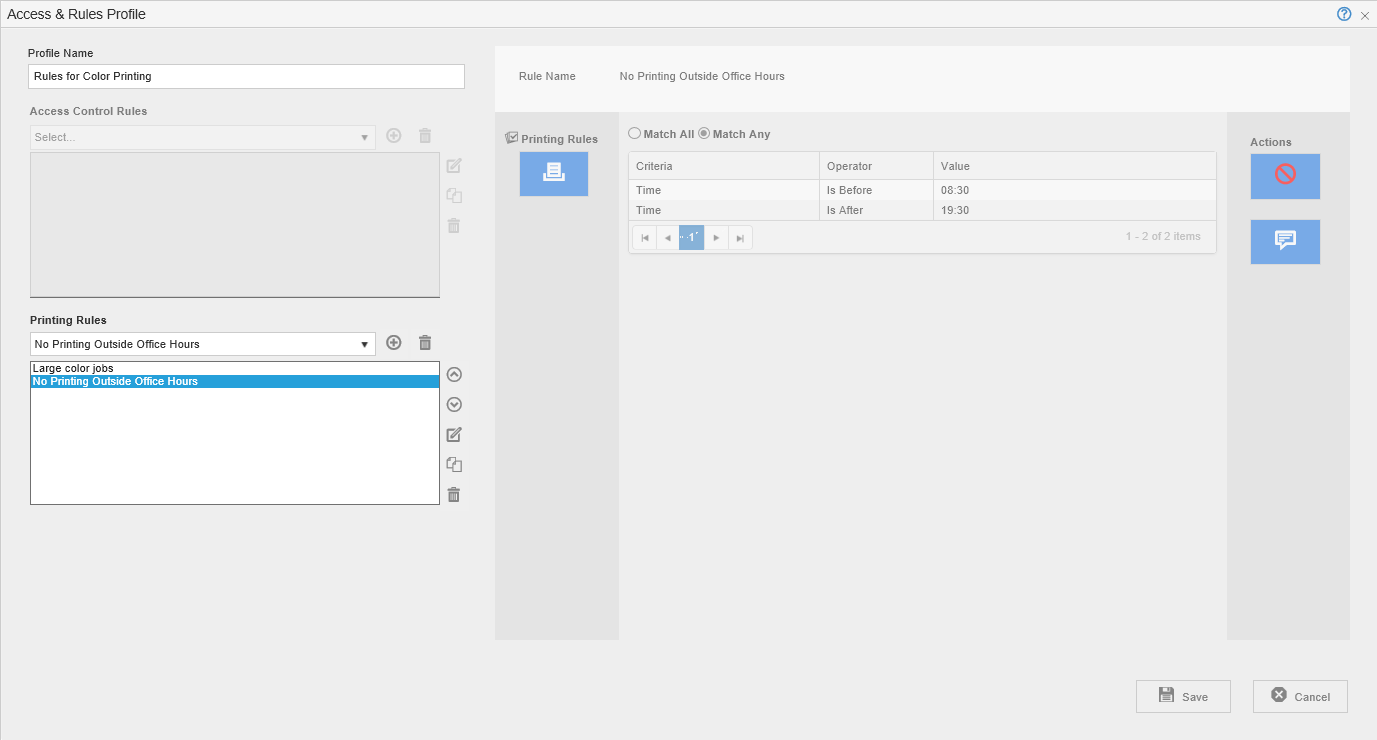
- Click [Save]. The screen should now look like this:
![]()
Example 3:
- Follow the procedure outlined in example 2 and create a new rule as shown in the image below:
![]()
- Click [Save]. You are returned to the Access and Rule Profile.
![]()
- Click
![]() to ensure that the Override Restrictions for HOD rule is placed as the first rule.
to ensure that the Override Restrictions for HOD rule is placed as the first rule.

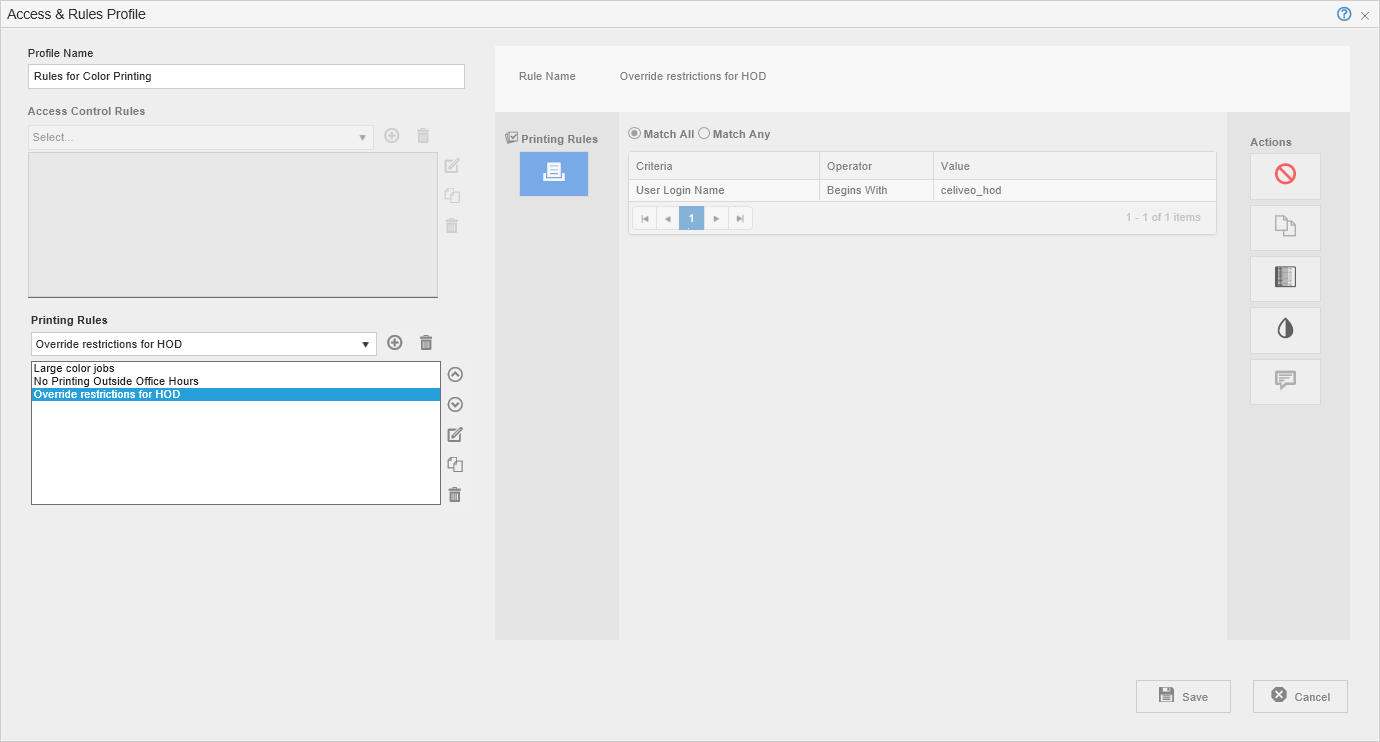
Note: The first rule is processed before all others. Because the rule triggered by the user name that begins with Celiveo_hod is processed first, that user has unrestricted access. Hence, the subsequent rules do not apply to that user.
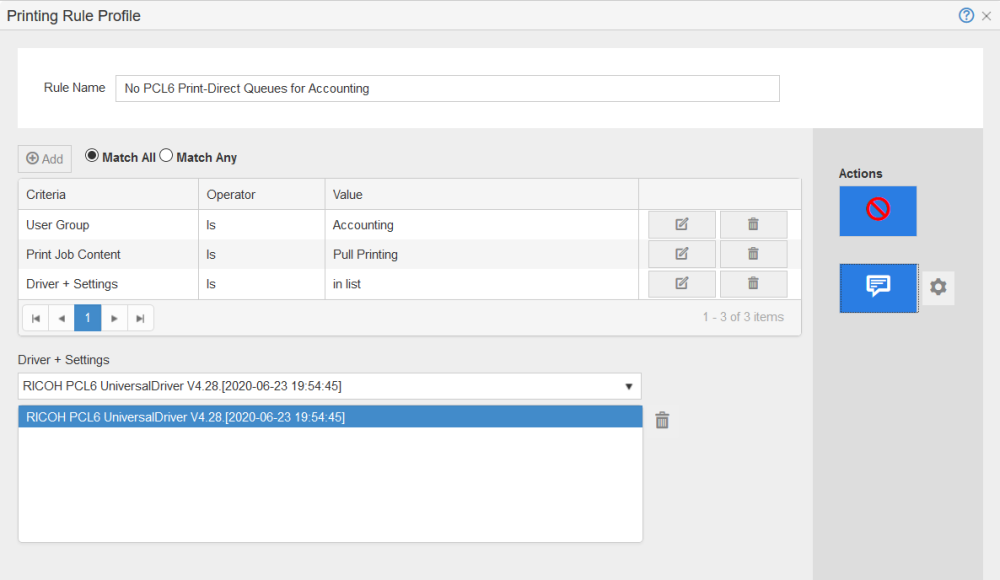
Example 4:
A print rule allows defining which ones of the virtual print queue default driver + settings are forbidden.
When the rule applies (at login time and when the network connection is reset for VPN) the settings rule is computed and defines what drivers are available.
As an example, here we want to prevent people belonging to the “Accounting” group to print from Print-Direct queues with a PCL6 driver.
- Create a rule condition for which:
Criteria is: User Group
Operator is: Is
Value is: Accounting - Create a second rule condition for which:
Criteria is: Print Job Content
Operator is: Is
Value is: Print-Direct - Create a third rule condition for which:
Criteria is: Driver + Settings
Operator is: Is
Value is: In List - Select the driver(s) in the drop-down menu so that it appears in the list.
![]()
- Enable the Stop button.
- Enable the Notifications button
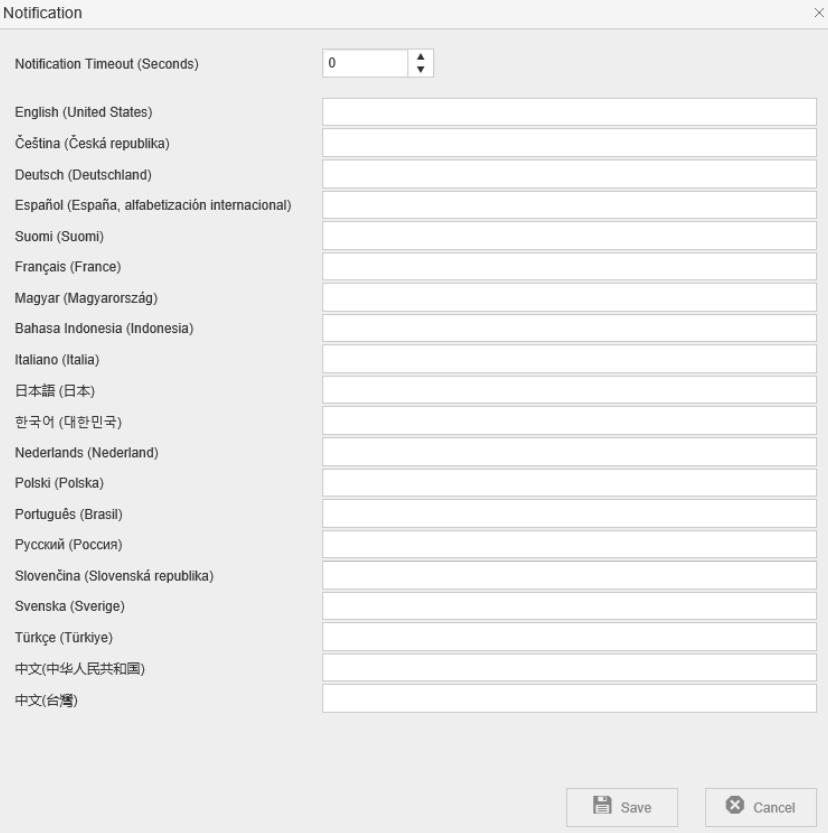
- Click the Notifications Settings button to define the notification message displayed to the user when he tries to select a Print-Direct queue. Messages can be defined in 20 languages.
![]()
Example 5:
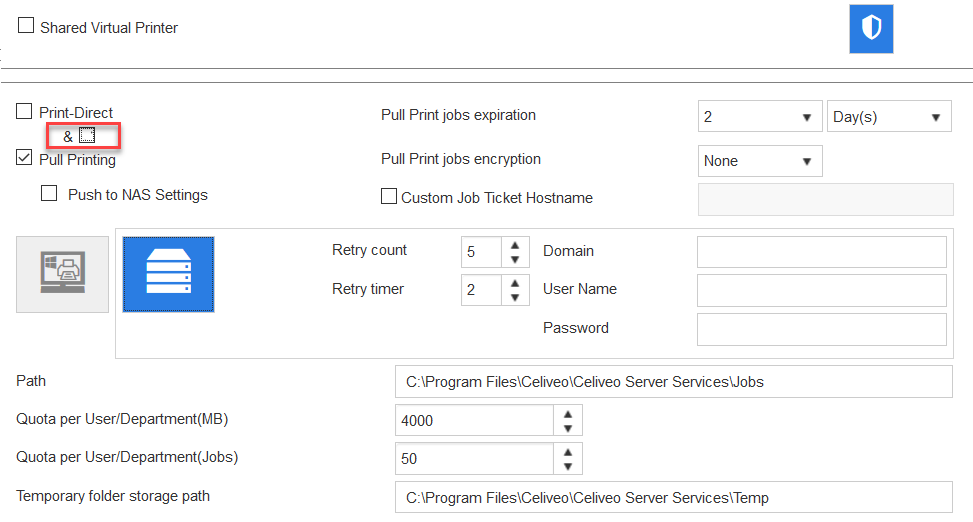
Celiveo Direct Printing will only be authorized if the user is in a group or Organizational Unit or has specific login (Client-Based Printing).
Define the printing methods available
In the Web Admin, the Celiveo Virtual Printer has a new setting to define if Print-Direct and Pull Printing can be used at the same time.
OR – “&” checkbox disabled: if Print Direct is activated, Pull Printing is deactivated, and the other way around.
AND – “&” checkbox enabled: Pull Printing and Print-Direct can be activated/deactivated independently and be available in parallel.
Assign Print Queues Rights using Print Rules
- Select a printer and click the Access & Rules button.
- Under Printing Rules, click + Add.
- In the Rules Definition Window, select your criteria.
You can restrict or authorize different actions using criteria, operators, and values.
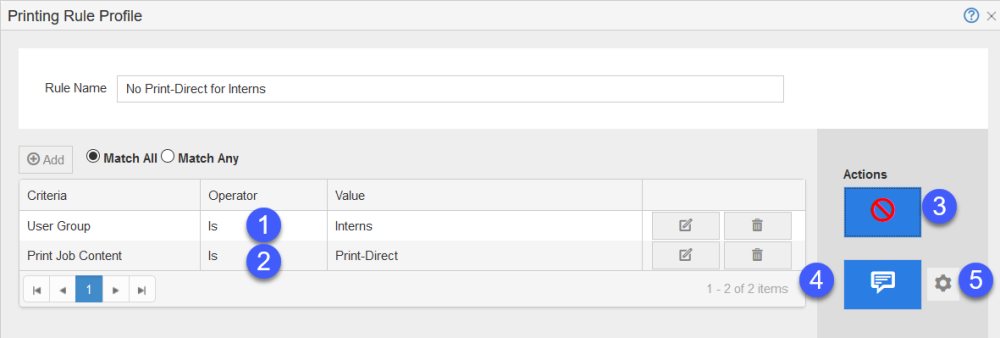
For example, to prevent users from a specific group to see a Print-Direct queue:
- Create a first rule condition for which:
Criteria is: User group
Operator is: Is
Value is: [Name of the User group] - Create a second rule condition for which:
Criteria is: Print Job Content
Operator is: Is
Value is: Print-Direct
![]()
- Enable the Stop button.
- Enable the Notifications button
- Click the Notifications Settings button to define the notification message displayed to the user when he tries to select a Print-Direct queue. Messages can be defined in 20 languages. You can also add the following variables to the notification messages:
| Variable | Description |
|---|---|
| %JOBNAME% | Displays the job name. |
| %JOBSIZE% | Displays the print job size in MB (includes “MB”) |
| %USERNAME% | Displays the sAMAccountName. |
| %USERSNAME% | Displays the user’s name. |
| %COST% | Displays the total print cost with rules applied. |
| %BWCOST% | Displays the cost with Black and White printing applied. |
| %DUPLEXCOST% | Displays the cost with Duplex printing applied. |
| %TONERSAVINGCOST% | Displays the cost with toner saving applied. |
| %PRECOST% | Displays the cost before applying the rules. |
| %TOTALPAGES% | Displays the total number of pages. |
| %MONOPAGES% | Displays the total number of pages in black and white (Mono). |
| %COLORPAGES% | Displays the total number of pages in color. |
Important information
The CVP rules and Printer print rules are complementary and do not replace one another.
CVP rules act and inform the user at the PC level, the admin-defined message (optional) shows up immediately in a popup window to inform the user the job has been canceled as it breaks the rules.
Printer print rules are run at the printer level and will inform the user (if a message is defined) on the jobs list (job list in color when the printer technology allows it, plus admin-defined message in job details).
Example:
You can define the corporate rules in the CVP:
- Printout from Outlook shall be duplex, toner saving, b&w
- Jobs with CONFIDENTIAL in title shall be stopped
- Any print job that may cost more than 10$ shall be stopped
Rules in printers are ideally device-centric, made to lower cost and avoid errors by end-users (trying to print a paper format not available on that printer model):
You can define the following rules on small non-duplex A4 printers:
- No print job of more than 25 pages
- No A3 paper print job
- No duplex job (printer is not duplex)
You can define the following rules on duplex and A3-capable printers:
- No print job of more than 100 pages, ask users to contact print room service
Limitations
Forced B/W, Forced Duplex, and Toner Saving actions are supported only by the following printers:
- HP
- Konica Minolta
- Ricoh Smart SDK (SOP2)
- Toshiba
- Lexmark
- Xerox
Post your comment on this topic.