
Celiveo Printers Discovery Agent helps you to import printers from an existing Print Server or find printers on the network.
You can also add printers manually.
Before you start
If the Web Admin is configured to run in HTTPS mode and Discovery Agent is run on a different machine than the one on which Web Admin is installed and Celiveo certificate is used then you need to import the Celiveo self-signed certificate to Trusted Root CA store where the Discovery Agent is running to import the printer/driver (use MS CertMgr).
The Celiveo self-signed certificate is found in the Web Admin installation directory:
…\Program Files\Celiveo\Celiveo 8\Web Admin\
The certificate name is .cer
*Note:*The default setting is the usage of the Celiveo certificate, a self-signed certificate that is used during installation to configure the IIS to host the Web Admin.
If you want to use your own certificate:
- Install your own certificate whose issuer is trusted by all PCs on IIS.
The certificate should have “localhost” in SAN (Subject Alternative Name) list
OR - You can change the sql.xml file to reflect the hostname/IP that your certificate supports.
Workflow
Follow the below instructions to add printers to Web Admin:
Stage 1: Start Printer Discovery Agent
- At the Main menu, click
![]() .
. - At the Printer menu, click
![]() .
. - At the Add Printer menu, click
![]() .
.
Note: If the Discovery Agent has not been installed earlier, the system downloads the installer and prompts you to install the Discovery Agent. Once installed the Discovery Agent starts.

Stage 2: Discover Printers
You can use one or both of the available options to search for printers in the network.
2.1 Discover printers from a print server
In the area marked 1.1 in the illustration above, enter the information and click on the ![]() Search icon.
Search icon.
- hostname or IP address of domain server,
- domain server administrator login,
- domain name and
- domain password.
2.2 Discover printers by scanning the network
In the area marked 1.2 in the illustration above, enter the information and click on the ![]() search icon.
search icon.
- start range of the IP address to scan
- end range of the IP address to scan
- the timeout period for the scan duration (seconds)
Discovery is performed by executing an SNMP query. To change the SNMP settings, click on the ![]() settings icon.
settings icon.
Stage 3: Add Printer from Search Results
Search results are shown in the section marked 3 in the illustration above.
- From the search results, select the printers you want to add.
- Click
![]() at the bottom-right (see 4 in illustration above).
at the bottom-right (see 4 in illustration above).
You are returned to the Add Printer wizard. The printers that are reachable are displayed on the top half of the screen, while the printers that are unreachable are displayed on the bottom half of the screen. - Click [Next].
Stage 4: Configure Printer Specific Information
The next stage displays a tabbed dialog box, where each printer type has a separate tab. The information you specify for each printer differs from one printer to another.
- Common Settings
- HP and HP Futuresmart Settings
- Ricoh Settings
- Konica Minolta Settings
- Lexmark Settings
- Xerox Settings
- Advanced Settings
Stage 4.1: Common Settings
![]()
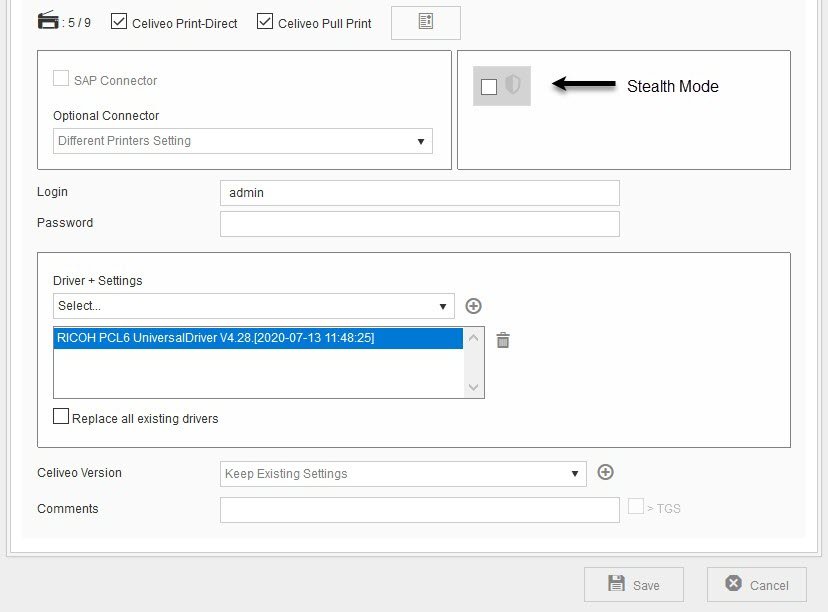
- You may choose [Celiveo Pull Print] or [Celiveo Print Direct] based on your configuration requirements.
- Click the [License] icon to view the information of product licenses that are available, applied, and/or expired.
- SAP Connector / Optional Connector:
- With Celiveo connectors, you benefit from a print solution tailor-made for the company’s special needs while maintaining tight control over security, compliance, and costs. It enables you to release pull print jobs generated by the specified vertical connectors. You can choose the optional connector from the drop-down if you have a license acquired for the connector.
- Stealth Mode:
- This feature allows you to securely print confidential documents. While performing a pull print event, all your print jobs are displayed under the Print job list when you authenticate at the printer. The information is also tracked in tracking reports. Enabling this option for the printer, masks the document name. The document name will be replaced with four asterisks symbols prefixed and suffixed respectively with the first and last character of its original name. In the tracking reports, the document name will appear as “[first character]****[last character]”.
- (Optional) Enter comments:
Enter any information for reference later. You can also use this field to define a reference code and opt to include it in the tracking information for Print-Direct printers.
To do so:
In the Printer Settings, enter a reference code in the Comments section and enable the > TGS checkbox.

Disable Log Encryption
It is possible to disable log encryption using the Comments field. To do so, enter the following command in the Comments field: [{LE:0}].

Stage 4.2: Settings for HP FutureSmart Printers
![]()

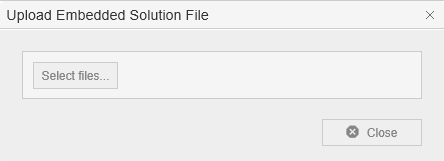
The ![]() button allows you to upload a customized OXPd Authorization Agent Configuration file. To learn more, see Custom Access Control for HP FutureSmart Printers
button allows you to upload a customized OXPd Authorization Agent Configuration file. To learn more, see Custom Access Control for HP FutureSmart Printers
- At [Login], specify an account name with administrator privileges.
- At [Password] specify the corresponding password.
- At [PJL Password], specify the password that authorizes Print Job Language (PJL) command strings.
- At [Driver+Settings], select the printer driver from the list. To add a new printer driver through Celiveo Printer Discovery Agent, click
![]() .
.
- At [Celiveo Version], click
![]() . The Add Celiveo Version dialog displays.
. The Add Celiveo Version dialog displays.
![]()
- Select the firmware file provided by Celiveo to “Celiveo-enable” HP FutureSmart printers (*.mh).
- For non-FutureSmart (Celiveo Smart Appliance agent enabled printers), choose the (* .mc/*.bmc) file.
Stage 4.3: Settings for Ricoh Printers
![]()
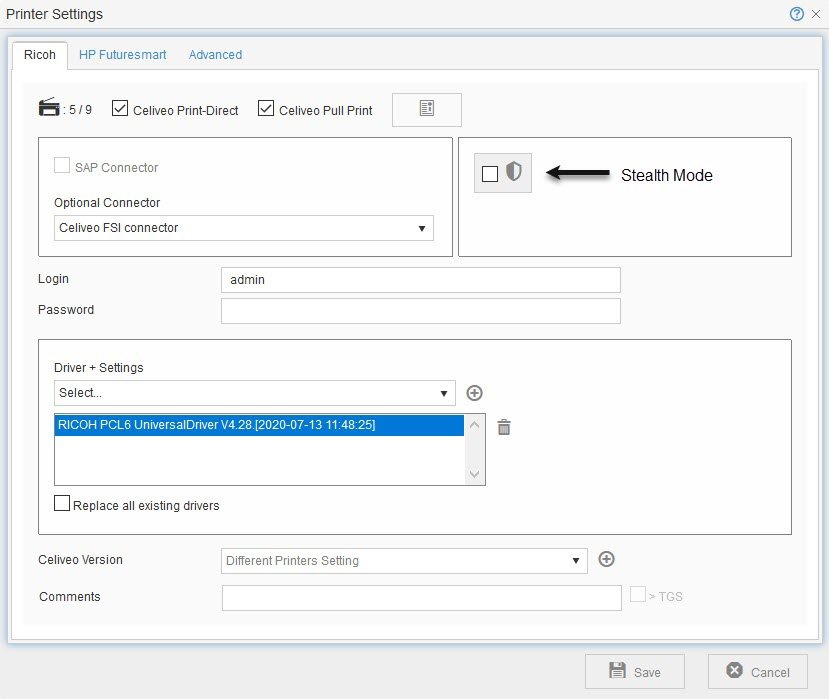
- At [Login], specify a user name with administrator privileges.
- At [Password] specify the corresponding password.
- At [Driver+Settings], select the printer driver from the list. To add a new printer driver through Celiveo Printer Discovery Agent, click
![]() .
.
- At [Celiveo Version], for Ricoh Android SOP 2.x printers, choose the .mr file to install the Business Edition Embedded agent for Ricoh. For CSA agent enabled printers, choose the *.mc/.bmc file.
Stage 4.4: Settings for Konica Minolta Printers
![]()
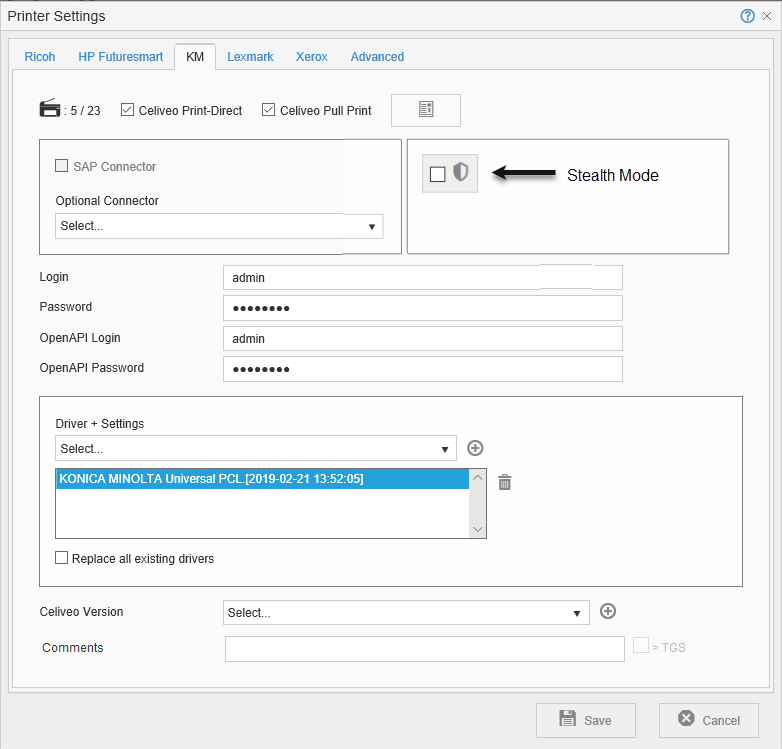
- At [Login], specify the administrator user name.
- At [Password] specify the administrator password.
- At [OpenAPI Login] specify the login name for the Open API authentication layer.
- At [OpenAPI Password] specify the password for the Open API authentication layer.
Stage 4.5: Settings for Lexmark Printers
![]()
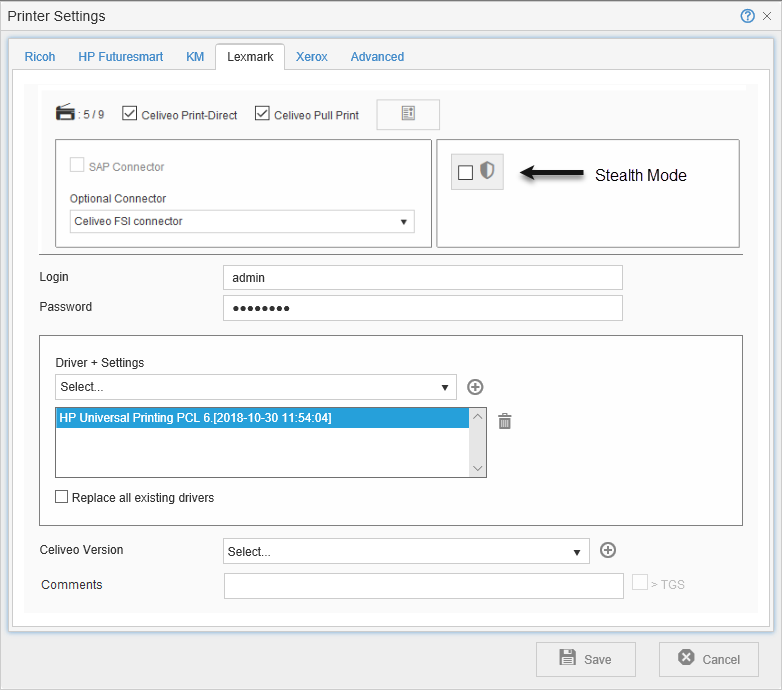
At [Login], specify an account name with administrator privileges.
At [Password] specify the corresponding password.
At [Driver+Settings], select the printer driver from the list. To add a new printer driver through Celiveo Printer Discovery Agent, click ![]() .
.
Stage 4.6: Settings for Xerox Printers
![]()
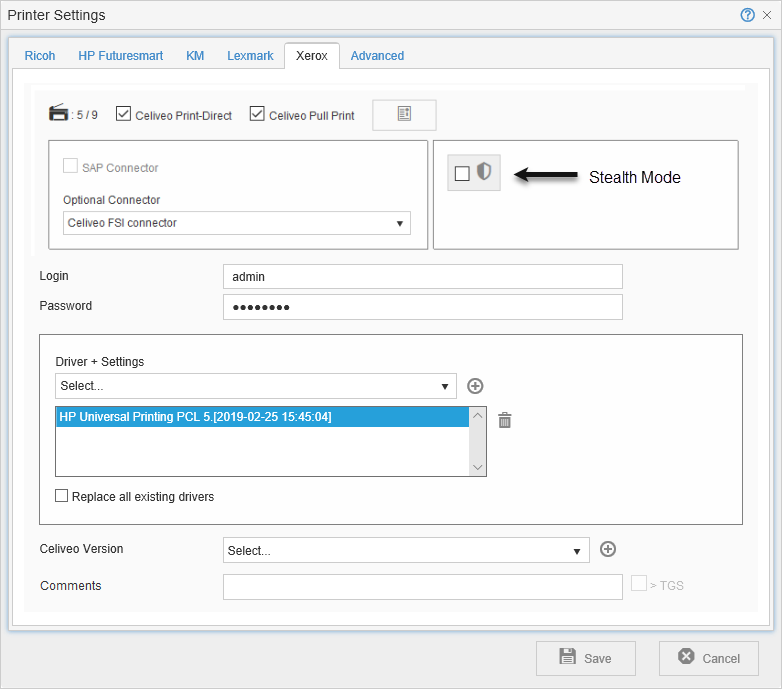
At [Login], specify the System Administrator login name.
At [Password] specify the corresponding password.
At [Driver+Settings], select the printer driver from the list. To add a new printer driver through Celiveo Printer Discovery Agent, click ![]() .
.
Stage 4.7: Advanced Settings
![]()
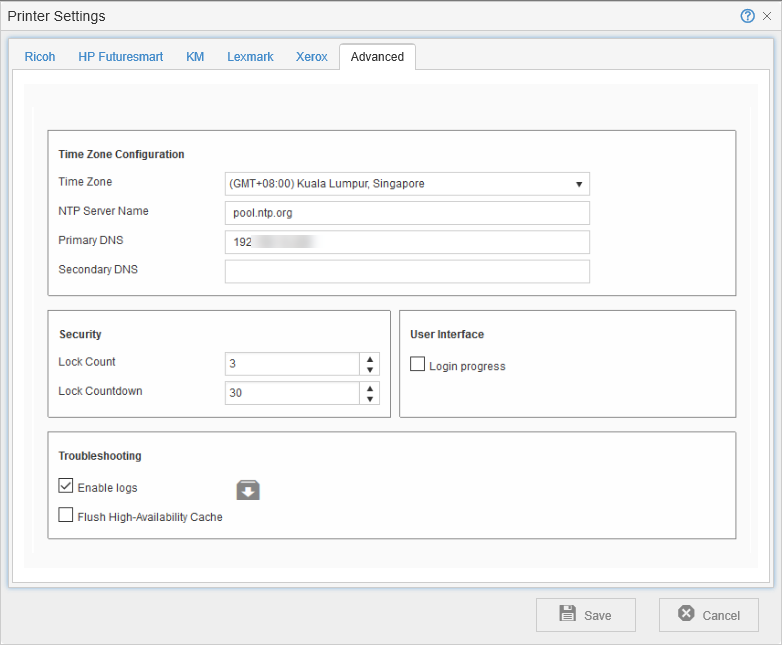
These settings help you to:
- Configure the time zone settings for tracking of information by the printer.
| Menu option | Description |
|---|---|
| Time Zone | Select the preferred time zone. |
| NTP Server Name | The Network Time Protocol (NTP) is typically used by hundreds of millions of computers and devices to synchronize their clocks over the Internet. Edit the IP address or domain name of the NTP server if required. |
| DNS Primary | Automatically pre-filled with the IP address of the primary domain server from Web Admin. Edit the address if required. |
| DNS Secondary | Automatically pre-filled with the IP address of the backup domain server from Web Admin. Edit the address if required. |
- Configure Security settings on the Printer screen for failed authentication.
Menu option Description Lock Count Defines the number of failed authentications before the printer screen locks. Lock Count default value is 3 but can be modified to a value between 1 and 9. Lock Countdown Defines the time in seconds the printer screen locks after the number of failed authentications defined by [Lock Count] is reached. Lock Countdown default value is 30 but can be modified to a value between 15 and 180.
- Configure settings for troubleshooting.
Menu option Description Enable Logs Logs provide information on the activities of Celiveo and the connected printers. Select [Enable logs] to enable collection of logs.
IMPORTANT NOTE: This option should only be set at the request of Celiveo and for the indicated duration. It produces an encrypted file that is not usable by end-users.Flush High-Availability Cache This is applicable if an Optional Connector with high-availability feature (license) is available for the printer(s). If the license is not applied to the printer, then this option is disabled. Selecting this option enables data to be purged from the cache regularly at predefined intervals.
NOTE: It is important to synchronize the printer(s) after selecting this option.If you are adding a printer with the Add Printer wizard,
Click [Next >] to go to the next step of the Add Printer wizard.If you are editing the settings of a connected printer,
Click [Save] to continue.
To apply the settings on the target printer, click the “synchronize printer”![]() icon.
icon.Stage 5: Finalize
- Click [Next]. until you arrive at the Save Confirmation dialog.
- Click [Save].
Post your comment on this topic.