
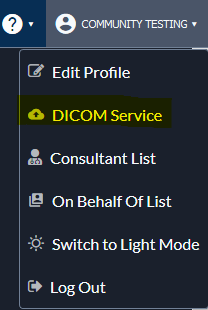
Navigate to the DICOM Service option in the user menu if you want to edit or add a DICOM Service to your Community account.
The information in the line labeled “Client:” is the computer name on which the DICOM Service is installed and the associated IP Address.
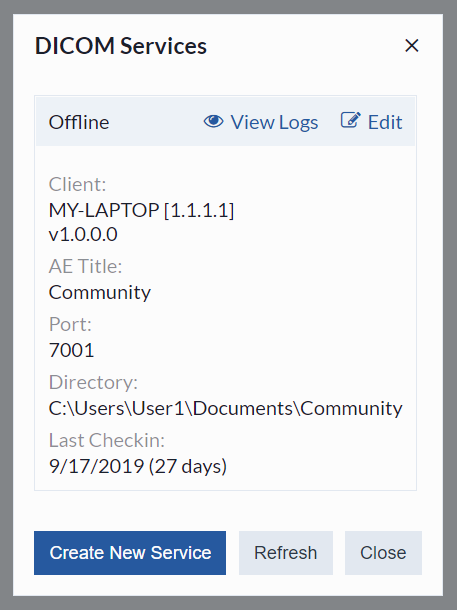
Use the edit button to change the settings if your network or IT administrator has specific requirements. By default, the DICOM Service monitors the computer “Documents” folder.
Have a mobile modality? Once logged on the modality, use the “Create New Service” option to install the DICOM Service. This will allow you to upload images directly from the modality into Community as soon as you have access to the internet.
Do you have multiple locations that need to submit report requests? Use the “Create New Service” option to install the DICOM Service on computers and modalities at other locations. Your Community user will have access to all images imported from those modalities – regardless of location.
Post your comment on this topic.