
Overview
The Inventory List section allows you to view and interact with your inventory. The inventory list page defaults to the Stock List Tab, however, you can access the Part Edit Tab and the Parts List Tab.
The Part Edit Tab allows you to edit master part records, or add inventory detail records, print barcode labels, and attach documents. The Parts List Tab is where you can create a specialized parts list or “Recipe” of parts.
Stock List Tab
From this page, you can quickly add new parts, view stock availability, view stock allocation to work orders, view on-order status, view a part’s reorder trigger point, and see warning notifications. The warning notifications will alert you when an item has reached or passed it’s reordering point, or if the item is expiring shortly or has expired.

 Using the Actions menu on the right of the page, you can add a new part, import your current inventory, print barcode stock labels, and export your inventory.
 To initiate a Request Restock, select the checkbox
 ![]() next to the part number you wish to restock. Once all of your selections have been made, press the Request Restock button. To learn more about how this feature works, go the Request Restock.
next to the part number you wish to restock. Once all of your selections have been made, press the Request Restock button. To learn more about how this feature works, go the Request Restock.
 To add a new master part number, click the Add New Master Part + button, which will open a window for your part details. To learn more about adding inventory, go to the Add Inventory sections.
![]()
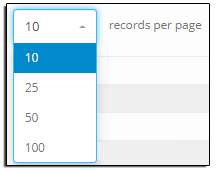 The Records Per Page drop-down allows you to change the number of records listed per page. All sortable columns will have the Up and Down Arrows
  . Use these icons to sort the listing in column alphanumeric ascending or descending order. The Search filter allows you to search the listing (perhaps by part number, alternate part number, or description.).
Part Edit Tab
 Clicking on the part number will take you to the Part Edit Tab. This tab allows you to edit or delete the master part record, edit or delete inventory detail records, print barcode labels, and attach documents. You can also reach the Part Edit Tab by clicking the tab at the top of the screen.

By clicking the Part Edit Tab instead of clicking on a part number, you will need to enter the part number you wish to edit. Type the first few characters of the part number or description into the search box. Once the desired part number appears, select the part number from the “Blue Field”.

After a part number has been selected and part data is returned to the screen, the Part Edit Tab will contain three sections: Edit Parts, Part Allocation, and Parts On Order.
Edit Parts Section
The Edit Parts section contains two parts: The Master Part Record, which allows you to make global changes to a master part record, and the Part Detail Record(s), which will enable you to edit the information that pertains to that particular part line item.
1) Master Part Record: This section is where you will enter the pertinent information about the part. You will enter the primary part number, primary part description, alternate part number(s), internal part description, weight, and a weight note. The information added to the weight field will be used for the Weight & Balance calculator in the work order. Go to Add Inventory for detailed information on the input fields and their meanings.

Clicking the History ![]() icon next to Selected Part Number will open a window with all of the histories for that part.
icon next to Selected Part Number will open a window with all of the histories for that part.
To edit a master part record, fill in the fields you wish to change and press the blue Save icon. ![]()
2) Part Detail Record: This section is where you add one or more detailed inventory line item records for the specific part. These details include a dozen-plus attributes about the line item, such as serial number, lot number, and expiration date. You can also attach documents and print barcode labels by clicking the appropriate part detail record icon.
 To create a new Part Detail Record, click the Add New Detail + button, which will open a window with Part Number and Description pre-populated from the Master Part Record. Go to Add Inventory for detailed information on the input fields and their meaning.
To edit a Part Detail Record, under the Actions Column, click the Edit Pencil ![]() . Edit the fields you wish to change and press the blue Submit button.
. Edit the fields you wish to change and press the blue Submit button.
To generate a barcode for that particular Part Detail Record click the View/Print Label ![]() icon which will open a print window. Reference Print Inventory Labels for more information.
icon which will open a print window. Reference Print Inventory Labels for more information.
To attach documents to a particular Part Detail Record click the View Document ![]() icon This action will open a Document window. Press the blue Upload button and select the file you want to attach.
icon This action will open a Document window. Press the blue Upload button and select the file you want to attach.

To Delete a Master Part Record from your inventory, delete all fields for the master part record section, and delete all part detail records by clicking the Delete ![]() icon for each part detail record. Once all records are removed, press the blue Save
icon for each part detail record. Once all records are removed, press the blue Save ![]() icon.
icon.
 Part Detail Records where the quantity is “0”, use the Hide Zero Quantity Lines link above the Add New Detail + button.
Part Allocation
This section shows work order and squawks for which the part has been requested. You can see when the request was generated, the quantity requested, quantity picked, and the remaining stock level. Clicking the work order in the “WO/Squawk” column will take you directly to the Part / Services / Tool tab for that work order. This section can be a useful tool for forecasting part demand for purchasing.

Parts On Order
This section shows purchase orders against the part. You can see when the purchase order was generated, what work order and squawk this part has been assigned to, the quantity requested, quantity received, and the remaining stock level. Click the purchase order number in the “PO” column to go directly to that purchase order. Clicking the work order number in the “Assigned To” column will take you directly to the Part / Services / Tool tab for that work order.

Part Lists
The Part Lists section is where you can create a specialized parts list or “Recipe” of parts that can be added to the Parts Requested & Picked section of a work order or quote on the Parts / Services / Tool tab. This feature allows you to quickly add several parts at once instead of line by line on repeat jobs. Reference Add Parts to a Job for more information.
To get started, select the Part Lists Tab on the Stock List Page.

The Records Per Page drop-down allows you to change the number of records listed per page. All sortable columns will have the Up and Down Arrows . Use these icons to sort the listing in column alphanumeric ascending or descending order. The Search filter allows you to search the listing (perhaps for specific inventory records by part number, alternate part number, or description.).
You can edit a list name by clicking the Edit ![]() icon or delete the list by clicking the Delete
icon or delete the list by clicking the Delete ![]() icon.
icon.
 Click the Add List + button, which will open a window for you to name and include any relevant aircraft make or model information as well as any notes about the list. Then press the blue Save button. Once the list is created, it will appear in the list section.

 To add parts to your list, first select the list name from your Parts in List page. Once the Parts in List page has loaded, press the Add Item + button, this will open a window to select a part from your inventory and the quantity needed for the list. Type the first few characters of the part number or description into the search box. Once the desired part number appears, select the part number from the “Blue Field” the add the quantity required and press the blue Save button.

Repeat this process until the list is complete.
Post your comment on this topic.