Overview

This section will cover the three ways to add your Vendors to the AMI system. There are two ways to add vendors: you can Add Vendors Manually or Import Vendors using the AMI spreadsheet template.

Add Vendor Manually
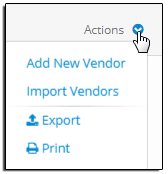
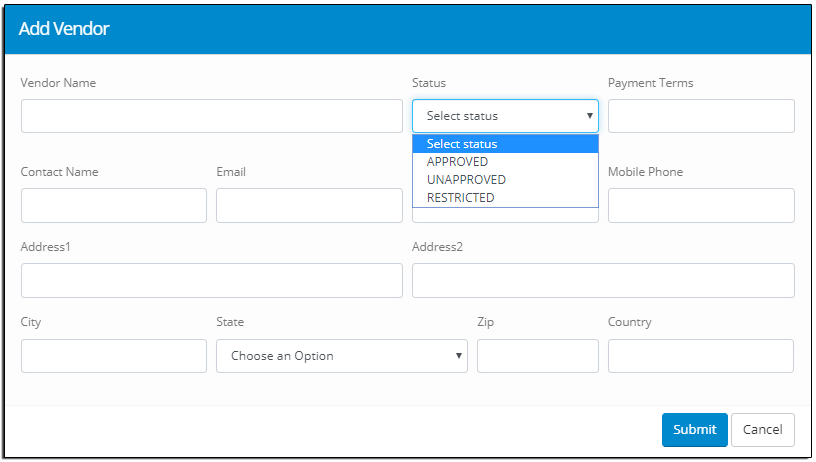
Figure 6.1-1 Actions Menu On the Vendor List Page, click the Actions menu located at the top right of the page and select Add New Vendor which will open the Add Vendor window where you can complete the form and press the Submit button.

Figure 6.1-1 Add Vendor Window

Vendor Status refers to the Quality Standards of the Vendor. These statuses were selected to mirror the principles of the ASA-100 and AS9100, 9120 standards.

  • Approved – The Vendor has a documented quality manual and does meet the requirements of ASA-100 and/or AS9100, 9120.
  • Unapproved –The Vendor has become unreliable.
  • Restricted – The Vendor does not have a quality manual that meets the requirements of ASA-100 and AS9100, 9120 but is a reliable and dependable supplier.

Payment Terms refers to payment terms with the vendor such as Net 30 or Credit Card. The Notes field can be used to identify whether the vendor is a supplier or a contractor or any other pertinent information you want to include.

Import Vendors

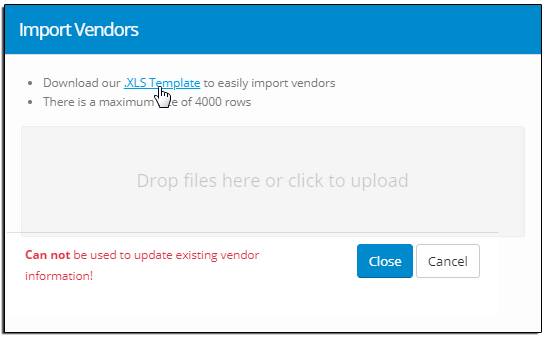
Figure 6.1-1 Actions Menu In the Vendor List Page, click the Actions menu located at the top right of the page and select Import Vendor. This will open the Import Vendors window where you can download the .XLS template. Fill in the columns with your Vendors’ information and save the spreadsheet to your computer – then “drag-and-drop” your saved spreadsheet to the dropzone on the Import Vendor window. The screen will refresh automatically when the import had finished.

Figure 6.1-2 Import Vendor Window

Feedback

Was this helpful?

Yes No
You indicated this topic was not helpful to you ...
Could you please leave a comment telling us why? Thank you!
Thanks for your feedback.

Post your comment on this topic.

Post Comment