
Step 1. Plug the Omega WiFi Amp into an available wall socket.
Step 2. Click the network icon on the bottom right of your desktop, and you will find the signal from the Omega WiFi Amp. Click “Connect” and wait for a few seconds.

Step 3. Open the web browser and type http://192.168.10.1/, the default IP address in the address bar. Then press Enter to continue. For better compatibility, we recommend using a Microsoft browser.
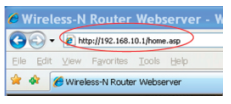
*NOTE: The default IP address for this extender is http://192.168.10.1/
**If you cannot load the management page on your browser, please hold the reset button for 5-8 seconds until all LED indicators re-flash, then remove the Omega WiFi Amp from the power socket and retry steps A1 to A3 again.
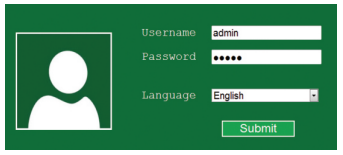
Step 4. Type the username and password into the appropriate spaces on the login page. The default username and password are both admin. Click Submit button to continue.
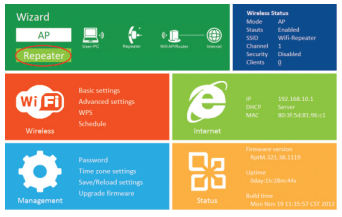
Step 5. After logging into the management page, please select the Repeater mode by clicking on the ‘Repeater’ button.
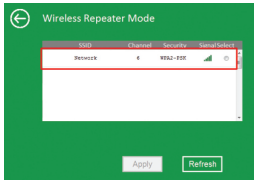
Step 6. Select your current wireless router SSID to continue.
*If you can not find your WiFi router, please refresh the page and try again.
Step 7. When you get the page below, please do NOT change the repeater SSID. Simply input your current WiFi security key and continue.
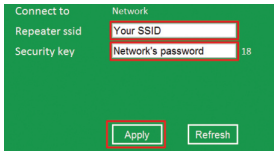
Click on the ‘Apply’ button. Wait for a few seconds as the Omega WiFi Amp restarts. Once the unit has turned back on, it is ready for use.
*We suggest that your current WiFi Security Key should not include strange symbols such as $ *& ^, as these might lead to a failed configuration. Characters and numbers are highly recommended.
Step 8. Wireless Repeater mode configure successfully!

*The default wireless SSID and security key is the same as your AP/router, after successful installation.
*The Management Page will be locked after your successful configuration. You CANNOT log into the management page via http://192.168.10.1. If you want to log into the Management Page again, please hold the ‘Reset’ button for 8-10 seconds to make all settings revert to Factory Default Settings. Once the unit has reset, reconfigure the Omega WiFi Amp again.
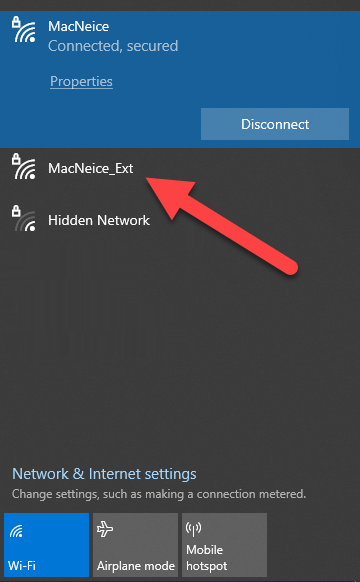
Step 9. Go to your available Wireless connections (i.e. just like in Step 2) and connect to the wireless connection called “YourSSID_ext”. Completing this step will add your computer to your main network via the Omega WiFi Amp device.
EXAMPLE: If your main Wi-Fi network at home has an SSID called “MacNeice”, after configuring the Omega WiFi Amp using the steps above, you should now have a “MacNeice_Ext” connection. The “MacNeice_Ext” will be the Omega WiFi Amp and the correct network to connect to if you wish to use the Omega WiFi Amp connection.
Post your comment on this topic.