
| |
This is the Map icon. |
| |
This is the Delete icon. |
| |
This is the Upload Map icon. |
You have a couple of options for removing a Map, but first, you need to open the Edit Map screen.
- Click on the Camera Group to expand it.
- To remove a map for a top-level group, do either of the following:
- Click the Edit Map button at the bottom of the group screen, or
- Click on the group’s pop-up menu and select Edit Map.
- To remove a map for a sub-group:
- Click on the sub-group’s pop-up menu and select Edit Map.
The Edit Map screen will appear.
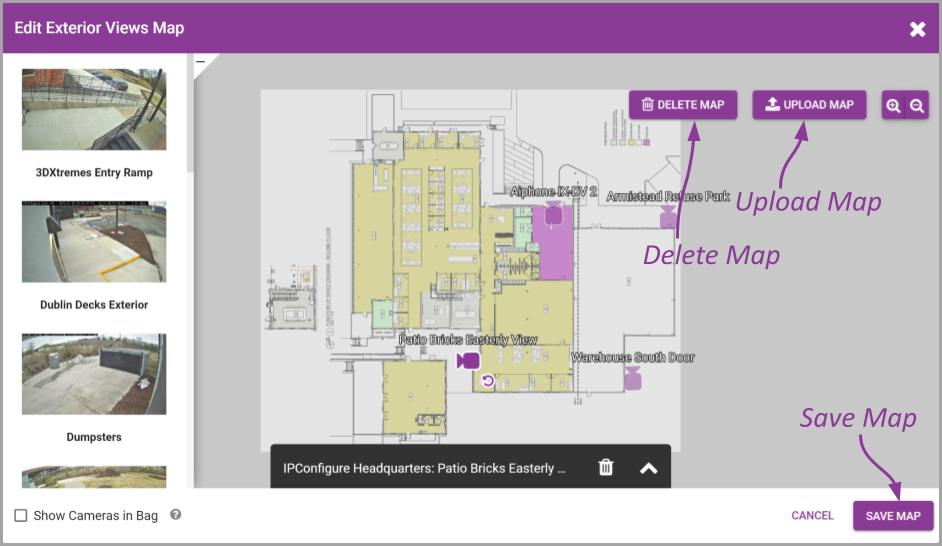
- To remove a Map and send all of the cameras back to the Camera Bag, click the Delete Map button. After you confirm the delete, there is no turning back. (You don’t have to save the Map to complete the delete process.)
- To replace the current Map image with a new background image, click the Upload Map button, then select the new Map image. Once you confirm the new image, the system will replace the background image, while keeping all of the camera icons in place. (You don’t have to save the Map to complete this process.) You may need to adjust camera positions based on the new Map.
Post your comment on this topic.