
The Users tab allows Administrators to manage users registered to the selected Orchid Core VMS. Each Orchid Core VMS is configured with one administrator user by default; this user is created during installation and cannot be removed. Additional users may be created with varying levels of access (determined by each user’s role).
About Orchid Core VMS User Roles
There are four different user roles in Orchid Core VMS, each with a different level of access:
- Live Viewer: A Live Viewer is only able to view live video.
- Viewer: A Viewer is able to view live and recorded video.
- Manager: A Manager can view live and recorded video, export video, view System Reports, and control PTZ Players. (The Manager is not able to create or manage users or cameras.)
- Administrator: An Administrator is able to do everything within Orchid Core VMS, including activating Orchid Core VMS, adding new users and cameras, resetting passwords, and viewing System Reports.
User roles are set when you create new users, however, an Administrator may change the role of an existing user by clicking the Edit pencil icon. Find out more about editing users later in this section.
Access the Orchid Core VMS Users List
- Sign in to Orchid Fusion VMS as an Administrator.
- Open the System Menu in the top-right corner of the screen and select Servers.
- Click on (and expand) the server you want to work with. Then click on the Users tab.
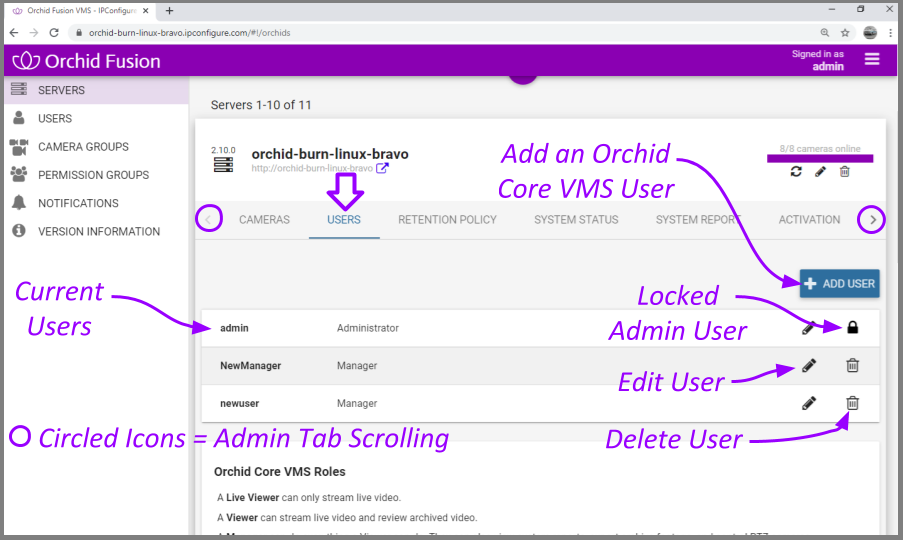
The Orchid Core VMS Users screen lists all of the users that have been added, and their assigned roles. Descriptions of the four roles appear at the bottom of the screen.
Adding a New User
| |
This is the Add icon. |
- Click the Add User button in the top-right corner of the Orchid Core VMS Users screen.
- A New User screen will open. Enter the username you would like to set for the new user in the Username field.
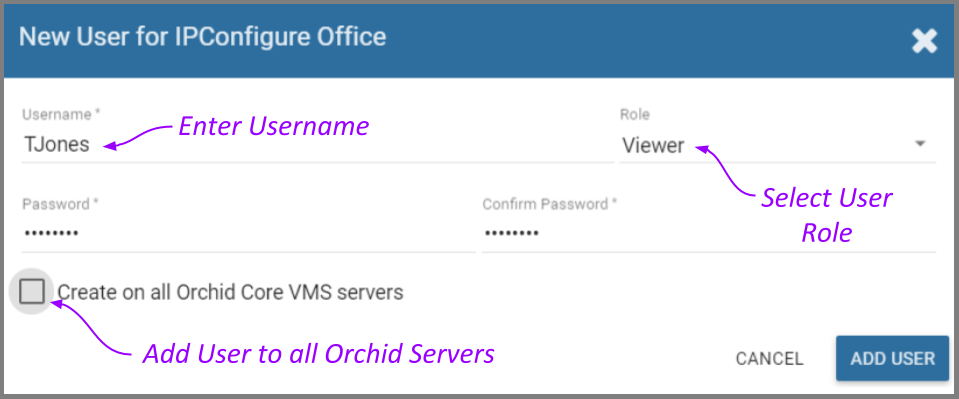
- Select a role for the new user from the Role drop-down list. (The role can be updated by an administrator at any time.) Available roles for Orchid Core VMS server users are listed at the bottom of the Users screen.
- Enter the password for the new user into the two fields labeled Password and Confirm Password.
- Mark the Create on all Orchid Core VMS Servers checkbox if you want this new user to have access to all of the Orchid Core VMS servers registered in Orchid Fusion VMS.
- Click the Add User button at the bottom of the screen to create the new Orchid Core VMS user. The new user will now appear in the Users list for this server (or for all of the Orchid Core VMS servers, if selected in step 5).
Editing Existing Users
| |
This is the Edit pencil icon. |
Nothing is set in stone for Orchid Core VMS users and almost all of the user settings can be updated, as needed. The only user that cannot be completely edited is the default admin user (which has a Lock icon in place of the Trash Can icon). While the password can be updated, the username and role cannot be changed.
- To edit a user, click the Edit pencil icon to the right of the user you want to update. The User screen will open.
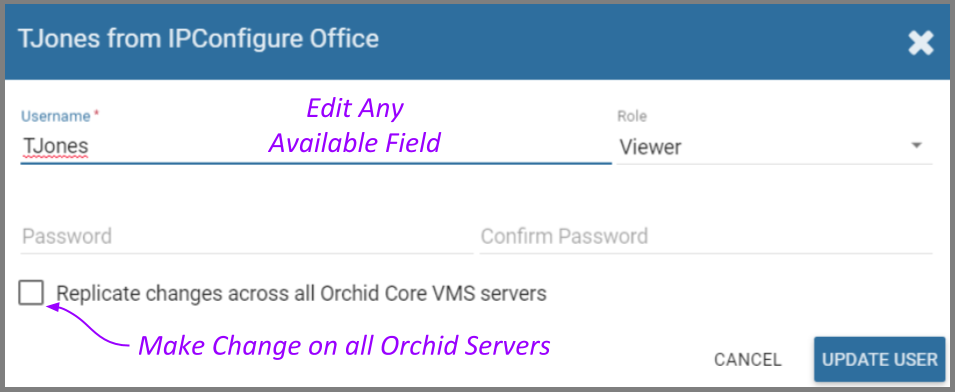
- Edit any of the available fields, as needed.
- If this user exists on multiple Orchid Core VMS servers, mark the Replicate changes across all Orchid Core VMS servers checkbox if you want your changes to cascade to all of those servers. (For example, you could push a password change to all the servers.)
- If you want to create this user on all of the other registered Orchid Core VMS servers, mark the Replicate changes across all Orchid Core VMS servers checkbox and the Also create new users checkbox. You will be required to enter an administrator password.

- Click the Update User button. If you didn’t mark the Replicate checkbox, all of the changes will be saved. If you did mark the Replicate checkbox, a summary of changes will appear.
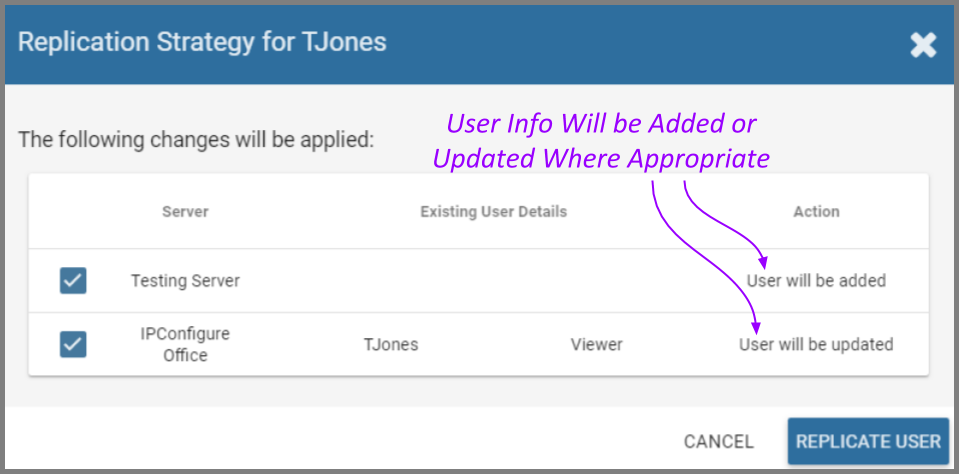
- Click the Replicate User button to implement the changes.
Deleting Existing Users
| |
This is the Delete / Trash Can icon. |
- To delete an existing Orchid Core VMS user, click the Trash Can icon to the right of the username.
- Orchid Fusion VMS will ask you to confirm that you would like to remove the user. (If you are deleting an Orchid Core VMS user that exists on multiple Orchid Core VMS servers, you may delete that user from all of the servers by marking the Delete user on all Orchid Core VMS servers checkbox.)
- Click the Delete User button to confirm you want the user removed.
- If you did not mark the checkbox in step 2, the user will be erased right away.
- If you marked the checkbox in step 2, you will receive a summary of the servers from which the user will be removed. Click the Delete User button again to confirm.
Post your comment on this topic.