
IPConfigure distributes Orchid Recorder for Ubuntu through debian package files (.deb files). The recommended method for installing the package file is through GDebi Package installer. GDebi can be used either through command line, or through the Graphical User Interface (GUI).
- Download the Orchid .deb file. You can find the latest version of Orchid Recorder on IPConfigure’s website at http://www.ipconfigure.com/download.
- Once you’ve downloaded the Orchid Recorder installation package, decide whether you want to perform the installation via the Command Line or the GUI.
Installing through the Command Line (Ubuntu Server)
- Open the Terminal program (CTRL+ALT+T) and navigate to the directory where you downloaded the Orchid Recorder installation package. (The package is probably stored in the Downloads folder.)
- Unless GDebi has been installed manually, it will need to be installed using the following command:
sudo apt-get install gdebi-core
It may take a few minutes for GDebi to install, depending on the speed of your system.
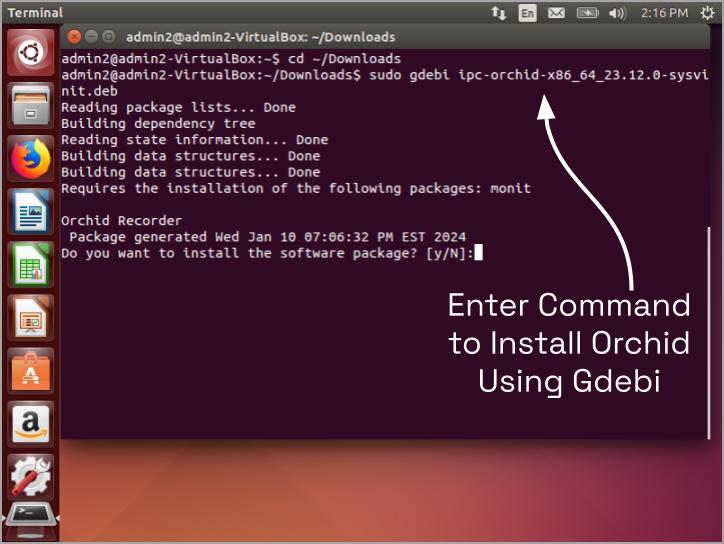
- The GDebi command can now be used to install the Orchid Recorder debian package. The syntax is
sudo gdebi (package-name).deb. For example, if the name of the package is ipc-orchid-x86_64_23.12.0-sysvinit.deb, the following command would be used:sudo gdebi ipc-orchid-x86_64_23.12.0-sysvinit.deb
- The system may ask for your Ubuntu user password. Type in the password and press Enter.
- The system will then ask if you want to install the software. Enter Y for yes, and press Enter.
- On a new installation, you will be asked to accept the End User License Agreement. After reading the agreement, press the Tab key to select Ok, then the Enter key to accept it.
- You will then be asked to accept the agreement in a separate prompt. Use the Left Arrow or Tab key to select Yes, and press Enter to accept it.
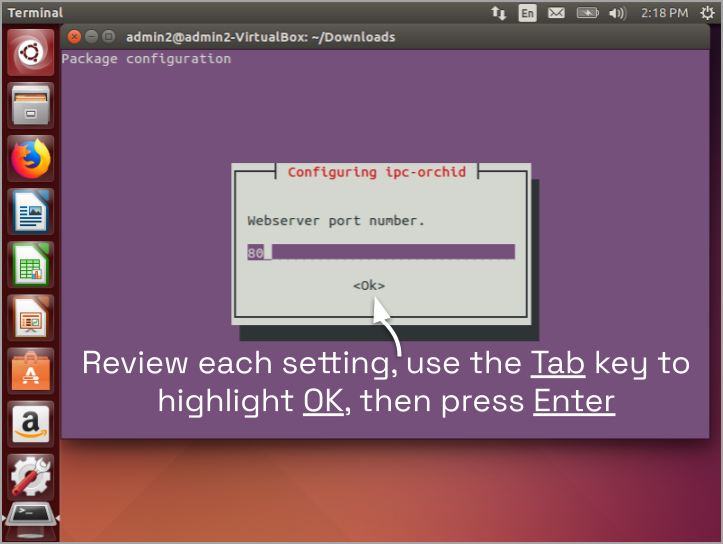
- Next, the installer will ask you to set the Web Server Port, Admin Password, and the Archive Directory for storage. You will also have an opportunity to select the language for the user interface.
- By default, the web server port is set to port 80 (which is the recommended port for most installations). If Orchid Recorder needs to use a different port, update the port, then press the Tab key to select Ok, and press Enter.
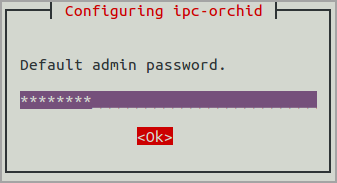
- Enter the password you would like to set for the default admin account, then press the Tab key to select Ok, and press Enter.
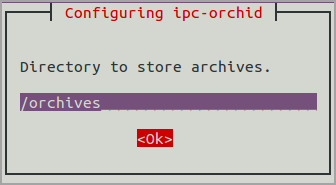
- Set the directory for video archives. The default folder is /orchives. Enter a new archives location, if needed, then press the Tab key to select Ok, and press Enter.
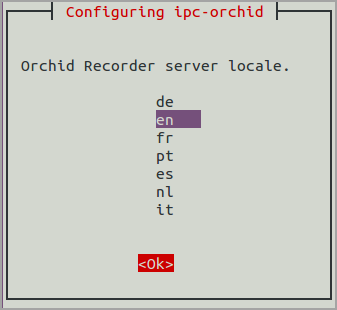
- Use the Orchid Recorder locale drop-down list to select the language. Available selections include the following: de (German), en (English), es (Spanish), fr (French), it (Italian), nl (Dutch), pt (Portuguese), and ru (Russian). Press the Tab key to select Ok, and press Enter.
The installation will complete automatically without any additional prompts. This process may take a few minutes.
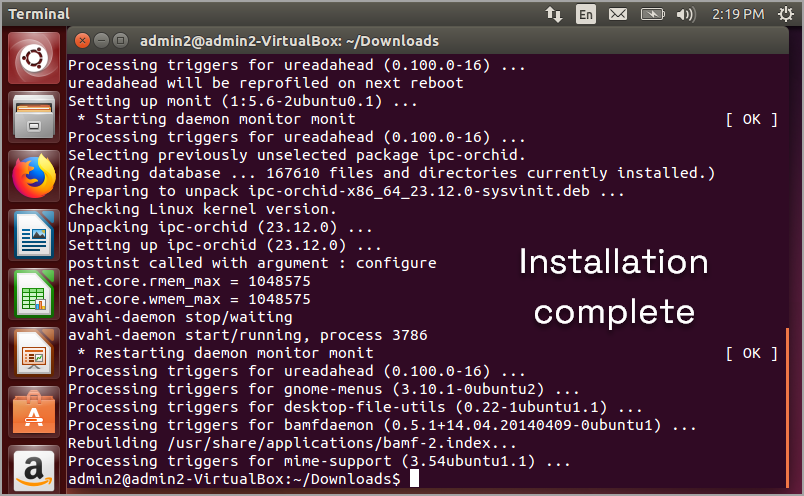
The Orchid Recorder services start automatically once the package installation is done, after which you can access the Orchid Recorder user interface in your web browser. (Please refer to the Sign in topic in the Orchid Recorder Administrator Guide for more details.)
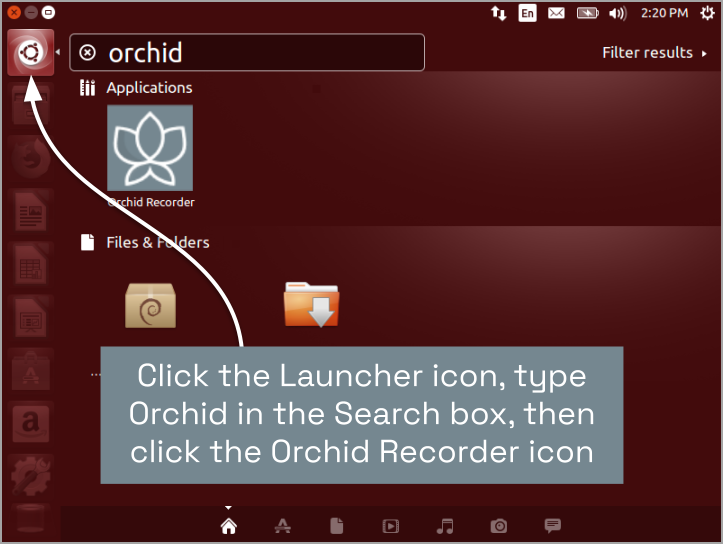
- You can automatically launch a browser to Orchid Recorder using the link installed on your server:
- Click on the Launcher icon in the top left corner of the screen.
- Type Orchid in the search box, then click the Orchid Recorder icon listed under Applications.
Installing through the GUI (Ubuntu Desktop)
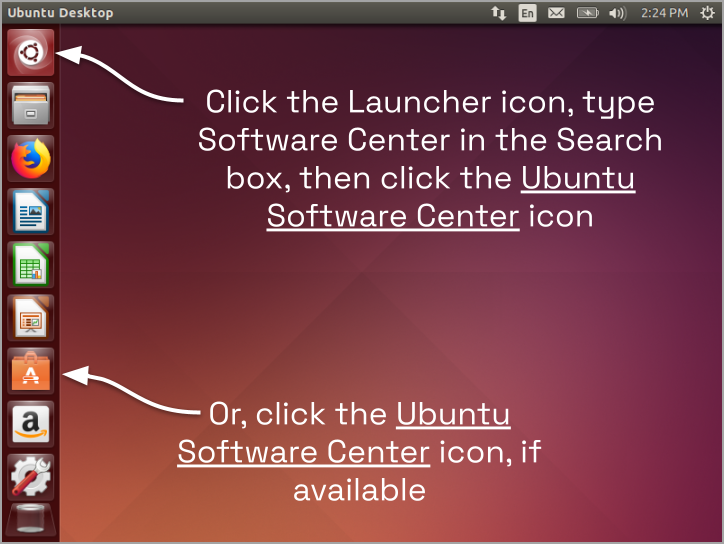
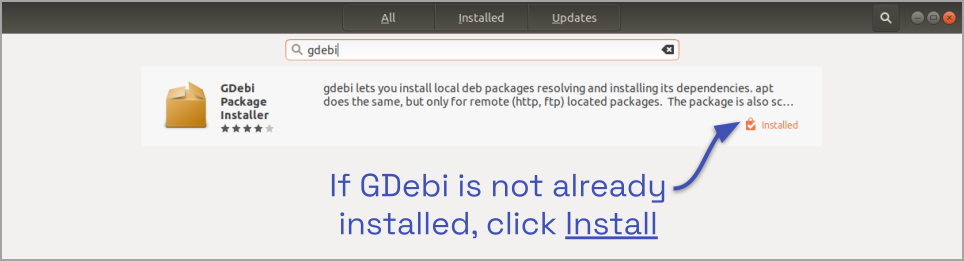
- Click on the Launcher icon and then type in Software Center. If it is listed on the toolbar, click the Ubuntu Software Center icon to open it.
- In the search bar in the top right-hand corner of the Software Center, type gdebi.
- Select GDebi Package Installer (gdebi) (which should be the first result). If it is not aleady installed, click the Install button.
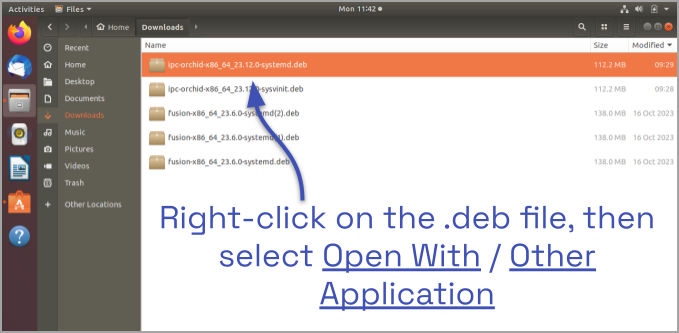
- After GDebi has finished installing, click the Files icon to open the Files Explorer, then navigate to the folder storing your Orchid Recorder package (.deb file). (The package is probably stored in the Downloads folder.)
- Right-click on the Orchid Recorder package, then select Open With, and Other Application.
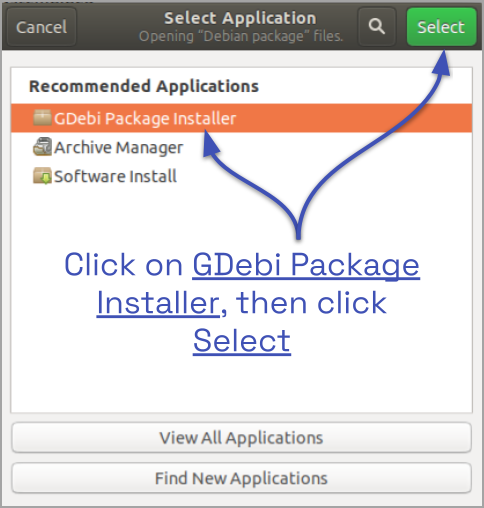
- At the Select Application screen, click on GDebi Package Installer and click Select.
- Once the GDebi package installer loads, click the Install Package button in the top right-hand corner of the window.
- You may be asked for your system password. Type it in and click OK.
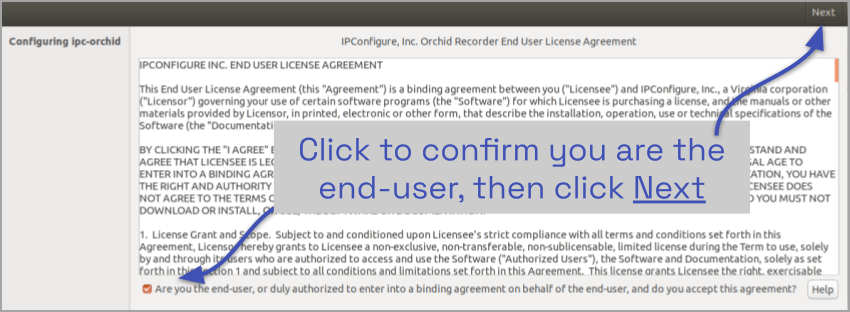
- If this is a new installation, you will be asked to accept the End User License Agreement. After you read the agreement, mark the Are you the end-user… checkbox and click the Next button.
- Next, the installer will ask you to set the Web Server Port, Admin Password, and the Archive Directory for storage. You will also have an opportunity to select the language for the user interface.
- By default, the web server port is set to port 80, which is recommended for most installations. Update the port number only if Orchid Recorder needs to use a port other than 80.
- Enter the password you would like to set for the default admin account.
- The default folder for video archives on Linux is /orchives. Enter a new archives location, if needed.
- Use the Orchid Recorder locale list to select the language. Available selections include the following: de (German), en (English), es (Spanish), fr (French), it (Italian), nl (Dutch), pt (Portuguese), and ru (Russian).
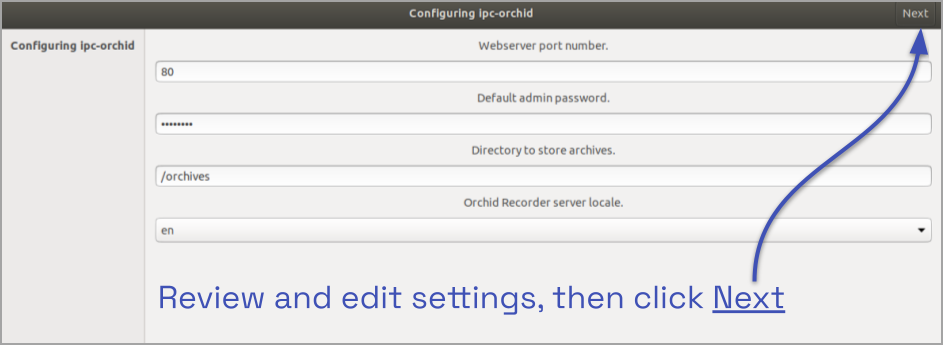
- When finished, click the Next button.
The installation will complete automatically without any additional prompts. This may take a few minutes.
- Once the package installer displays an “Installation Finished” message at the top of the screen, click the Close button to close the installer and complete the installation. The Orchid Recorder services will start automatically once the package installation is done, after which you can access the Orchid Recorder user interface in your web browser. (Please refer to the Sign in topic in the Orchid Recorder Administrator Guide for more details.)
- You can automatically launch a browser to Orchid Recorder using the link installed on your server:
- Click on the Launcher icon in the top left corner of the screen.
- Type Orchid in the search box, then click the Orchid Recorder icon.
Post your comment on this topic.