
Color Overlay
Adds a color to all the pixels in an image. It will not affect the alpha channel so the shape of your image will be retained and only the color will change. This can be useful for making silhouettes by filling black or more creative graphical uses with images that are imported and have an alpha channel.
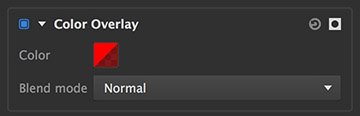
- Color: The color you want to add to all the pixels in the image and the opacity controls how much.
- Blend mode: The blend mode you want to use to mix the color with the original pixels color. See blend modes for more information.
Inner Glow
Applies a glow effect to the inside of the layer’s edges. The glow is applied as a gradient, which fades out as it reaches farther into the image.
- Color: Click the swatch to set the color of the glow.
- Size: Adjusts the width of the glow, in pixels.
- Spread: Increasing spread weights the glow transition in favor of the solid end of the gradient. The result is more of a solid line at the layer edge, and a smaller feather inside of the layer.
- Offset: Shifts the position of the glow in relation to the image, either horizontally on the X axis, or vertically on the Y axis.
The following image shows an example of black text with an orange inner glow:

Linear Gradient
Creates a linear between colors of your choice.
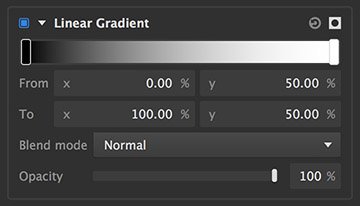
- Gradient controls: The gradient shows a visual representation of the current color selections.
- Editing the colors: Double-click the rectangular box at either end of the gradient to open a color picker and select the color you want to use at that end. You can also double click at any point to add an additional gradient stop. Up to 16 gradient stops can be specified.
- From: Defines the X (horizontal) and Y (vertical) positions of the left end of the gradient. X values run from 0 on the left to 100 on the right. Y values run from 0 at the top to 100 at the bottom.
- To: Defines the X (horizontal) and Y (vertical) positions of the right end of the gradient. X values run from 0 on the left to 100 on the right. Y values run from 0 at the top to 100 at the bottom.
- Blend mode: Choose the blend mode used to combine the gradient with the contents of the layer. Full details of all blend mode options can be found on the Blending modes page of this manual.
- Opacity: Adjusts the opacity of the gradient that is applied to the layer’s contents. Lower values make the gradient more transparent.
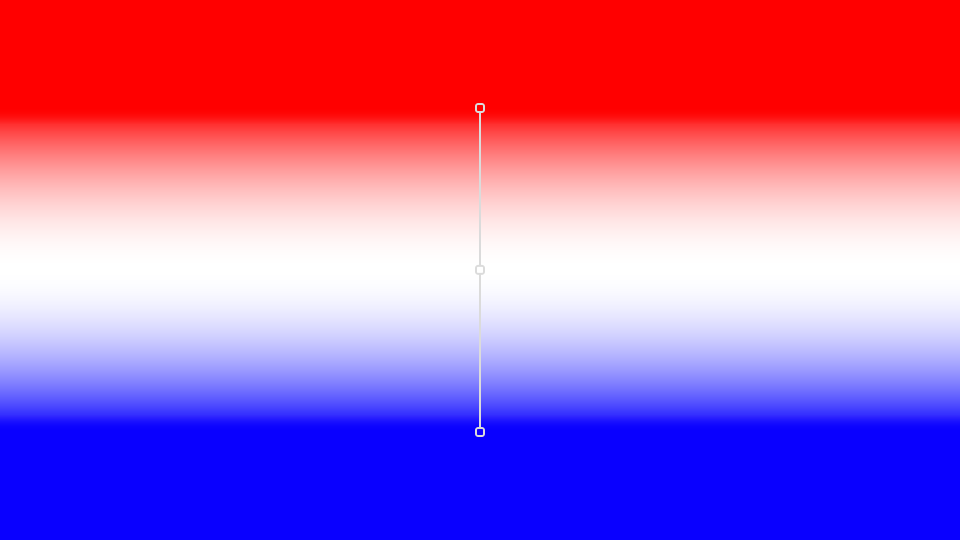
Below shows and example of a three color stop linear gradient:
Multi-Point Gradient
Creates a complex non-linear gradient of as many colors as you want. You can click anywhere on the canvas to add a new point, and assign each point any color you like, and Imerge will create transitional gradients between all points.
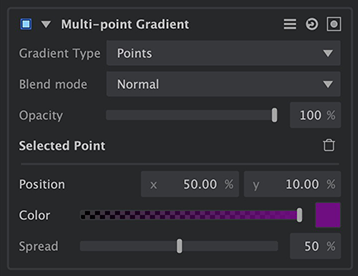
- Gradient Type: Select how the gradient layout is displayed. The position of the points can be edited in either type.
- Points: Displays the final gradient, with circles to indicate the individual control points.
- Voronoi: Displays the color blocks on which the gradient is constructed, without the gradient transitions being displayed.
- Blend mode: Choose the blend mode used to combine the gradient with the contents of the layer. Full details of all blend mode options can be found on the Blending modes page of this manual.
- Opacity: Adjusts the opacity of the gradient that is applied to the layer’s contents. Lower values make the gradient more transparent.
Selected Point
Select any control point in the gradient and you can edit its values further here.
- Position: Defines the X (horizontal) and Y (vertical) position of the currently selected control point. X values run from 0 on the left to 100 on the right. Y values run from 0 at the top to 100 at the bottom. Dragging the control point in the canvas is often the preferred way to adjust its position, but you can also manually edit the values here for more precise placement.
- Color: Double-click the rectangular color swatch to open a color picker and select the color you want to use for the currently selected control point. Drag the slider to adjust the opacity of the currently selected control point.
- Spread: Increasing the spread will enlarge the color block associated with the currently selected control point. Decreasing the spread will reduce the size of the color block associated with the currently selected control point.
Outer Glow
Applies a glow effect to the outside of the layer’s edges. The glow is applied as a gradient, which fades out as it reaches farther from the edges of the image.

- Color: Click the swatch to set the color of the glow.
- Size: Adjusts the width of the glow, in pixels.
- Spread: Increasing spread weights the glow transition in favor of the solid end of the gradient. The result is more of a solid line at the layer edge, and a smaller feather on the outside edge.
- Offset: Shifts the position of the glow in relation to the image, either horizontally on the X axis, or vertically on the Y axis.
The following image shows some text with a black outer glow:

Outline
Creates a solid line along the edges of the layer.
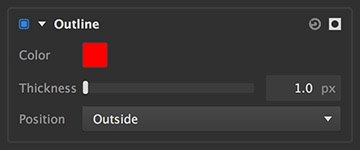
- Color: Click the swatch to open a color picker and select the color of the outline.
- Thickness: Sets the width of the line, in pixels.
- Position: Choose where the outline sits, in relation to the layer edge.
- Outside: The outline is positioned entirely outside the layer, so the inside edge of the line corresponds to the outside edge of the layer.
- Inside: The outline is positioned entirely inside the layer, so the outside edge of the line corresponds to the outside edge of the layer.
- Center: The outline is centered on the layer edge, so half the line is inside the layer and half is outside the layer.
Below is an example of a black outline on white text:

Pattern Overlay
Pattern overlay enables you to apply another image as an overlay onto the layer contents. The selected image is applied as a tile pattern, so it always fills the entire contents of the layer.

- File selector: Click the file icon at the right to open a file browser and select an image file. PNG, JPG and 8-bit TIFF files are supported.
- Scale: Adjusts the size of each instance of the selected image within the tiled pattern.
- Offset: Shifts the position of the pattern image in relation to the layer contents, either horizontally on the X axis, or vertically on the Y axis.
- Rotation: Turns the pattern image around its center point.
- Blend mode: Choose the blend mode used to combine the gradient with the contents of the layer. Full details of all blend mode options can be found on the Blending modes page of this manual.
- Opacity: Adjusts the opacity of the pattern. Lower values make the pattern more transparent.
- Mirror: By default, all tiles in the pattern use the same orientation. Enabling this option mirrors every alternate tile, for a more seamless pattern.
Below is a Imerge project with two layers. The bottom layer is a solid black layer with a pattern overlay, vignette and opacity reduced to make it blend with the black and darken. Then text is put on top with the same pattern overlay. You can see how pattern overlay can be used to make more graphical effects on both text and solid layers. It can also be used on image layers but if most useful when a layer has an alpha channel.

Pencil Sketch
Creates a hand-drawn look, with sketched lines on a solid background. The weight, color, direction and length of the lines are configurable, to adjust the style of the sketch.
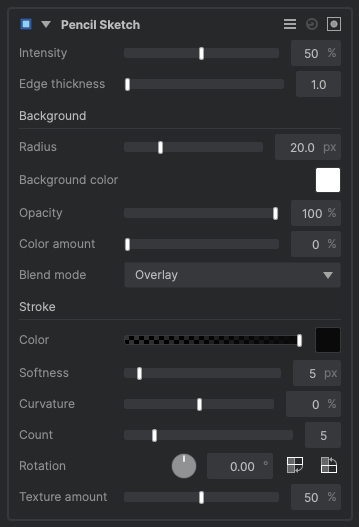
- Intensity: Adjusts the intensity of the sketch effect. Lower values give a more refined appearance, while higher values create a rougher, sketchier look.
- Edge thickness: The pencil sketch effect works by finding the edges in your images, and sketching along those edges. This control adjusts the thickness of the edge lines before the pencil sketch is applied.
- Background: The background controls adjust the appearance of the virtual paper on which the sketch is drawn, or the areas of the frame where the sketch lines do not appear.
- Radius: Sets the radius of the blur applied to the background, which affects the amount of shading present in the sketch.
- Background color: Select a color for the paper on which the sketch is drawn. You can use the eyedropper to choose a color from the viewer, or click the swatch to open a color picker and choose any color you prefer. You can also manually enter the color values for the red, green, and blue channels.
- Opacity: Adjusts how transparent the background is, with 0% being fully transparent and 100% being fully opaque.
- Color amount: Adjusts the blend of your selected background color with the original color of the layer or clip.
- Blend mode: Select the blend mode used to combine the sketch effect with the underlying layer.
- Stroke: These controls adjust the appearance of the pencil lines that make up the sketch.
- Color: Select a color for the pencil lines in the sketch. You can use the eyedropper to choose a color from the viewer, or click the swatch to open a color picker and choose any color you prefer. You can also manually enter the color values for the red, green, and blue channels.
- Softness: Determines how far the sketch lines feather out past the edges identified by the sketch effect.
- Curvature: Adjusts the curve of the individual sketch lines. 0.0% creates straight lines. Negative values create a concave curve, and positive values give the lines a convex curve.
- Count: Specify the number of stroke angles used to build up the sketch.
- Rotation: Offsets the angle of the sketch lines from their original position, by the number of degrees you specify.
- Texture: Introduces a graphite texture to the sketch lines. Higher values break up the lines more with a fine texture.
Radial Gradient
Creates a radial gradient, from one center color to another color at the outside of the radius.
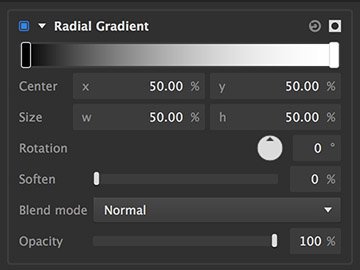
- Gradient controls: The gradient shows a visual representation of the current color selections.
- Editing the colors: Double-click the rectangular box at either end of the gradient to open a color picker and select the color you want to use at that end. You can also add additional color stops between by double clicking anywhere on the gradient. Up to 16 color stops can be specified.
- Center: Defines the X (horizontal) and Y (vertical) positions of the gradient’s center. X values run from 0 on the left to 100 on the right. Y values run from 0 at the top to 100 at the bottom.
- Size: Defines the vertical and horizontal radii of the gradient, as a percentage of the layer’s width and height.
- Rotation: Spins the gradient round the center position. This option is more useful when the width and height sizes differ.
- Soften: Shifts the center of the gradient transition.
- Blend mode: Choose the blend mode used to combine the gradient with the contents of the layer. Full details of all blend mode options can be found on the Blending modes page of this manual.
- Opacity: Adjusts the opacity of the gradient that is applied to the layer’s contents. Lower values make the gradient more transparent.
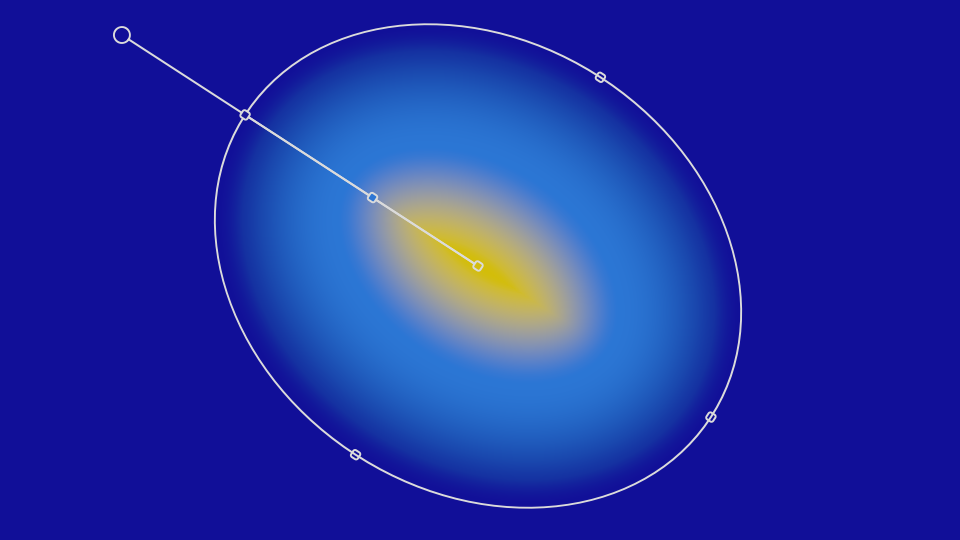
Below is an example of a three stop radial gradient going from yellow in the center to dark blue at the circumference with a lighter blur half way between.
Roughen Edges
The Rough Edges effect adds fractal roughness to the edges of a layer’s alpha channel. This is effective for distressing or weathering text or graphics, or for generating organic edges such as torn paper. The controls are divided into two tabs, Edge and Noise.
Edge

- Thickness: Adjusts the width of the area affected by the roughness, along the edge of the alpha.
- Type: Select the type of fractal used to generate the roughness pattern.
- Clouds: Creates a pattern of gradual transitions with dithered edges, reminiscent of clouds.
- Emboss: Uses a pattern similar to clouds, but then applies a height map, creating a stone-like texture.
- Energy: A pattern of thin, energetic strings.
- Fluid: Replicates a pattern similar to the caustics created by looking through a volume of water.
- Smoke: Soft, billowing shapes like the texture of smoke.
- Photocopy: Creates a rough edge surrounding the layer, and hides the center of the layer.
- Edge Color: Select the color used to fill in the edge color areas. Use the slider to adjust the color’s opacity, or click the color swatch to open a color picker and select any color you desire.
- Edge softness: Adjusts the feathering along the warped edge, and how far the rough edge extends outward.
Noise

- Randomize: Randomizes the fractal pattern used to generate the rough edges, within the style created by the other settings. Each seed value creates a unique pattern.
- Type: Select the type of fractal used to generate the roughness pattern.
- Clouds: Creates a pattern of gradual transitions with dithered edges, reminiscent of clouds.
- Emboss: Uses a pattern similar to clouds, but then applies a height map, creating a stone-like texture.
- Energy: A pattern of thin, energetic strings.
- Fluid: Replicates a pattern similar to the caustics created by looking through a volume of water.
- Smoke: Soft, billowing shapes like the texture of smoke.
- Photocopy: Creates a rough edge surrounding the layer, and hides the center of the layer.
- Interpolation: Choose the method used to build the pattern from the fractal geometry.
- Block: Creates a square, pixelated appearance.
- Linear: Applies more gradual transitions from one block to the next.
- Cubic: More dramatic gradients completely obscure the block pattern to create organic shapes.
- Influence: Adjusts the degree to which the subsettings alter the base layer of fractal noise. Higher values create more fine detail in the noise.
Transform
- Position: Shift the noise on the X (horizontal ) or Y (vertical) axis.
- Size: Changes the granularity of the fractal noise, thereby affecting the size of the detail in the roughened edge.
- Rotation: rotates the fractal noise pattern on which the rough edges are based.
![]() Rotate 90° clockwise: Rotate the noise in a clockwise fashion, in precise 90° increments.
Rotate 90° clockwise: Rotate the noise in a clockwise fashion, in precise 90° increments.![]() Rotate 90° counter-clockwise: Rotate the noise in a counter-clockwise fashion, in precise 90° increments.
Rotate 90° counter-clockwise: Rotate the noise in a counter-clockwise fashion, in precise 90° increments.
- Stretch: Allows you to scale the fractal noise pattern on each axis individually.
- X: Scales the width of the pattern without affecting the height.
- Y: Scales the height of the pattern, without affecting the width.
![]() Unlink/
Unlink/ ![]() Link: Use this toggle to control whether the stretch values are edited in tandem or individually.
Link: Use this toggle to control whether the stretch values are edited in tandem or individually.
Noise Appearance
- Exposure: Adjusts the exposure of the fractal noise on which the rough edge is based. Bright areas within the fractal noise are affected more strongly than dark areas. Positive values expand the rough edge, and negative values contract it.
- Offset: Shifts the entire range of tonal values in the fractal noise up or down. Values shifted beyond pure black or pure white will be clipped.
Need more help with this?
Don’t hesitate to contact us here.