
Stacked layers differ from other image layers in the way they handle the layer contents. With a stacked layer, the image which is displayed as the layer content is generated by combining multiple source images, to create a new result with characteristics of each of the source images. There are two kinds of stacked layers:
- HDR Merge Layers: Dynamic range refers to the number of steps between the brightest and darkest areas displayed in an image. HDR, or High Dynamic Range, combines multiple exposures to create a single image with a wider dynamic range than can be captured in-camera.
- Focus Stack Layers: Focus stacking combines multiple images with different focal distances to create an image with greater depth of field than any individual source image. It is effective for any situation where individual images have a very shallow depth of field, such as macro photography, or in landscape photography, where the distance between the foreground and distant background is too great to get everything in focus at the same time.
HDR Merge layers
High Dynamic Range, or HDR, photography is a technique developed to overcome the luminance limitations of modern cameras. Using the f/stop system used by cameras as a measurement, a good camera can capture a range of around 14 stops, from the brightest to darkest values in an image. Values outside that range will be clipped, and appear as either pure black or pure white. The human eye, by comparison, can see around 30 stops. In an effort to create images which convey more accurately how the world looks to our eyes, a technique was developed where the same scene is photographed multiple times, with each image using a different exposure compensation, to include a greater amount of the tonality visible to our eyes. These exposures are then combined into a single image using a higher color depth, allowing details to be seen in the brightest highlights and the darkest shadow areas.
For example, the lighting in this library is much brighter on the top shelves than the lower shelves. As a result, trying to capture the scene in a single exposure means that some areas are too bright, while other areas are too darkly shadowed to read the book titles:
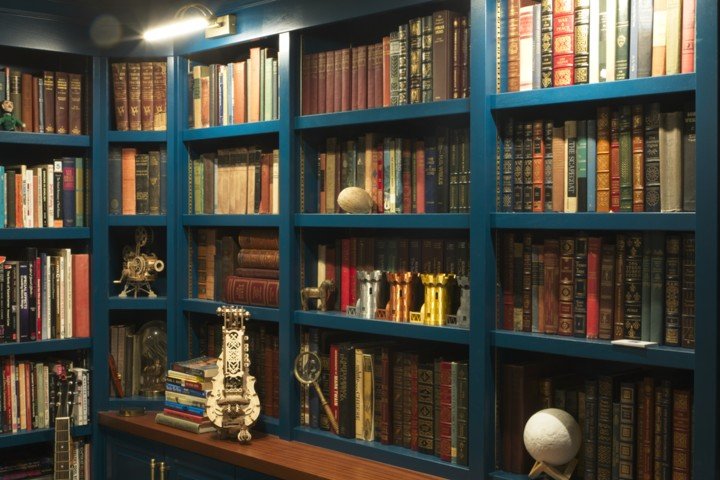
By shooting three exposures, with exposure compensation set to -2, 0, and +2, we are able to capture greater detail in the shadow and highlight areas. These three exposures are them combined to create an HDR image. Note that while three exposures were used here, you are not limited to only three, and can use whatever number of exposures are required to cover the dynamic range of your scene.


The brighter exposure on the right reveals additional details in the shadow areas, while the darker exposure on the left brings the highlights down to reveal additional detail there. By using the HDR technique to combine these images, we have increased the dynamic range of the image, and can now have a single image including a range of tones which would require three ordinary exposures to capture.
Note that the HDR merge is not necessarily intended to create the final image, but rather creates a source image which can then be refined or processed to get the results you desire.
Creating an HDR Merge
- In the sidebar, click the
![]() New Layer Stack button, and select HDR Merge.
New Layer Stack button, and select HDR Merge. - Select the images which should be merged, and click Open.
- It may take a few moments for the images to process and for Imerge to build and display the merged final image.
- The HDR Merge layer which is created will have the Tone Map effect applied, which you can use to modify how the dynamic range is mapped into the new image.
- See Tone Effects for full details on using the Tone Map effect.
Alternate workflow for pre-imported images
Alternately, if you already have the images imported into Imerge as separate layers, you can use the following workflow:
- In the layer stack, select the layers you want to merge (Shift-click to select contiguous layers, or CTRL+Click to select layers out of order).
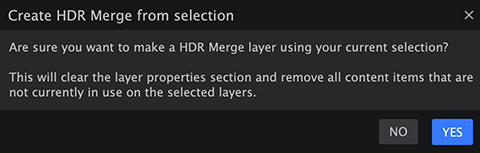
- Right-click one of the selected images, and choose HDR from selection from the menu.
- An alert will ask you to confirm that you want to merge the layers. Click Yes:
![]()
- It may take a few moments for the images to process and for Imerge to build and display the merged final image.
Focus Stack Layers
The amount of any scene which can be captured in-focus by a camera is dependent on several factors, including the aperture, stability of the camera, the proximity of the subject to the camera, and the total depth of the scene itself. Focus stacking is a technique for overcoming these limitations, and creating a single image where the focal range includes everything you want.
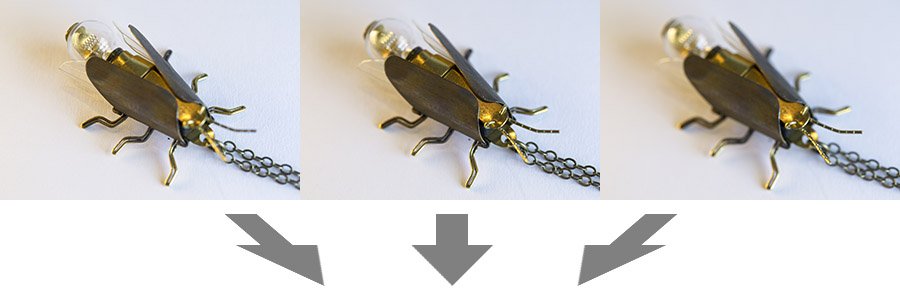
In this product shot of a firefly pendant, It is not possible to get the bulb in focus at the same time as the head, in a single exposure:

By shooting three images, each focused on a different part of the pendant, we can capture all of the detail we need. Then, by focus stacking those images, we can combine the in-focus areas of each image to create a new image where everything is in focus. Note that you are not limited to three images, you can use as many images are required to cover the range of focus you are dealing with.

This allows us to present the detail of the product in a way that better matches how it would actually appear to the human eye.
Creating a focus stack
- In the sidebar, click the
![]() New Layer Stack button, and select Focus Stack.
New Layer Stack button, and select Focus Stack. - Select the images which should be stacked, and click Open.
- It may take a few moments for the images to process and for Imerge to build and display the merged final image.
Alternate workflow for pre-imported images
Alternately, if your images are already imported into Imerge as separate layers, you can use the following workflow:
- In the layer stack, select the layers you want to merge (Shift-click to select contiguous layers, or CTRL+Click to select layers out of order).
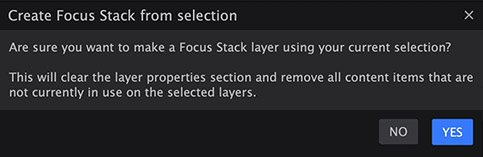
- Right-click one of the selected images, and choose Focus Stack from selection from the menu.
- An alert will ask you to confirm that you want to merge the layers. Click Yes:
![]()
- It may take a few moments for the images to process and for Imerge to build and display the merged final image.
Need more help with this?
Don’t hesitate to contact us here.