
Create a C/C++ project to execute tests in a Docker environment. The user needs to enter the necessary information to build the source code.
- Enter the project name in [Project name].
![]()
- The following characters are allowed in the name of a C/C++ project in a Docker environment. Spaces are not allowed.
- Uppercase and lowercase letters
- Numbers
- Hyphen (-)
- Underscore (_)
- Period (.)
- The following characters are allowed in the name of a C/C++ project in a Docker environment. Spaces are not allowed.
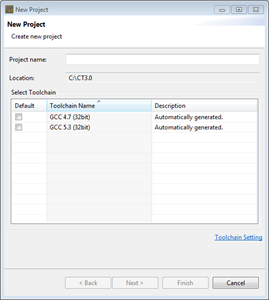
- In [Select Toolchain], select the toolchain to use in the project. This section displays the available toolchains (GCC, Clang) for C/C++ Project from Docker Environment. If there is no created toolchain, create a toolchain through [Toolchain Setting]. Please refer to Set a Toolchain for details.
- Click the [Next] button to move to the next screen.
![]()
- You can select the source file directly, or through a text file with a file path.
- Select source files directly.
- Click [Browse …] to specify the [Source Root] to be displayed in the directory screen below.
- Except in special cases, make the source root one level higher than the directory containing the source files you want to select as the top-level directory.
- On the left section, select the directory containing the source files to be used for project creation.
- The files in the selected directory appear on the right section. Select the files to add.
- Click [Browse …] to specify the [Source Root] to be displayed in the directory screen below.
- Select source files by using a text file with the file paths.
- On the [Text file written list of source files] screen shown below, click [Browse …] to select a text file with a list of source files(absolute file path).
- Clicking the [Remove] button deselects the selected text file and the source file selected through the file.
- Select source files directly.
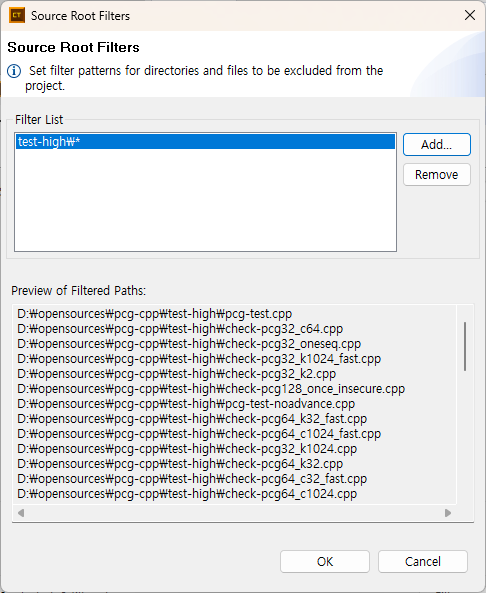
- Click the [Filter…] to configure filter patterns for directories and files to be excluded from the project.
![]()
- Filtered paths will not appear on the left and right section of the source file selection screen and will also be excluded from automatic change detection.
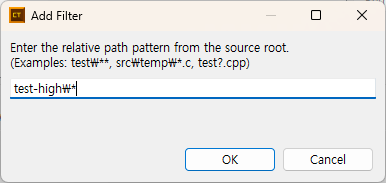
- Click [Add…] to include a new filter.
![]()
- The filter must be specified as a relative path from the source root.
- Click [Remove] to delete a selected filter.
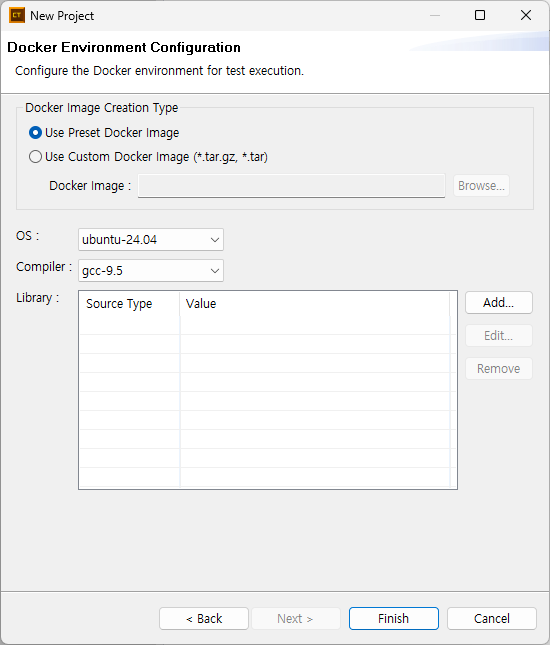
- Click the [Next] button to proceed to the [Docker Environment Configuration] page.
![]()
- [Docker Image Creation Type]
- Select [Use Preset Docker Image] to choose the operating system and compiler to be used as the image from the combo boxes below.
- Select [Use Custom Docker Image] and enter a Docker image file (*.tar.gz, *.tar) to display the operating system and compiler information of the image below.
- [Library]
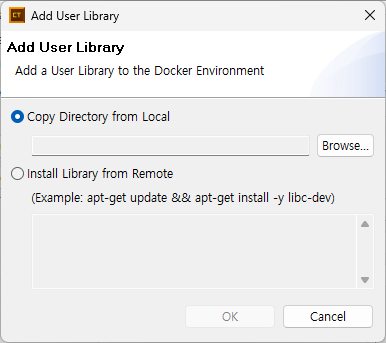
- Click the [Add…] button to add libraries to be included in the Docker image.
![]()
- [Copy Directory from Local]: Copy local library files in to the Docker image.
- [Install Library from Remote]: Install libraries using commands into the Docker image.
- Click the [Edit…] button to modify the selected library.
- Click the [Remove] button to delete the selected library from the list.
- Click the [Add…] button to add libraries to be included in the Docker image.
- [Docker Image Creation Type]
Need more help with this?
Don’t hesitate to contact us here.
Copyright © 2025 Suresofttech
—
Powered by 