Getting Started
In order to charge for QR Codes, you first need to have a Stripe account. Sign up at www.stripe.com or sign in to your existing account. Then follow the steps to configure Stripe and Breeze Cloud.
Setup Steps
- Create Stripe API Key
- Create Stripe Product
- Add Credentials to Breeze Cloud
- Add Product to Breeze Cloud
- Branding the Stripe Checkout
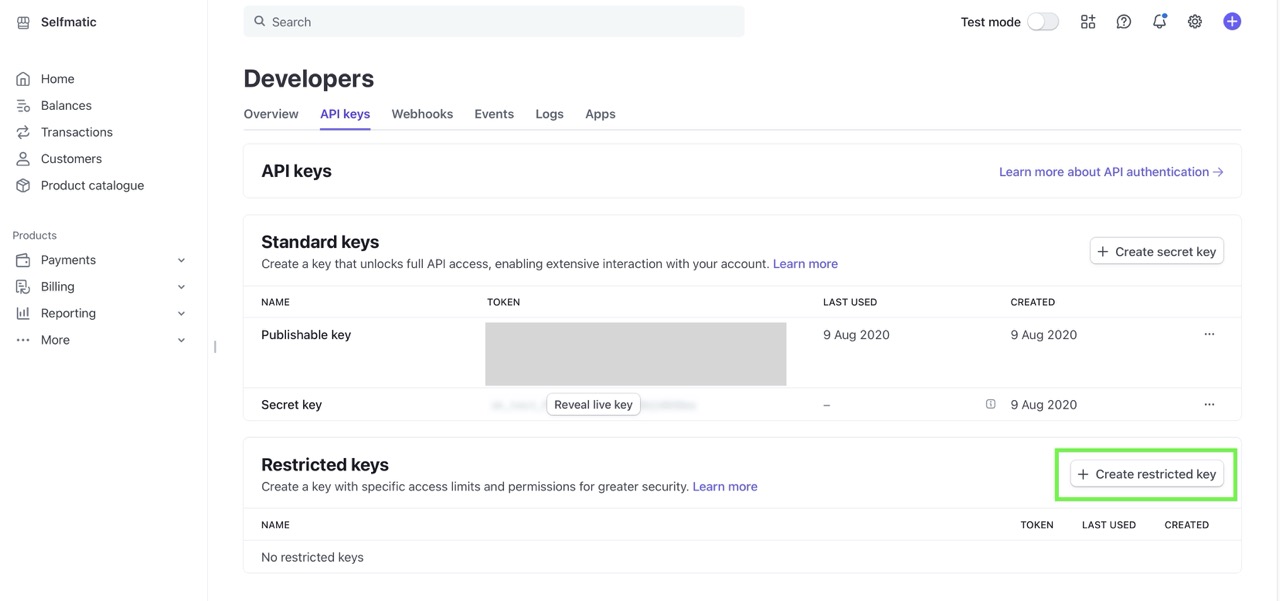
Create Stripe API Key
Create your Stripe API key. This can be done here: https://dashboard.stripe.com/apikeys
Create a new Restricted Key
Select the Option: Providing this key to another website
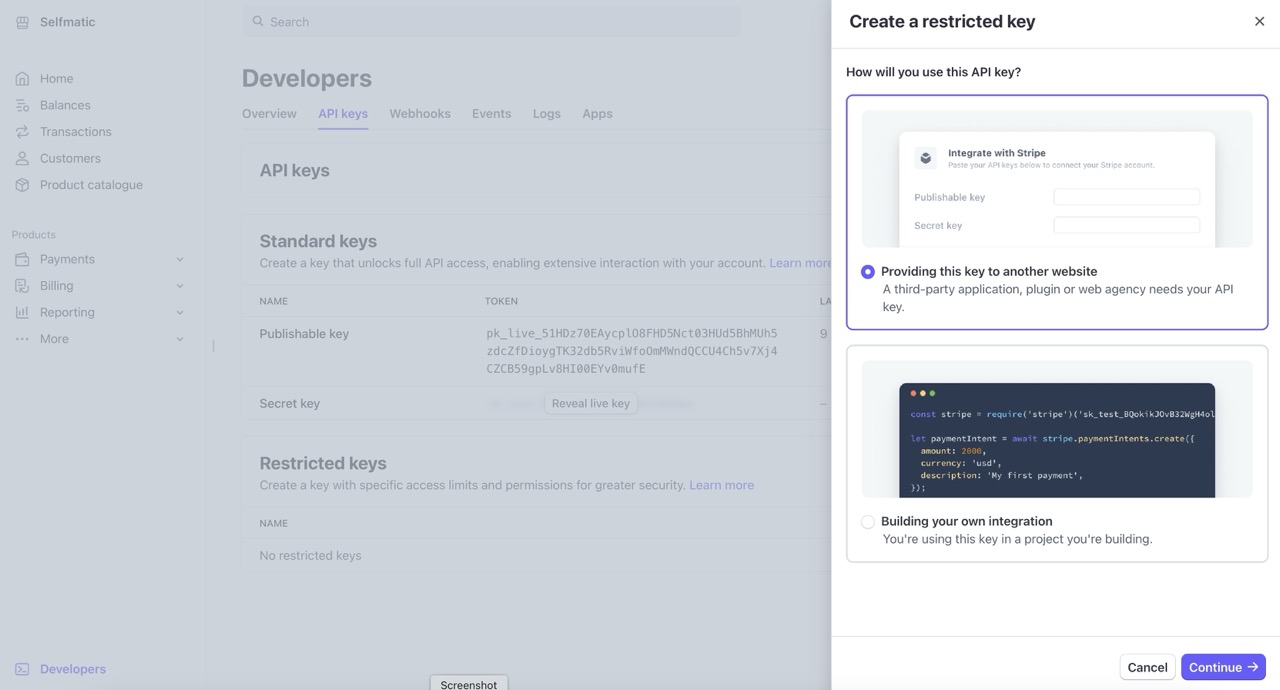
Name your key and enter the Breeze Cloud URL as below:
Name: eg: Breeze Cloud
URL: https://cloud.breezesoftware.com
Then press Create Restricted Key

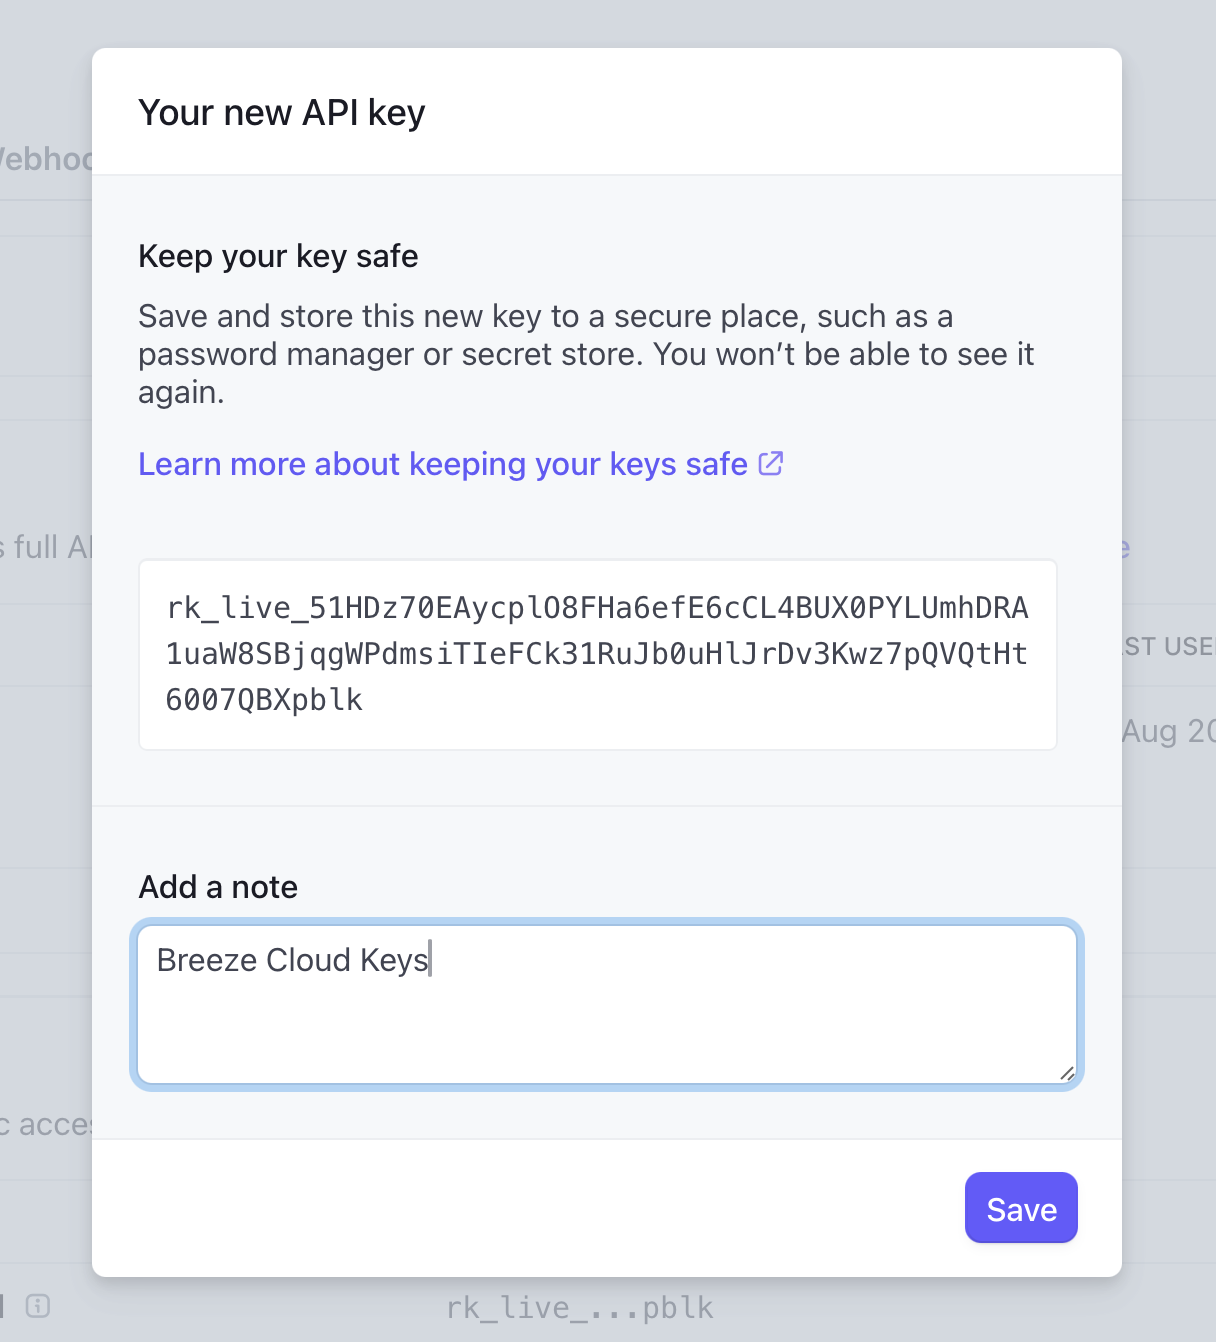
Stripe will prompt you to verify adding the key, by sending an email and text message. Follow their verification steps by pressing Send Verification

Upon successful verification, you will be shown your Key. Make a copy of the key immediately.
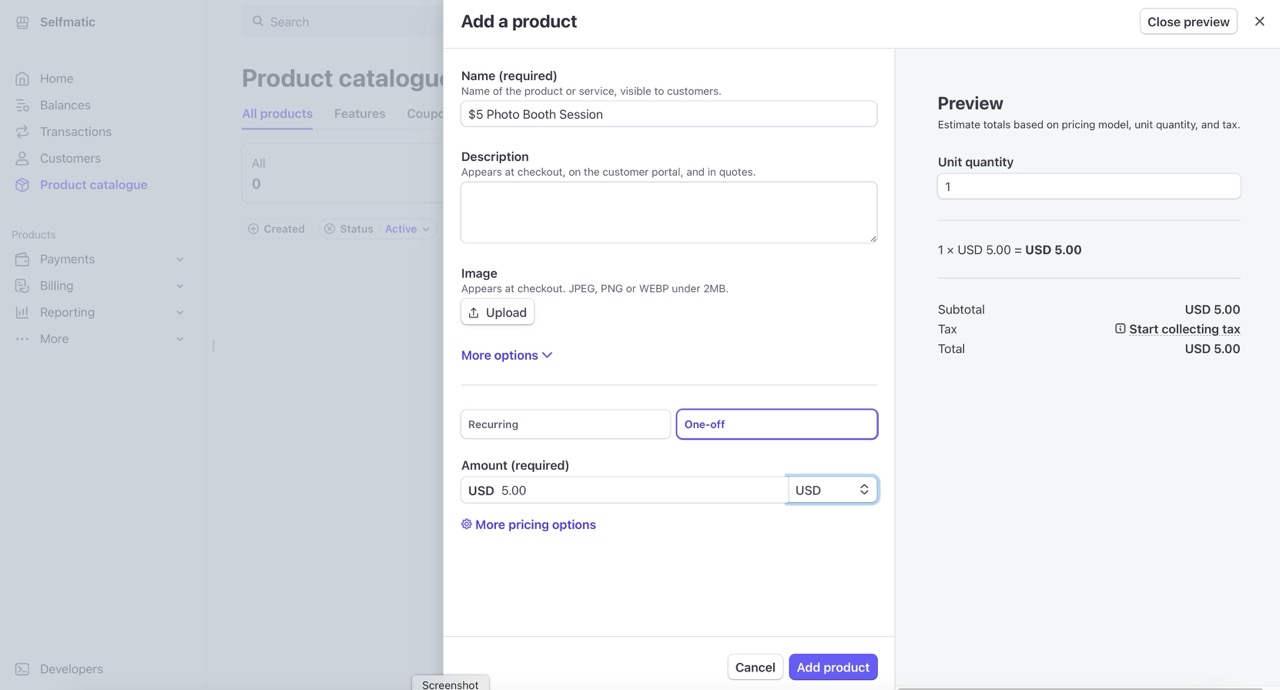
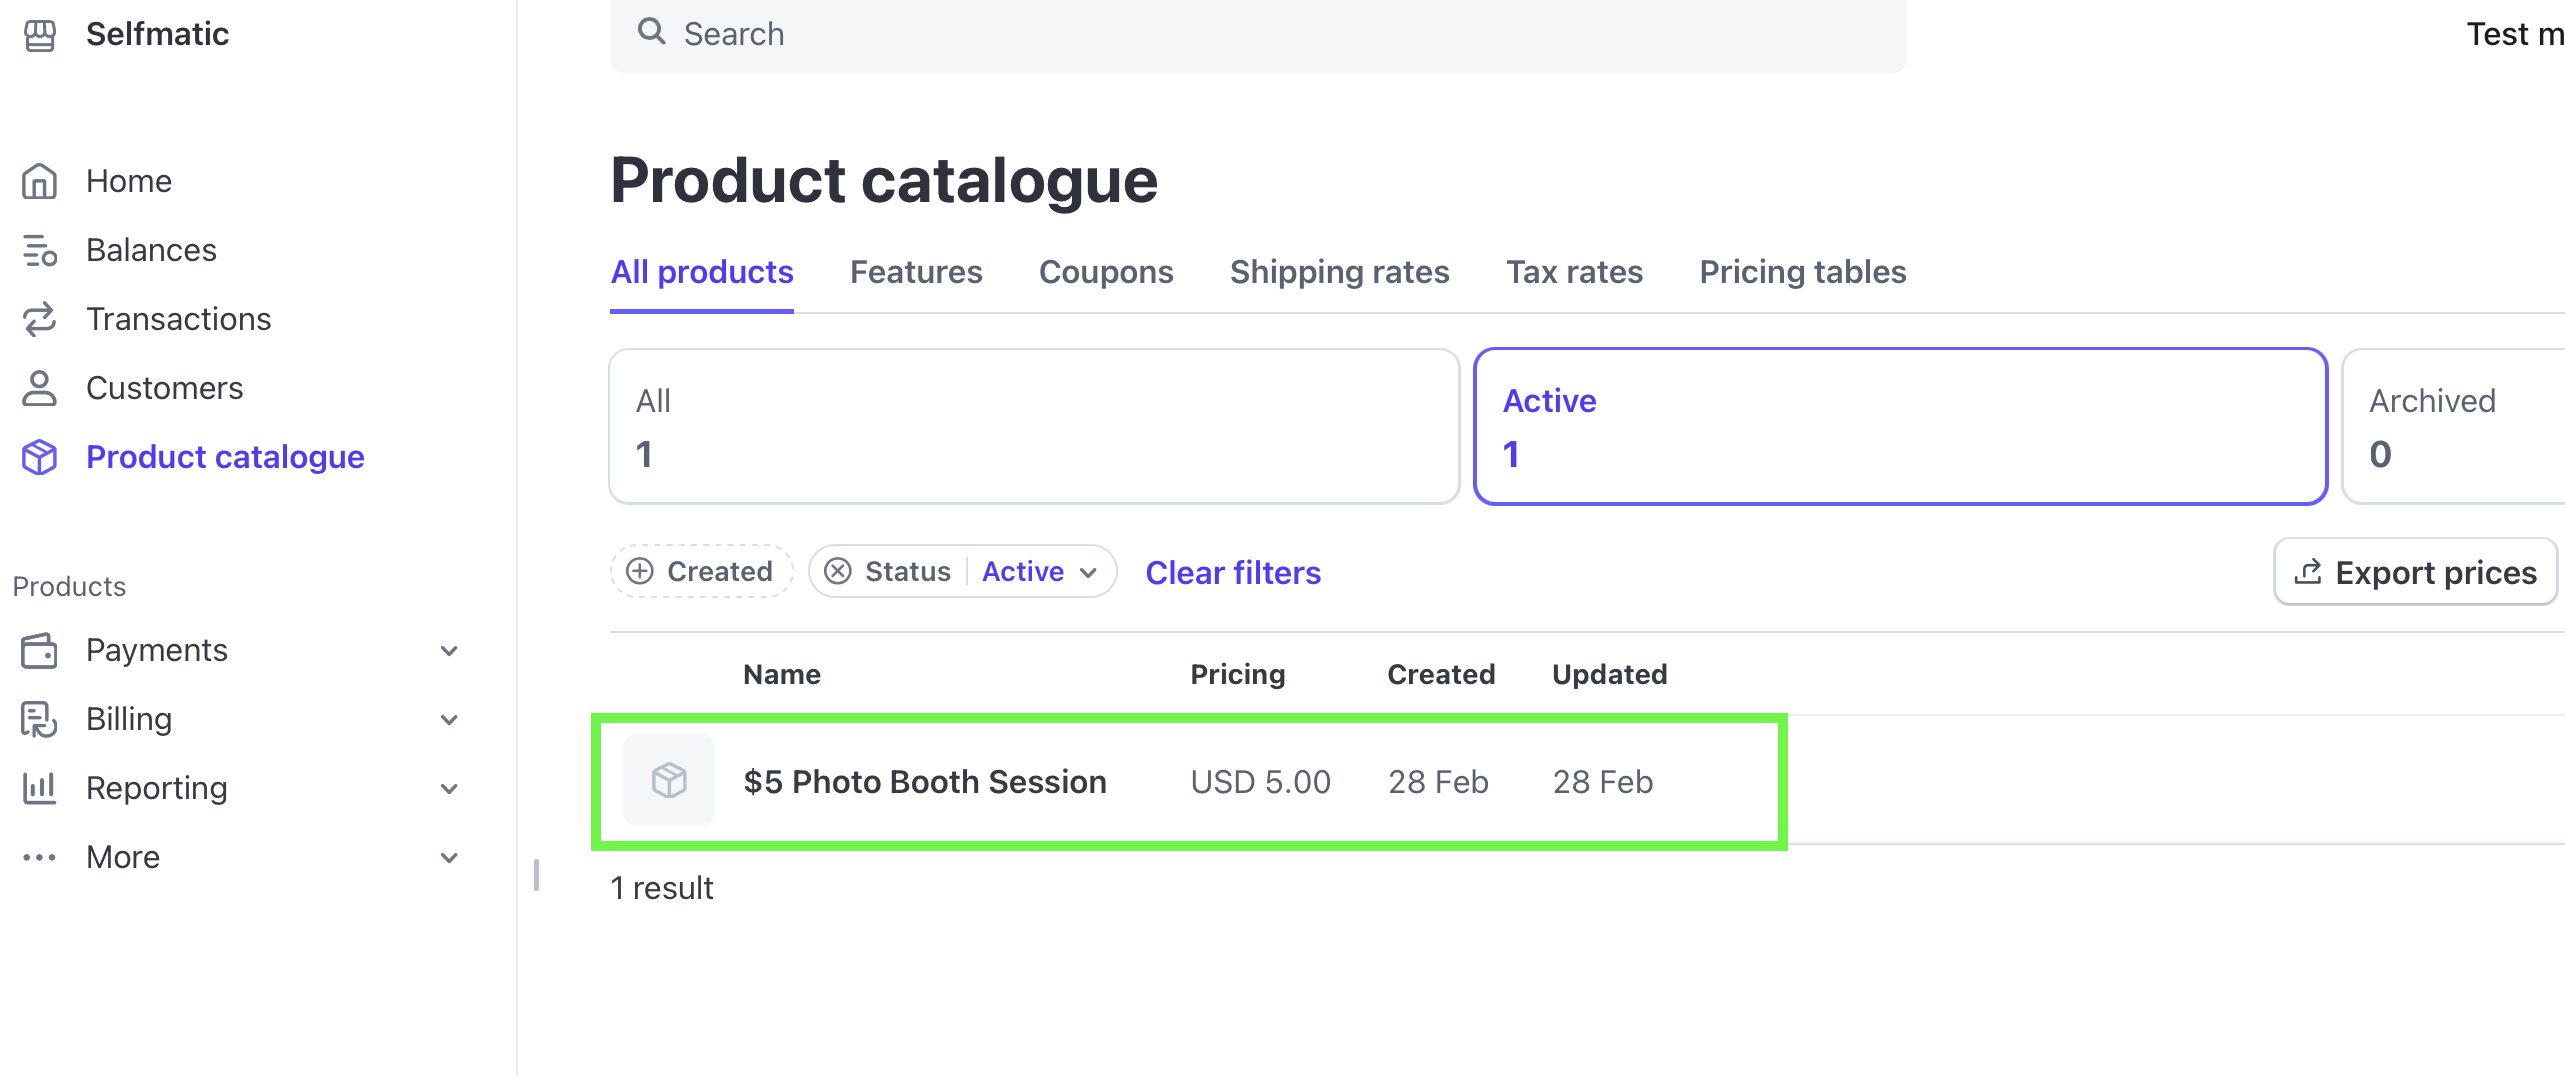
Create a Stripe Product
Create a new product (eg, a $5 Photo Booth Session) go to https://dashboard.stripe.com/products and press Create Product

Fill in the product details (name, price, taxes etc). And then press Add Product.
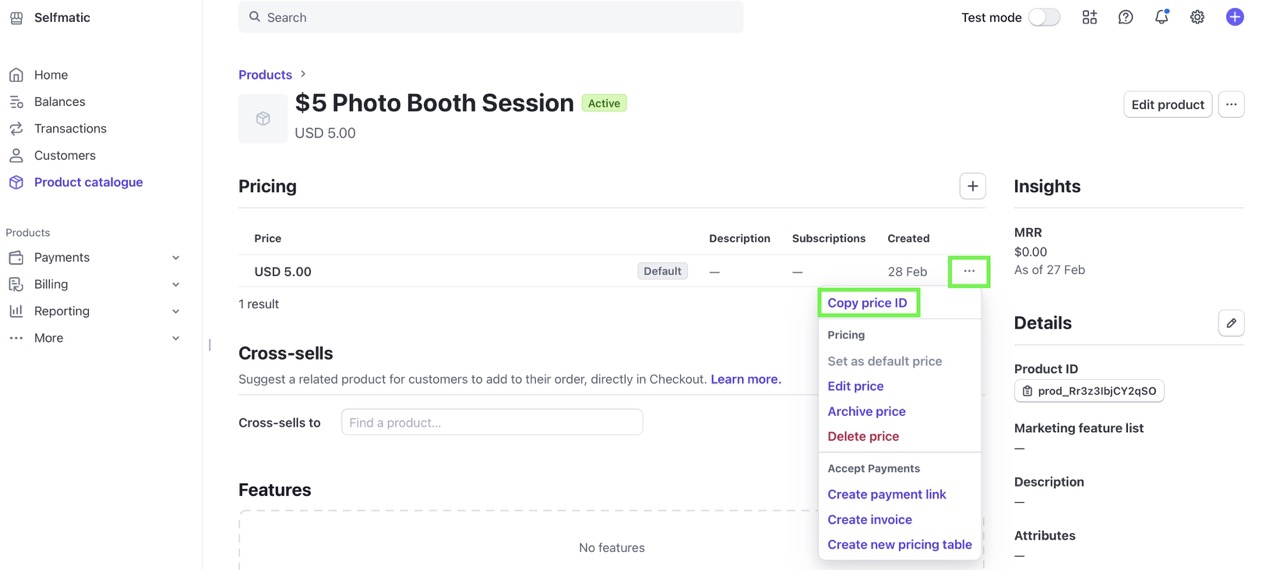
Click on the product name to edit it
Press the three dots … next to the pricing and select Copy Price ID
Add Credentials to Breeze Cloud
Next we need to add the Stripe Key and Product ID to Breeze Cloud.
Go to https://cloud.breezesoftware.com/settings/payment-booth
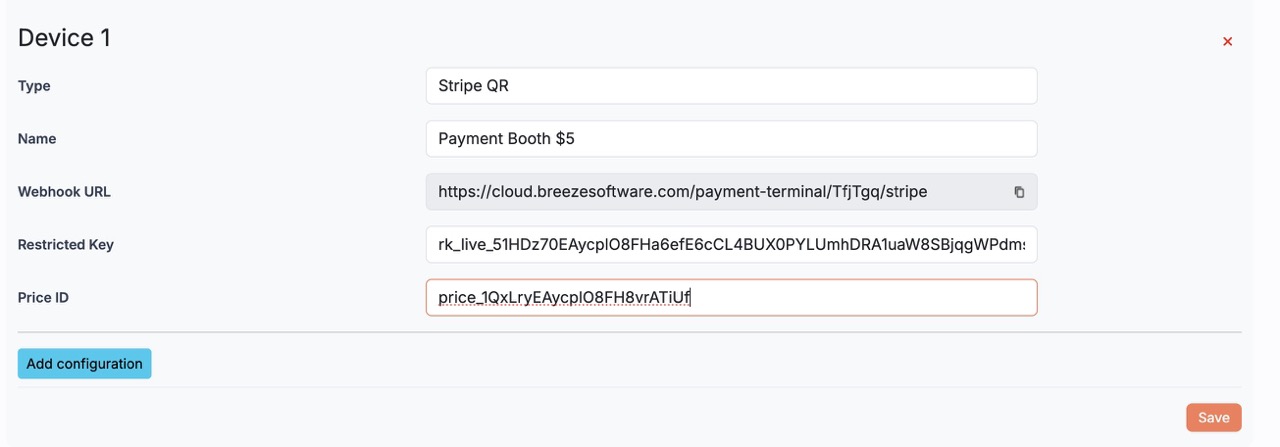
Press Add Configuration

Add Configuration
- Set the Type as Stripe QR
- Set a descriptive name eg: Payment Booth $5
- Paste in your Stripe Restricted Key
- Paste in your Stripe product Price ID
- Press Save
Configure the QR Code
Create a new QR Code Microsite, and enable the Payment Mode and select your configuration.
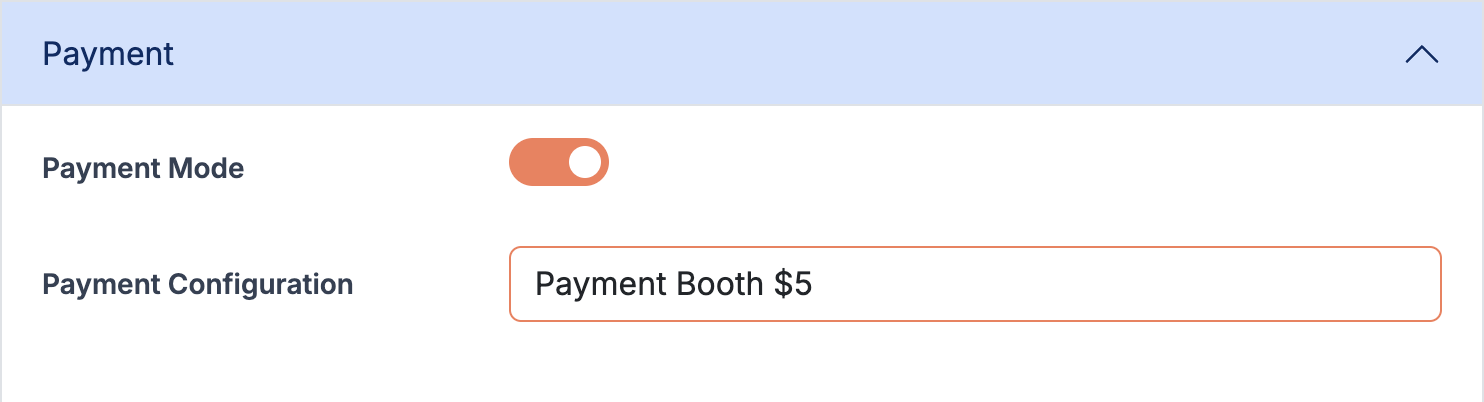
Now, when a QR code form is submitted, users will be taken to a Stripe Checkout to make payment. On suucessful payment, they will be redirect to their QR Code.
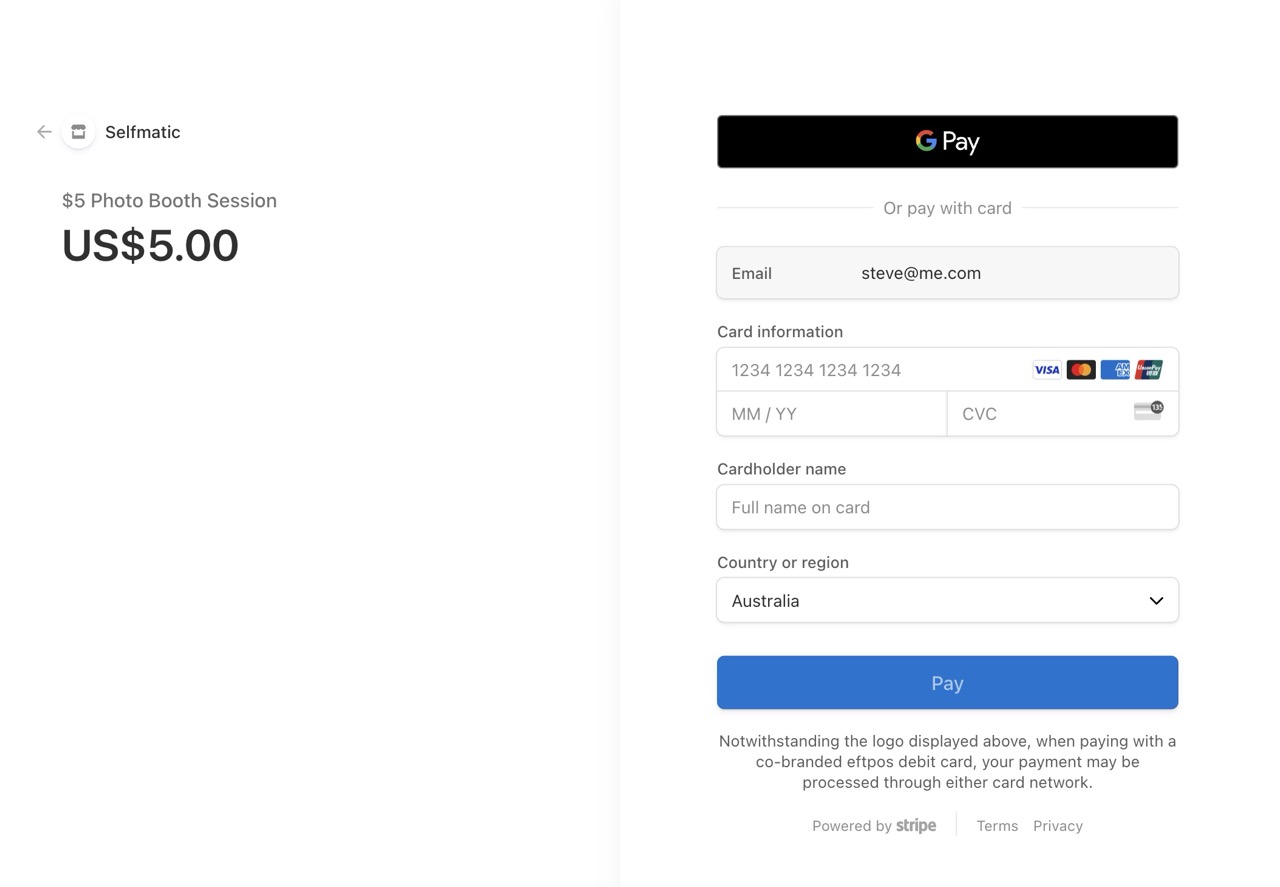
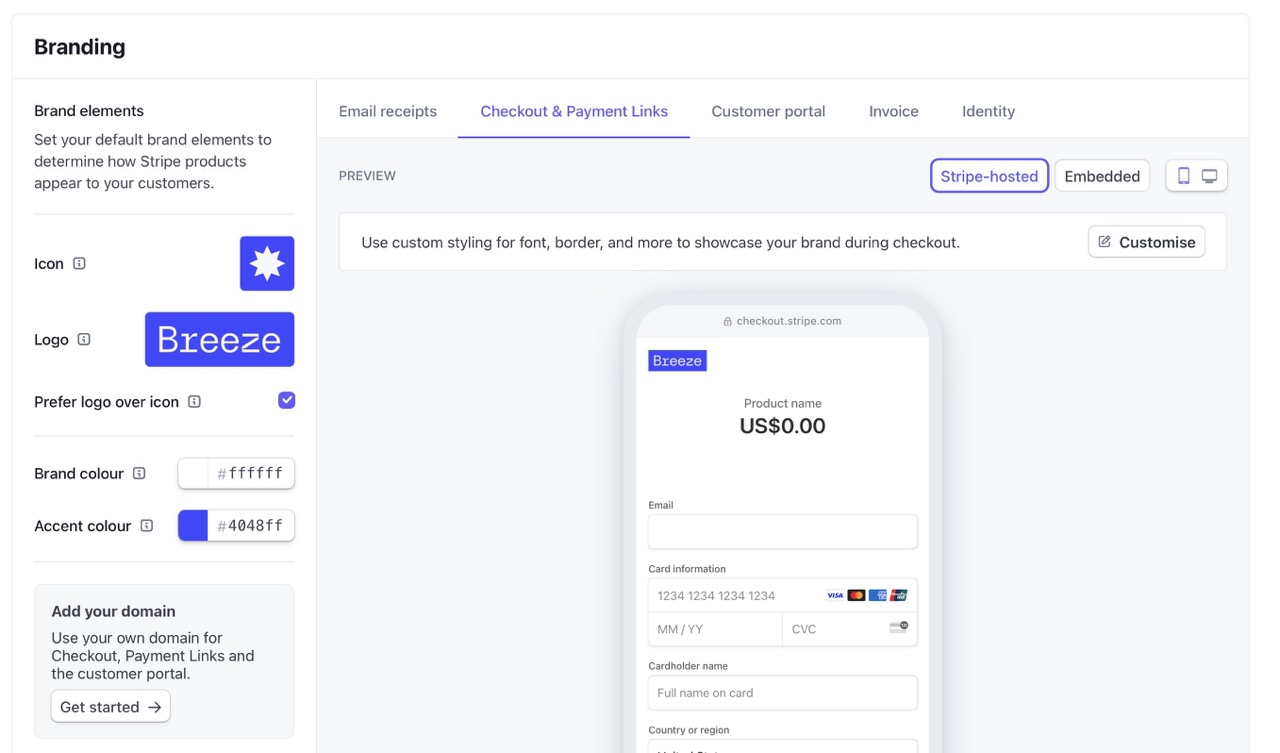
Branding the Stripe Checkout
Stripe allows for custom branding of the check out page, including custom URLs. This can be done here: https://dashboard.stripe.com/settings/branding