| |
This is the Add icon. |
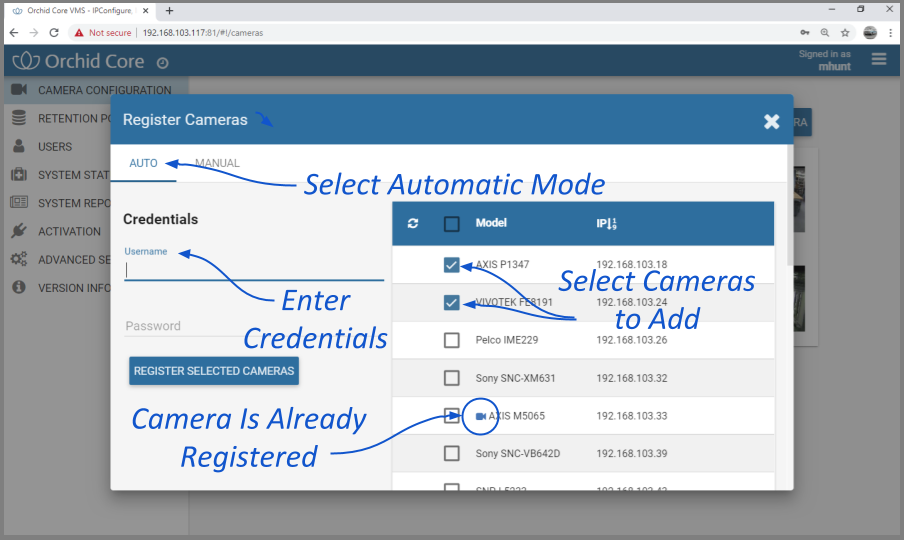
- From the list of registered cameras on the Camera Configuration screen, press the Add Camera button to access the Register Cameras screen. Orchid Core VMS will open the Register Cameras screen in Auto mode by default. This screen displays a list of all the cameras Orchid Core VMS was able to auto-discover.

- To add a new camera, mark the checkbox next to the camera. (You may select multiple cameras as long as they all use the same ONVIF username and password.)
- Enter the ONVIF username and password that is setup on the camera(s) you would like to add.
- Press the Register Selected Cameras button to add the cameras to Orchid Core VMS.
Depending on the number of cameras being added, it may take a few minutes for Orchid Core VMS to add them successfully. When complete, Orchid Core VMS will show a list of all cameras that were successfully and unsuccessfully added. If Orchid Core VMS fails to add a camera, an error message will appear.
- Go to each of the newly added cameras and enter a unique, descriptive name for each one. (Good camera names are important because they are searchable in Orchid Fusion VMS.) You should also review or edit the camera stream settings.


Post your comment on this topic.