
Brush masks are used to easily paint the visibility of a layer or effect. The mask can be adjusted at any time while painting using the controls displayed above the Viewer. Any adjustments made will define the mask shape used to create the next stroke. The controls panel contains additional controls, which alter the entire painted mask as a whole.
While applying a mask, it is often most effective to use keyboard shortcuts to manipulate the brush’s shape and behavior.
- Brush mode: Shift + ~ toggles the brush mode between Brush in and Brush out.
- Radius: [ key will reduce the radius. ] key will increase the radius.
- Softness: Shift + [ will decrease the softness. Shift + ] will increase the softness.
- Opacity: Alt + [ will decrease opacity. Alt + ] will increase opacity.
Viewer controls

Once a brush mask is added, the viewer automatically switches to brush mode, and relevant controls are displayed in the top toolbar.
![]() Brush in: The layer will be revealed in the areas you paint.
Brush in: The layer will be revealed in the areas you paint.![]() Brush out: The layer will be hidden in the areas where you paint.
Brush out: The layer will be hidden in the areas where you paint.
 Brush in: The layer will be revealed in the areas you paint.
 Brush out: The layer will be hidden in the areas where you paint.
- Radius: Defines the radius of the brush, in pixels.
- Opacity: Determines how opaque the brush stroke is. 100% is fully opaque, while 0% is completely transparent.
![]() Settings: Additional brush settings can be accessed here.
Settings: Additional brush settings can be accessed here.
![]()
- Radius: Defines the radius of the brush, in pixels.
- [ key will reduce the radius.
- ] key will increase the radius.
- Softness: Controls the width of the feathered edge around the brush.
- Shift + [ will decrease the softness.
- Shift + ] will increase the softness.
- Opacity: Determines how opaque the brush stroke is. 100% is fully opaque, while 0% is completely transparent.
- Alt + [ will decrease opacity.
- Alt + ] will increase opacity.
- Spacing: Controls the distance, as a percentage of the radius, between each instance of the brush shape, as you paint. For a continuous line a low value should be used. Increasing the value will create a visible scalloped edge, and once you exceed 100% there will be gaps between the separate instances of the brush shape.
- Smoothing: Adjusts the overall smoothness of the brush path, to reduce unwanted shake or jitter and create a smoother line.
- Radius: Defines the radius of the brush, in pixels.
 Settings: Additional brush settings can be accessed here.
Sidebar controls
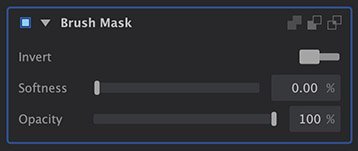
The controls in the right sidebar will modify the entire mask. The mask can contain multiple strokes which each use individual opacity, radius, or softness settings, by using the Viewer controls. But these controls will adjust the mask as a whole.
- Invert: Swaps the visible and masked areas of the layer.
- Softness: Applies a feather, or blur, to the entire mask.
- Opacity: Determines how opaque the mask is. 100% uses the original opacity settings for each stroke, while 0% is completely transparent.
Need more help with this?
Don’t hesitate to contact us here.