
The Distort effects are used to change the shape and behavior of a layer.
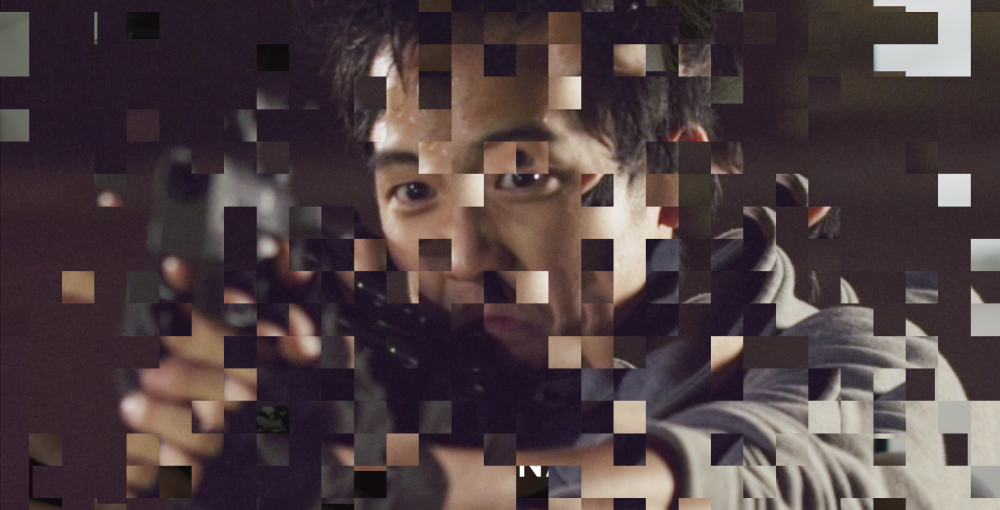
Block Displacement
Block displacement divides the contents of the layer into blocks, then randomly scatters the blocks to break up the layer
- Size: Sets the size, in pixels, of the blocks.
- Displacement: The distance, in pixels, which the blocks will be displaced from their original position.
Block Settings
- Seed: Randomizes the pattern of blocks the layer is divided into.
- Coverage: The percentage of the source layer that will be visible.
- Displaced Blocks: The percentage of the visible blocks that will be displaced from their original position. By keyframing the Coverage and Displaced Blocks values, you can make the blocks of a layer gradually appear, or gradually assume their correct position to build the layer.
- Aspect Ratio: Adjusts the aspect ratio of the area into which the blocks can be displaced.
Position
- Position: Shifts the position of the blocks without moving the displaced layer.
- Use Layer: Use this menu to select another layer on the timeline and use its position to control the block position. When a Layer is selected here, the Position property above reflects the offset of the blocks from the parent layer’s location.
Displacement Settings
- Seed: Randomizes the direction in which each block is displaced.
- Rotation: Rotates the portion of the layer that is visible within each block
- Sub-Block Displacement: Adds a secondary layer of displacement, to distort the layer even further.
- Displacement Axis: Select the axis on which the blocks will be displaced:
- Horizontal: Blocks are only displaced left and right, along the horizontal axis.
- Vertical: Blocks are only displaced upward and downward, along the vertical axis.
- Both: Blocks are displaced in all directions.
- Wrap: Controls how the displacement will be wrapped when it reaches the edge of the frame.
- No: No wrapping is applied.
- Tiled: A second identical copy of the image is used alongside the original to fill the wrapped area.
- Reflection: A mirrored copy is used alongside the original to fill the wrapped area.
Image Position
- Position: Shifts the position of the source layer without moving the displaced blocks.
- Use Layer: Use this menu to select another layer on the timeline and use its position to control the image position. When a Layer is selected here, the Position property above reflects the offset of the block’s contents from the parent layer’s location.
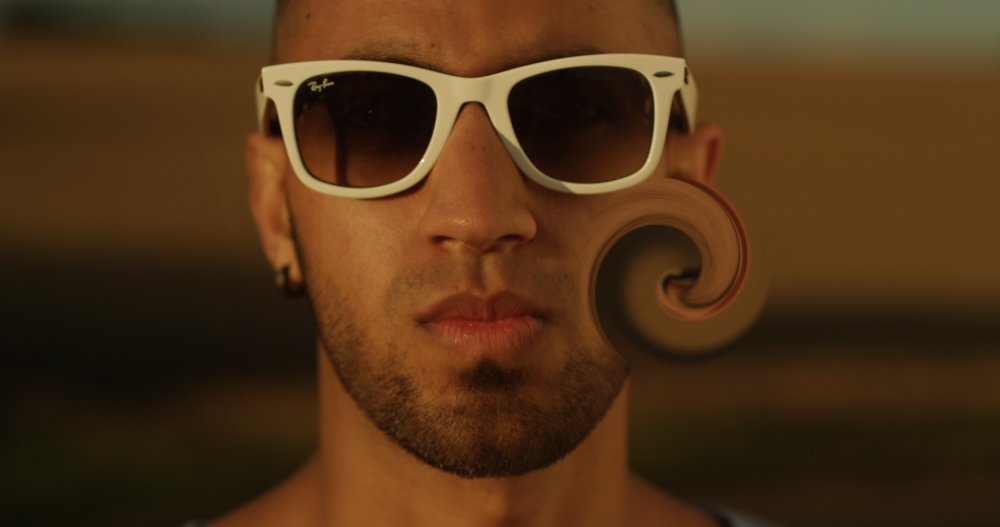
Bulge
Creates the illusion of a bulging shape pushing through the layer. You can choose from multiple shapes and adjust the size and shape of the bulge.
- Center: By default the bulge is centered in the frame, but you can reposition the center if you wish.
- Position: Sets the exact location of the vignette center, using X and Y values.
- Use Layer: Select any other layer on the timeline to use it’s position as the center of the vignette. When a layer is selected, the Position property above functions as an offset from the selected layer’s position.
- Bulge: Adjusts the height of the bulge. Negative values invert the bulge and create a recessed pinch effect.
- Radius: Set the overall size of the bulge.
- Plateau: You can create a flat area in the center of the bulge. This value sets the radius of that flat area.
- Wrap: When the edges of the frame are distorted, especially using negative values, this determines how the blank space created is handled.
- None: The blank areas remain unaffected.
- Tile: An exact copy of the layer is used to fill the blank area.
- Reflect: A mirrored copy of the layer is used to fill the blank area. The mirroring helps hide any seam at the layer’s edge.
- Shape: The bulge can be created in a variety of geometric shapes.
- Choose from Circle, Triangle, Square, Pentagon, Hexagon, Heptagon, Octagon, Nonagon, or Decagon.
- Scale: Independently adjust the width and height of the bulge.
- X: Adjusts the width of the bulge.
- Y: Adjusts the height of the bulge.
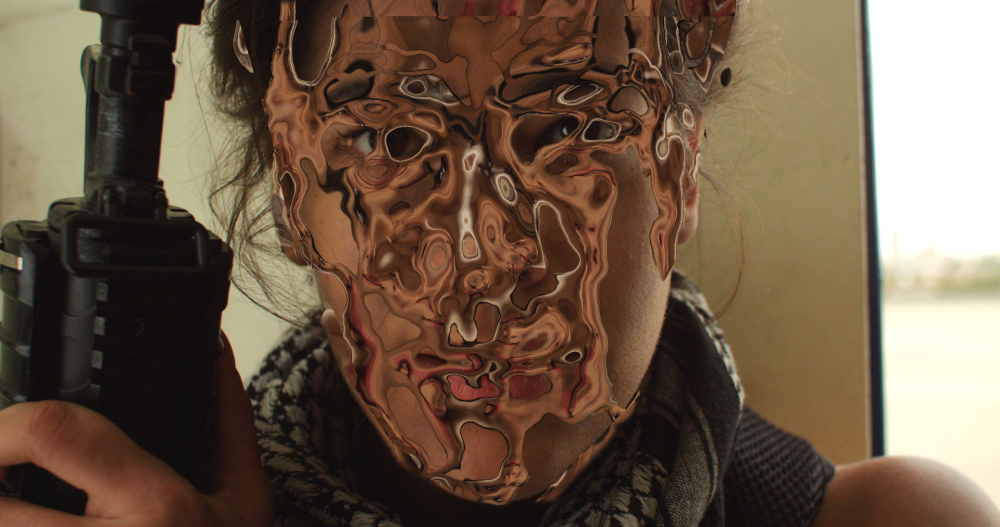
Chromenator
Creates the appearance of liquid metal.
- Preset: Chose from preset configurations of settings.
- Source Layer: The Chromenator effect creates a reflective surface. Select another layer to be reflected into the chrome surface created.
- Channel: Select a channel of the layer the effect is applied to. The selected channel will be used to create the depth map on which the Chromenator effect is based.
- Detail Scale: Sets the minimum size of details that will be included in generating the depth map.
- Reflection Distance: Changes the distance between the surface and the reflection.
- Wrap: When the edges of the frame are distorted, wrap determines how the blank space created is handled.
- None: The blank areas remain unaffected.
- Tile: An exact copy of the layer is used to fill the blank area.
- Reflect: A mirrored copy of the layer is used to fill the blank area.
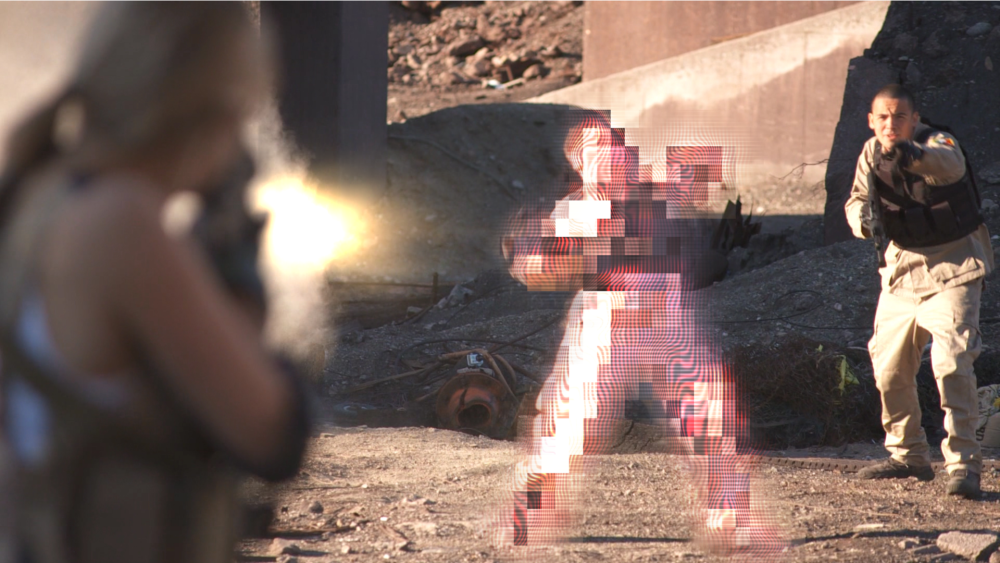
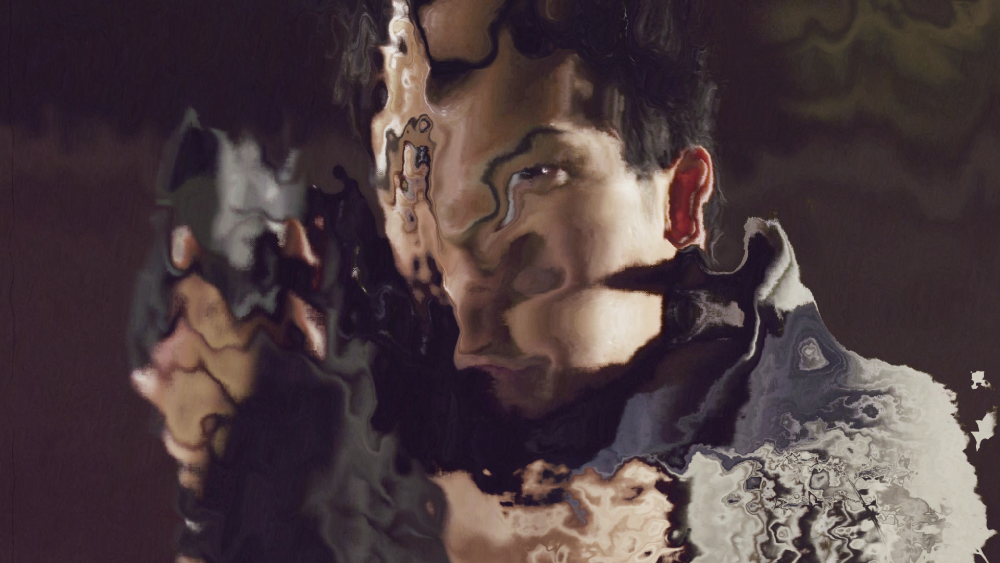
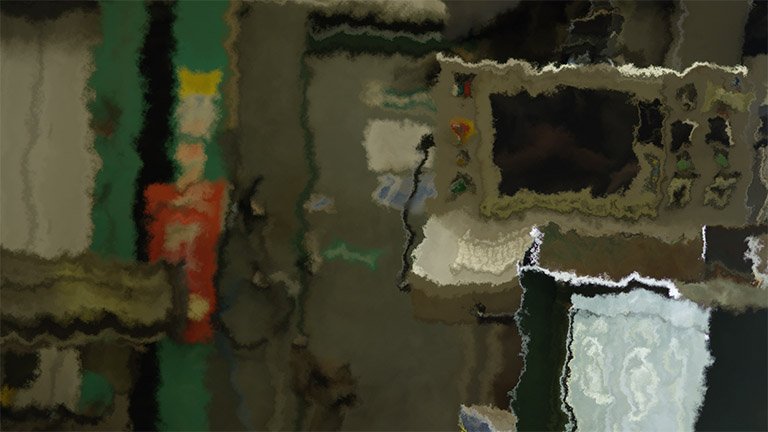
Derez (VGHS)
Custom-built for Freddie Wong’s Video Game High School web series. Creates a digital glitching appearance which was used for characters disappearing out of the game after being shot.
- View: Select the component of the effect you wish to see.
- Result: Shows the final result, with all components of the effect enabled.
- Pixelation: Shows only the pixelation component of the effect, with its associated controls.
- Wavy Lines: Shows only the wavy lines component of the effect, with its associated controls.
- Horizontal Lines: Shows only the horizontal lines component of the effect, with its associated controls.
- Mask: Select another layer from the timeline to be used as a mask for the effect. The results of the effect will only be visible within the area of the selected layer.
Pixelation
- Strength: Higher values make the pixelation more obvious.
- Source Frame Shift: The pixelation can be based on a different frame of the layer the effect is applied to, to create a temporal glitching. Select the amount of frame shift used with this control.
- Mask Erode/Expand: When a Mask is selected, this control adjusts the exact size of the mask area. Negative values contract the mask, and positive values expand the mask.
- Horizontal Blocks: Sets the number of horizontal blocks in the effect. Lower values create larger blocks.
- Vertical Blocks: Sets the number of vertical blocks in the effect. Lower values create larger blocks.
Wavy Lines
- Strength: Higher values make the wavy lines more obvious.
- Source Frame Shift: The distortion of the wavy lines can be based on a different frame of the layer the effect is applied to, to create a temporal glitching. Select the amount of frame shift used with this control.
Lines
- Frequency: Controls the number of wavy lines. Higher values create more lines.
- Sharpness: Defines how separate and distinct the lines are. Higher values blur the lines together more.
- Angle: Rotate the knob to set the angle of the wavy lines. The angle sets the direction of frequency, and is perpendicular to the lines themselves.
- Smooth Source: The wavy lines are distorted based on a depth map created form the underlying layer. Increasing this value applies a blur to the layer before calculating the depth map, to smooth the distortion.
Color
- This effect has a built-in version of the Color Correction Wheels effect that modifies the wavy lines specifically. For full details on these controls, see the Color Correction page of this manual.
Displacement
- Smooth Source: The wavy lines are displaced based on selected channels of the underlying layer. Increasing this value applies a blur to the selected channels before calculating the displacement, to smooth the distortion.
- Horizontal Displacement: Sets the distance, in pixels, of the horizontal displacement.
- Vertical Displacement: Sets the distance, in pixels, of the vertical displacement.
- Horizontal Displacement Channel: Select the channel of the underlying layer that will be used to calculate the horizontal displacement.
- Vertical Displacement Channel: Select the channel of the underlying layer that will be used to calculate the vertical displacement.
Horizontal Lines
- Strength: Higher values make the horizontal lines more obvious.
- Source Frame Shift: The distortion of the horizontal lines can be based on a different frame of the layer the effect is applied to, to create a temporal glitching. Select the amount of frame shift used with this control.
Inverted Lines
- Frequency: Controls the number of horizontal lines. Higher values create more lines.
- Sharpness: Defines how separate and distinct the lines are. Higher values blur the lines together more.
- Angle: By default these lines are horizontal, as the name implies, but you can rotate the knob to set the angle of the horizontal lines.
- Brightness: Sets the brightness of the inverted lines. Lower values create brighter lines.
- Offset: Controls the overall brightness of the layer. Higher values create a darker image.
- Smooth Source: Increasing this value applies a blur to the layer before calculating the depth map, to smooth the distortion. Lower values make the shapes in the underlying layer more apparent.
Brightness Contrast
- Brightness: Adjusts the brightness of the final, altered image.
- Contrast: Adjusts the contrast of the final, altered image.
Displacement
Shifts the pixels in particular directions according to the displacement source. This can create excellent invisibility and other distortion effects. You can select the source layer and source channels, plus adjust the strength of the displacement.
- Source Layer: Select another layer on the timeline to be used as the displacement source.
- Horizontal Displacement: Select the channel of the source layer that will be used to calculate the horizontal displacement.
- Max Horizontal Displacement: Displacement is based on the value of each pixel, with middle gray pixels remaining in place, darker pixels shifting right, and lighter pixels shifting left. This value sets the maximum distance, in pixels, of the horizontal displacement. Using a negative value inverts the direction in which brighter and darker pixels are shifted.
- Vertical Displacement: Select the channel of the source layer that will be used to calculate the vertical displacement.
- Max Vertical Displacement: Displacement is based on the value of each pixel, with middle gray pixels remaining in place, darker pixels shifting right, and lighter pixels shifting left. This value sets the maximum distance, in pixels, of the vertical displacement. Using a negative value inverts the direction in which brighter and darker pixels are shifted.
- Wrap Pixels: When the edges of the frame are distorted, this setting determines how the blank space created is handled.
- None: The blank areas remain unaffected.
- Tile: An exact copy of the layer is used to fill the blank area.
- Reflect: A mirrored copy of the layer is used to fill the blank area. The mirroring makes the edges of the frame less apparent, helping to hide any visible seams.
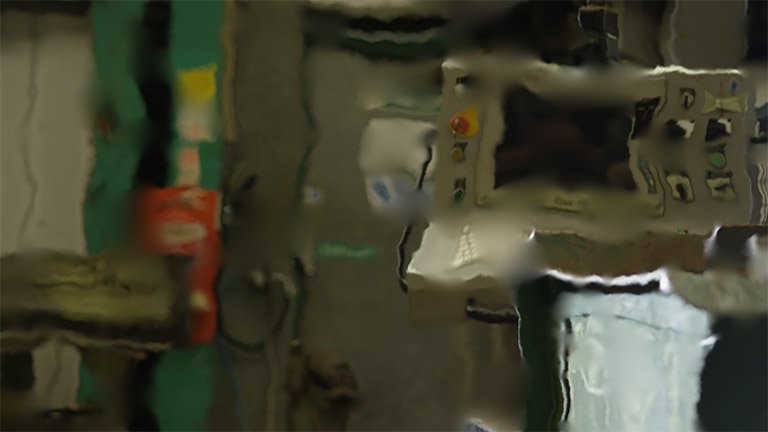
Energy Distortion
 Energy Distortion is available in the VFX: Distortion Pack.
Distorts your footage based on a procedurally generated fractal pattern. You can adjust the appearance of the distortion using the controls.
- Distortion: Adjusts the intensity of the distortion applied to the layer.
- Scale: Sets the scale of the distortion
- Diffusion Bias: Set the amount of the image that is affected by diffusion blurring. Increasing the setting will make the blur more prevalent.
- Diffusion Strength: Sets the strength of the blur in the areas affected by diffusion
- Distortion Rotation: Sets the angle in which the distortion is applied.
- Distort Single Axis: Enabling this option applies the distortion in a single direction. The specific angle used can be set with the Distortion Rotation setting above.
Animation
By default the Energy Distortion is animated. You can set the details of the movement within the effect here.
- Wind Direction: Sets the direction of the movement
- Wind Speed: Sets the speed of the movement along the axis determined in the Wind Direction, by altering the position of the noise. Higher values will create more movement in the distortion.
- Noise Speed: Sets the speed of the movement of the fractal noise the distortion is based on. This speed alters the shape of the noise, while the Wind Speed property affects its position.
Noise
- Seed: Acts as a randomizer for the shape of the noise. Each seed value sets a unique starting shape for the procedurally generated noise.
- Interpolation: Provides options for how the noise is interpolated. Linear Interpolation uses the simplest path to connect points in the rectilinear grid the effect is based on. Cubic interpolation uses smoother paths to interpolate the grid. Neither option is better than the other, they just provide different options for the effect.
Transform
Multiple layers of fractal noise are combined to create the final noise that the distortion is based on. The Transform controls adjust the primary noise, while the Sub Settings alter the sub levels of noise that add detail to the distortion.
- Position: Sets the position of the primary fractal noise the distortion is based on.
- Use Layer: You can select another layer on your timeline, to parent the position of the distortion to that layer
- Rotation: Sets the rotation of the primary fractal noise
- Axis Scale X: Alters the aspect ratio of the primary fractal noise by changing its scale along the X axis. Higher values will stretch the distortion horizontally.
- Axis Scale Y: Alters the aspect ratio of the primary fractal noise by changing its scale along the Y axis. Higher values will stretch the distortion vertically.
Sub Settings
- Sub Levels: Sets the number of sub levels that are used to calculate the distortion. Higher levels create greater detail in the distortion.
- Influence: Controls the intensity with which the sub levels alter the primary noise.
- Scale: Sets the scale of the sub levels, thus impacting the size of the detail added by the additional sub levels.
- Rotation: Alters the angle of the sub levels which are laid over the primary noise.
- Offset: Sets the position of the sub levels in relation to the primary noise position.
- Center Subscale: Enabling this option links the center of all subscale layers, so they stay aligned when offset using the above control.
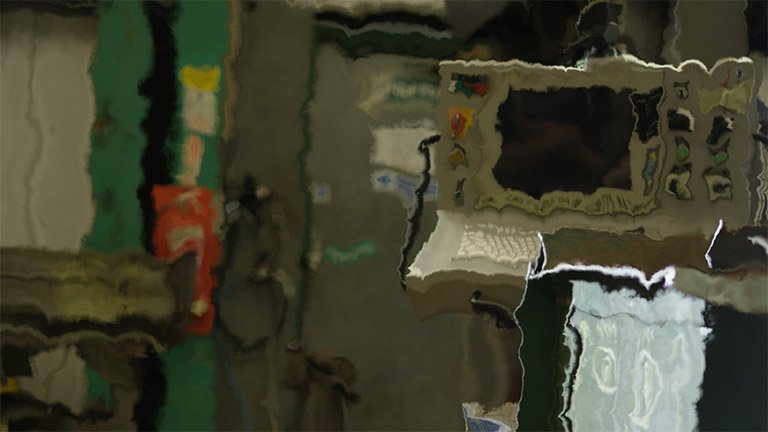
Fluid Distortion
Fluid Distortion is available in the VFX: Distortion Pack.
Distorts your footage based on a procedurally generated fractal pattern. You can adjust the appearance of the distortion using the controls.
- Distortion: Adjusts the intensity of the distortion applied to the layer.
- Scale: Sets the scale of the distortion
- Diffusion Bias: Set the amount of the image that is affected by diffusion blurring. Increasing the setting will make the blur more prevalent.
- Diffusion Strength: Sets the strength of the blur in the areas affected by diffusion
- Distortion Rotation: Sets the angle in which the distortion is applied.
- Distort Single Axis: Enabling this option applies the distortion in a single direction. The specific angle used can be set with the Distortion Rotation setting above.
Animation
By default the Fluid Distortion is animated. You can set the details of the movement within the effect here.
- Wind Direction: Sets the direction of the movement
- Wind Speed: Sets the speed of the movement along the axis determined in the Wind Direction, by altering the position of the noise. Higher values will create more movement in the distortion.
- Noise Speed: Sets the speed of the movement of the fractal noise the distortion is based on. This speed alters the shape of the noise, while the Wind Speed property affects its position.
Noise
- Seed: Acts as a randomizer for the shape of the noise. Each seed value sets a unique starting shape for the procedurally generated noise.
- Interpolation: Provides options for how the noise is interpolated. Linear Interpolation uses the simplest path to connect points in the rectilinear grid the effect is based on. Cubic interpolation uses smoother paths to interpolate the grid. Neither option is better than the other, they just provide different options for the effect.
Transform
Multiple layers of fractal noise are combined to create the final noise that the distortion is based on. The Transform controls adjust the primary noise, while the Sub Settings alter the sub levels of noise that add detail to the distortion.
- Position: Sets the position of the primary fractal noise the distortion is based on.
- Use Layer: You can select another layer on your timeline, to parent the position of the distortion to that layer
- Rotation: Sets the rotation of the primary fractal noise
- Axis Scale X: Alters the aspect ratio of the primary fractal noise by changing its scale along the X axis. Higher values will stretch the distortion horizontally.
- Axis Scale Y: Alters the aspect ratio of the primary fractal noise by changing its scale along the Y axis. Higher values will stretch the distortion vertically.
Sub Settings
- Sub Levels: Sets the number of sub levels that are used to calculate the distortion. Higher levels create greater detail in the distortion.
- Influence: Controls the intensity with which the sub levels alter the primary noise.
- Scale: Sets the scale of the sub levels, thus impacting the size of the detail added by the additional sub levels.
- Rotation: Alters the angle of the sub levels which are laid over the primary noise.
- Offset: Sets the position of the sub levels in relation to the primary noise position.
- Center Subscale: Enabling this option links the center of all subscale layers, so they stay aligned when offset using the above control.
Heat Distortion
Applies automatic heat distortion with built-in displacement and diffusion. The behavior can be adjusted for faster or slower movement.
- Scale: Sets the scale of the distortion
- Distortion: Adjusts the intensity of the distortion applied to the layer.
- Diffusion Bias: Set the amount of the image that is affected by diffusion blurring. Increasing the setting will make the blur more prevalent.
- Diffusion Strength: Sets the strength of the blur in the areas affected by diffusion
- Distortion Rotation: Sets the angle in which the distortion is applied.
- Distort Single Axis: Enabling this option applies the distortion in a single direction. The specific angle used can be set with the Distortion Rotation setting above.
Animation
By default the Energy Distortion is animated. You can set the details of the movement within the effect here.
- Wind Direction: Sets the direction of the movement
- Wind Speed: Sets the speed of the movement along the axis determined in the Wind Direction, by altering the position of the noise. Higher values will create more movement in the distortion.
- Noise Speed: Sets the speed of the movement of the fractal noise the distortion is based on. This speed alters the shape of the noise, while the Wind Speed property affects its position.
Noise
- Seed: Acts as a randomizer for the shape of the noise. Each seed value sets a unique starting shape for the procedurally generated noise.
- Interpolation: Provides options for how the noise is interpolated. Linear Interpolation uses the simplest path to connect points in the rectilinear grid the effect is based on. Cubic interpolation uses smoother paths to interpolate the grid. Neither option is better than the other, they just provide different options for the effect.
Transform
Multiple layers of fractal noise are combined to create the final noise that the distortion is based on. The Transform controls adjust the primary noise, while the Sub Settings alter the sub levels of noise that add detail to the distortion.
- Position: Sets the position of the primary fractal noise the distortion is based on.
- Use Layer: You can select another layer on your timeline, to parent the position of the distortion to that layer
- Rotation: Sets the rotation of the primary fractal noise
- Axis Scale X: Alters the aspect ratio of the primary fractal noise by changing its scale along the X axis. Higher values will stretch the distortion horizontally.
- Axis Scale Y: Alters the aspect ratio of the primary fractal noise by changing its scale along the Y axis. Higher values will stretch the distortion vertically.
Sub Settings
- Sub Levels: Sets the number of sub levels that are used to calculate the distortion. Higher levels create greater detail in the distortion.
- Influence: Controls the intensity with which the sub levels alter the primary noise.
- Scale: Sets the scale of the sub levels, thus impacting the size of the detail added by the additional sub levels.
- Rotation: Alters the angle of the sub levels which are laid over the primary noise.
- Offset: Sets the position of the sub levels in relation to the primary noise position.
- Center Subscale: Enabling this option links the center of all subscale layers, so they stay aligned when offset using the above control.
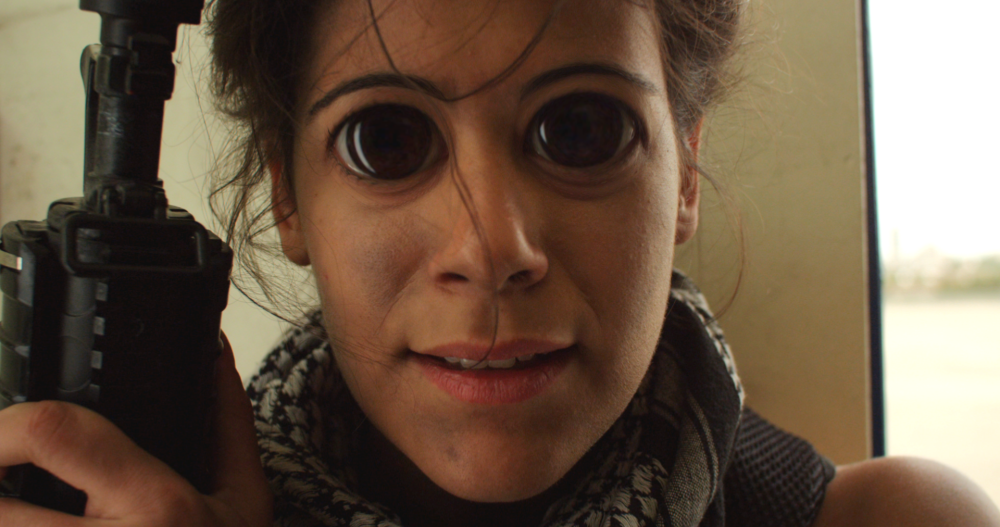
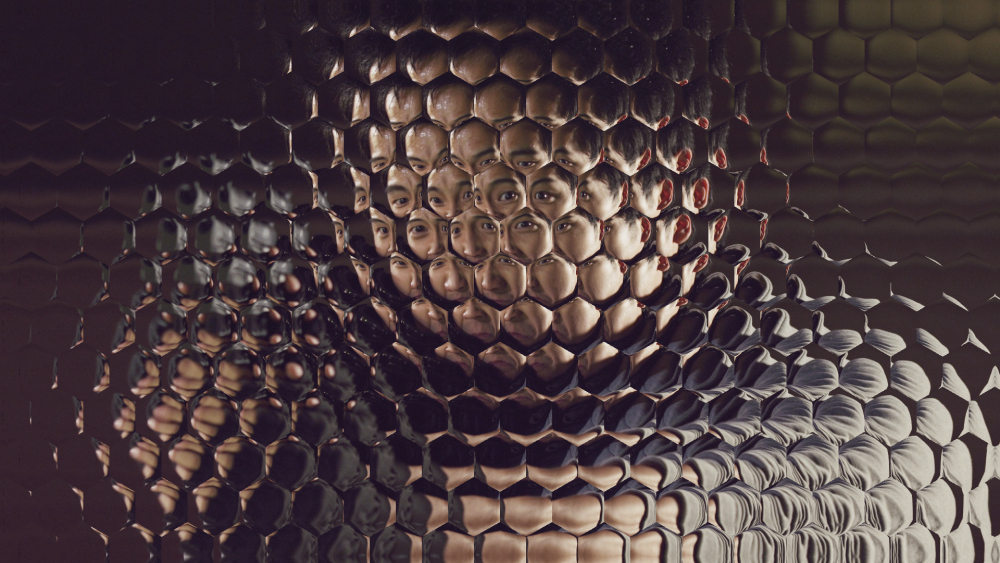
Insect Vision
Distorts the layer through a hexagon pattern of tiles, to create the appearance of a multi-faceted insect eye.
- Preset: Choose a preset configuration of settings as a starting point.
- Center: By default the effect is centered in the frame, but you can reposition the center if you wish.
- Position: Sets the exact location of the effect center, using X and Y values.
- Use Layer: Select any other layer on the timeline to use it’s position as the center of the effect. When a layer is selected, the Position property above functions as an offset from the selected layer’s position.
- Rotation: Rotates the hex pattern around the central tile.
- Lens Size: Determines the width, in pixels, of each hex tile in the pattern.
- Zoom: Controls how much of the underlying image is visible through each hex tile, or lens. Lower values tend to give the effect of multiple copies of the image typically associated with this effect.
- Iris Bulge: Distorts each lens as if it was bulged, creating a fisheye distortion within each lens.
- Wrap: At low Zoom levels, the edges of the frame may become visible within each lens. This control determines how the blank space created is handled.
- No: The blank areas remain unaffected.
- Tile: An exact copy of the layer is used to fill the blank area.
- Reflect: A mirrored copy of the layer is used to fill the blank area.
Magnify
Zooms in on a specific area of the layer. The shape, size and position of the magnification can all be changed.

- Center: By default the magnification is centered in the frame, but you can reposition the center if you wish.
- Position: Sets the exact location of the magnification center, using X and Y values.
- Use Layer: Select any other layer on the timeline to use it’s position as the center of the magnification. When a layer is selected, the Position property above functions as an offset from the selected layer’s position.
- Radius: Sets the radius, in pixels, of the magnified area.
- Magnification: Adjusts the amount of magnification applied within the radius.
- Bulge: Controls the amount of bulge distortion applied within the radius. Higher bulge values reduce the distortion at the edges of the magnified area.
- Wrap: When the edges of the frame are distorted, wrap determines how the blank space created is handled.
- No: The blank areas remain unaffected.
- Tile: An exact copy of the layer is used to fill the blank area.
- Reflect: A mirrored copy of the layer is used to fill the blank area.
- Shape: Select the shape to be used for the bulge.
- Choose between Circle, Triangle, Square, Pentagon, Hexagon, Heptagon, Octagon, Nonagon, or Decagon.
- Blend: Choose the blend mode used to apply the effect to the underlying layer.
Shape
When a shape other than Circle is selected in the Shape menu, additional controls will be displayed to provide further control over he shape.
- Rotation: Turn the knob to rotate the magnified shape.
- Curvature: Adds a curve to each edge of the shape. Negative values curve inward, and positive values curve outward.
- Pinch: Adjusts the weighting of the curvature.
- Shift: Rotates the curvature without moving the shape itself, to shift how the edges are curved.
Mosaic
Creates a tiled, mosaic appearance by reducing the number of distinct pixels in the layer. The color values of all pixels within each block are averaged to determine the color value used for that block.
- Preset: Choose from a variety of predetermined configurations of the effect.
- Horizontal Blocks: Determines the number of horizontal blocks. Lower numbers create larger, more obvious blocks.
- Vertical Blocks: Determines the number of vertical blocks. Lower numbers create larger, more obvious blocks.
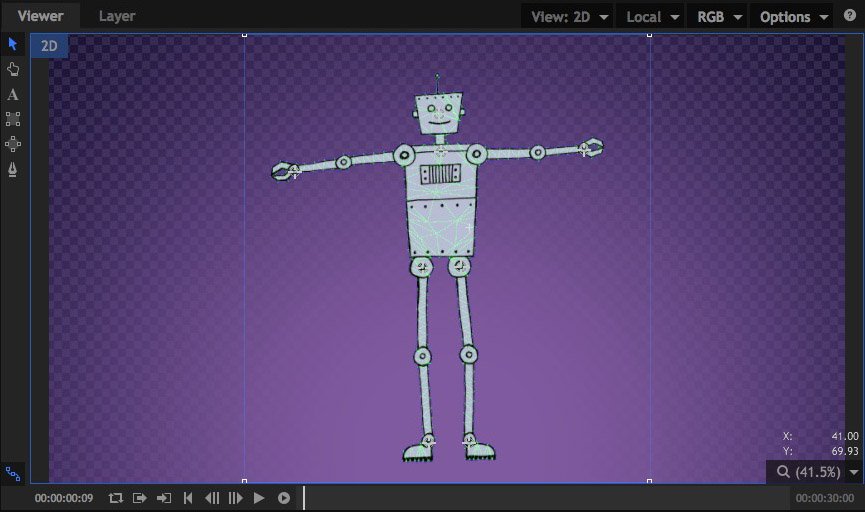
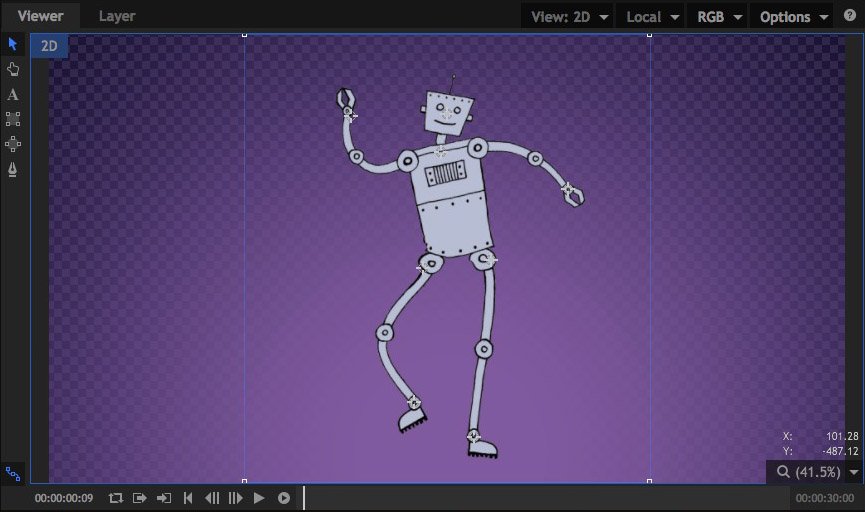
Puppet
Puppet is available in the Motion: Puppet Pack.
The Puppet tool allows you to set up specific control points within your layer, then animate the position of each point to move or distort the layer’s contents. After adding the Puppet effect to your layer, Click in the Viewer to add new control points. A new control point will be added at each location you click. Drag any existing point to a new location to distort the image beneath it. If you wish to reposition a point without distorting the image, hold Shift while you drag the point. While shift is help, the mesh that is used to generate the distortion will be visible, and points can be repositioned without altering the distortion.
- Mode: The Mode changes automatically as you edit the effect in the Viewer. If you want to manually force a specific mode, you can do so here.
- Animate: In Animate Mode the control points are pined to the layer, and moving any control point will distort the layer accordingly. Note that keyframing must still be enabled for individual control point properties in order to change the values over time.
- Edit: In Edit mode you can add points and change the position of existing points without affecting the source layer. The mesh is overlaid onto your image when Edit mode is active.
When Edit mode is selected, some additional controls appear, which allow you to fine tune the mesh used to distort the image.
- Expansion: Expands the boundaries of the mesh beyond the borders of the layer. If you get unwanted creasing along the edges of your layer when it is distorted, try increasing the expansion to smooth out the edges.
- Tessellation: Controls the size of the triangles that make up the mesh. Increasing tessellation creates more faces, for smoother curves in the distortion. Increased tessellation may also increase processing time.
- Rigidity Map: You can use a map to add rigidity to certain areas of the layer, and further control how it is distorted.
Control Points
You can create as many control points as necessary within the Puppet tool. Control points are numbered in the order in which they are created, and each control point will have two controls:
- Position: Identifies the exact position of the control point at the current frame, on the X and Y axes.
- Z-Order: Controls the depth order of the points. If your points are moved so that parts of the layer overlap, the Z order determines which point is in front. In overlapping areas, point with higher Z-order values will be rendered in front of points with lower values.
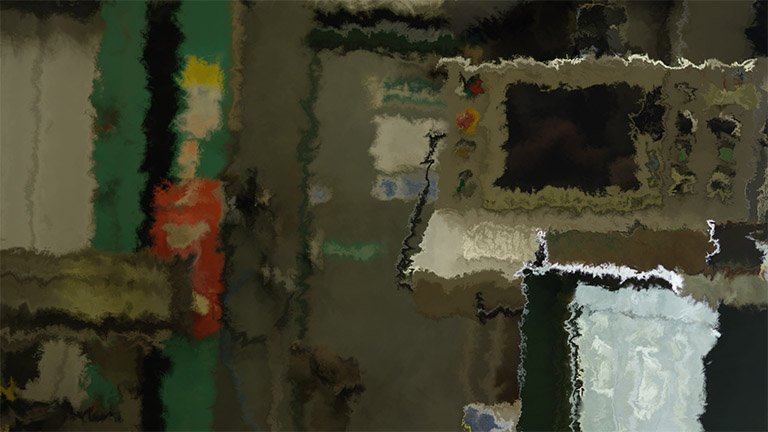
Smoke Distortion
Smoke Distortion is available in the VFX: Distortion Pack.
Distorts your footage based on a procedurally generated fractal pattern. You can adjust the appearance of the distortion using the controls.
- Distortion: Adjusts the intensity of the distortion applied to the layer.
- Scale: Sets the scale of the distortion
- Diffusion Bias: Set the amount of the image that is affected by diffusion blurring. Increasing the setting will make the blur more prevalent.
- Diffusion Strength: Sets the strength of the blur in the areas affected by diffusion
- Distortion Rotation: Sets the angle in which the distortion is applied.
- Distort Single Axis: Enabling this option applies the distortion in a single direction. The specific angle used can be set with the Distortion Rotation setting above.
Animation
By default the Energy Distortion is animated. You can set the details of the movement within the effect here.
- Wind Direction: Sets the direction of the movement
- Wind Speed: Sets the speed of the movement along the axis determined in the Wind Direction, by altering the position of the noise. Higher values will create more movement in the distortion.
- Noise Speed: Sets the speed of the movement of the fractal noise the distortion is based on. This speed alters the shape of the noise, while the Wind Speed property affects its position.
Noise
- Seed: Acts as a randomizer for the shape of the noise. Each seed value sets a unique starting shape for the procedurally generated noise.
- Interpolation: Provides options for how the noise is interpolated. Linear Interpolation uses the simplest path to connect points in the rectilinear grid the effect is based on. Cubic interpolation uses smoother paths to interpolate the grid. Neither option is better than the other, they just provide different options for the effect.
Transform
Multiple layers of fractal noise are combined to create the final noise that the distortion is based on. The Transform controls adjust the primary noise, while the Sub Settings alter the sub levels of noise that add detail to the distortion.
- Position: Sets the position of the primary fractal noise the distortion is based on.
- Use Layer: You can select another layer on your timeline, to parent the position of the distortion to that layer
- Rotation: Sets the rotation of the primary fractal noise
- Axis Scale X: Alters the aspect ratio of the primary fractal noise by changing its scale along the X axis. Higher values will stretch the distortion horizontally.
- Axis Scale Y: Alters the aspect ratio of the primary fractal noise by changing its scale along the Y axis. Higher values will stretch the distortion vertically.
Sub Settings
- Sub Levels: Sets the number of sub levels that are used to calculate the distortion. Higher levels create greater detail in the distortion.
- Influence: Controls the intensity with which the sub levels alter the primary noise.
- Scale: Sets the scale of the sub levels, thus impacting the size of the detail added by the additional sub levels.
- Rotation: Alters the angle of the sub levels which are laid over the primary noise.
- Offset: Sets the position of the sub levels in relation to the primary noise position.
- Center Subscale: Enabling this option links the center of all subscale layers, so they stay aligned when offset using the above control.
Twirl
Twists the layer around the effect’s center point. The center point stays in place, while the pixels at the edge of the radius are distorted by the angle you choose.
- Angle: Sets the number of degrees by which the area inside the radius will be rotated.
- Center: By default the twirl is centered in the frame, but you can reposition the center if you wish.
- Position: Sets the exact location of the effect center, using X and Y values.
- Use Layer: Select any other layer on the timeline to use it’s position as the center of the effect. When a layer is selected, the Position property above functions as an offset from the selected layer’s position.
- Radius: Determines the distance from the center point to which the distortion will extend.
- Wrap: Controls how the distortion will be wrapped when it reaches the edge of the frame.
- No: No wrapping is applied.
- Tiled: A second identical copy of the image is used alongside the original to fill the wrapped area.
- Reflection: A mirrored copy is used alongside the original to fill the wrapped area.
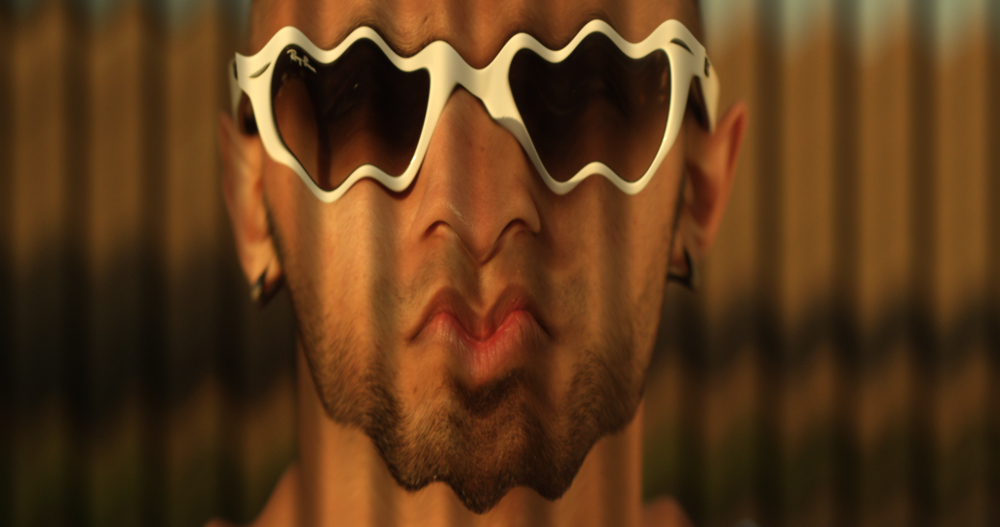
Waves
Creates a corrugated effect. You can also choose another layer as the displacement source and alter the lighting on the bright and dark sides of the wave.
- Amplitude: Sets the height from the peak of the waves to the bottom of the valley between waves.
- Frequency: Sets the distance from one peak to the next.
- Angle: Rotate the dial to define the angle, in degrees, at which the angle travels, from one peak to the next.
- Displace Angle: Distorts the position of the underlying image shown within the waves.
- Center: By default the effect is centered in the frame, but you can reposition the center if you wish.
- Position: Sets the exact location of the effect center, using X and Y values.
- Use Layer: Select any other layer on the timeline to use it’s position as the center of the effect. When a layer is selected, the Position property above functions as an offset from the selected layer’s position.
- Phase Speed: Adds movement to the waves in the direction of the Angle wheel above. Set the speed of the movement here.
- Distance To Image: The distance from the waves to the underlying image affects how the image is refracted through the waves. Higher value make the image more distant, and therefore smaller.
- Wrap X: Controls how the blank areas at the left and right edges of the frame will be handled, when the Distance To Image is increased.
- No: No wrapping is applied, and the area is left blank.
- Tiled: A second identical copy of the image is used alongside the original to fill the wrapped area.
- Reflect: A mirrored copy is used alongside the original to fill the wrapped area.
- Wrap Y: Controls how the blank areas at the top and bottom edges of the frame will be handled, when the Distance To Image is increased.
- No: No wrapping is applied, and the area is left blank.
- Tiled: A second identical copy of the image is used above or below the original to fill the wrapped area.
- Reflect: A mirrored copy is used above or below the original to fill the wrapped area.
- Illumination: Gives the waves themselves a 3D appearance by shadowing the valleys between the waves.
Distortion Map
The waves effect can be limited to a specific area of the frame by using another layer as a distortion map
- Source Layer: Choose any other layer on the timeline to be used as a source for the distortion.
- Blur: Softens the detail of the distortion generated from the source layer.
- Channel: Choose the channel of the source layer which will be used as a map to generate the distortion.
- Invert: Reverses the values in the selected channel to invert the distortion.
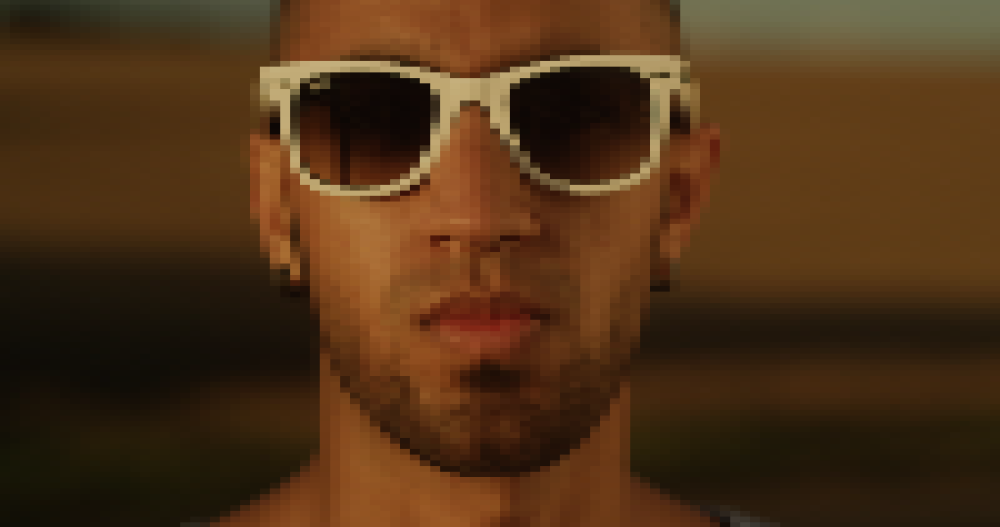
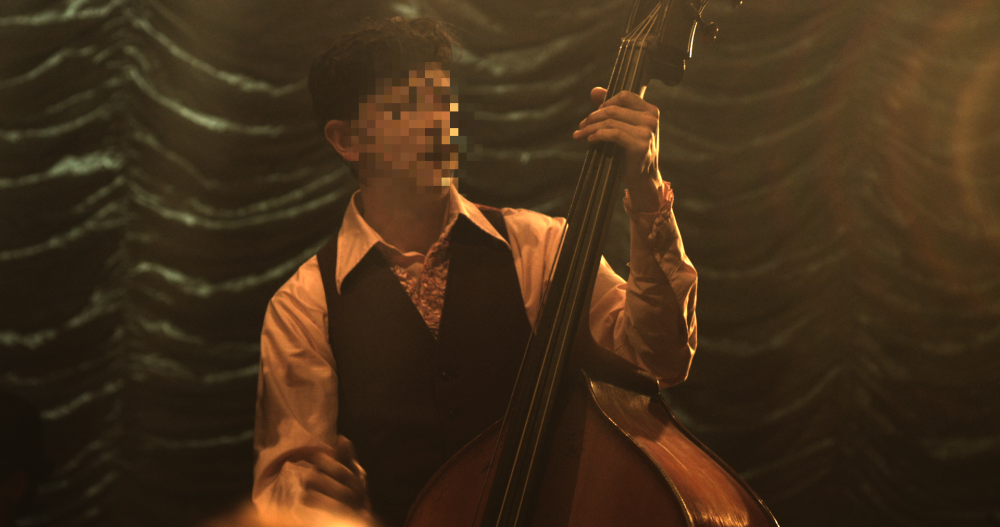
Witness protection
This is a quick way to obscure an item within a shot, such as a face, number plate or product logo. You can choose between blur or pixelate styles.
- Preset: Choose from a variety of presets that give you different looks for the effect.
- Size: Sets the diameter of the area that will be distorted.
- Edge Softness: Feathers the edges so they blend softly into the rest of the frame.
Shape
- Scale X: Adjusts the width of the distortion area.
- Scale Y: Adjusts the height of the distortion area.
- Rotation: Rotates the area by the number of degrees to which the dial is moved.
Position
By default the effect is centered in the frame, but you can reposition the center if you wish.
- Center: Sets the exact location of the effect center, using X and Y values.
- Use Layer: Select any other layer on the timeline to use it’s position as the center of the effect. When a layer is selected, the Center property above functions as an offset from the selected layer’s position.
- Method: Choose how the detail within the distortion area is obscured.
- Pixelate: Creates a pixelated mosaic of the area, by dividing it into large blocks and filling each block with the average color of all pixels it contains. Selecting this option reveals the Pixelate controls below.
- Blur: Applies a blur within the distortion area. Selecting this option reveals the Blur controls below.
Pixelate
- Block Size: Sets the size, in pixels, of each block within the pixelation.
- Randomize Source: Scrambles the position of the blocks to further obscure their contents.
Blur
- Radius: Sets the radius of the blur. Larger numbers hide the details to a greater extent.