
The BIM Server page shows a grid listing the BIM files uploaded for this project.

To upload a new BIM file click the Select button, select a file from your computer, then click the Select Facility link and select a facility from this project that you want to associate with the uploaded file. If you are uploading a file that was not uploaded before click the Upload button. If you are uploading a file to replace the existing file then select the file you want to replace by checking the radio button in the grid next to the file’s name and then click the Replace button. You can download the file from the grid by selecting it (check the radio button) and then clicking the Download button.
Click the BIM button in the grid to be transferred to the Model Viewer page.
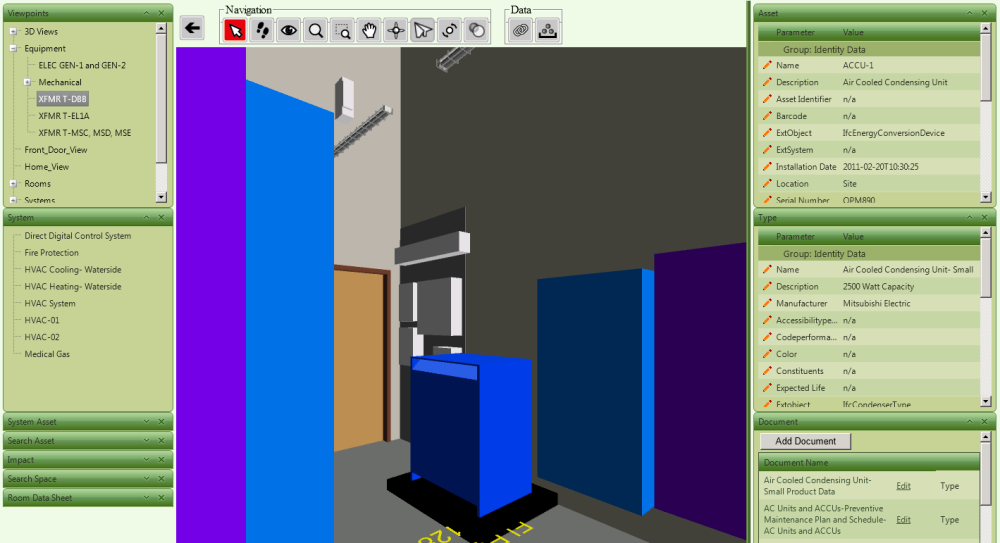
The upper left section is called Viewpoints. These are preset camera views allowing for quick navigation within the model.
The section below the Viewpoints is called System. These are the same systems you can see and edit on the COBie: System page. When you select a system the model will highlight the system’s components (assets), and these components will be listed in the section called System Asset (below the System section).
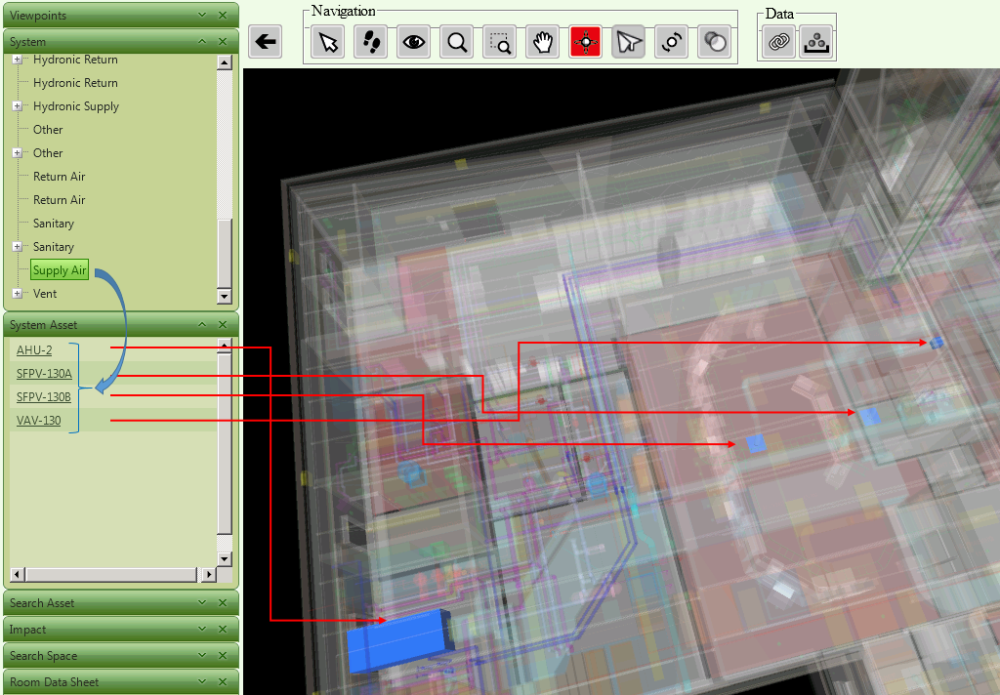
You can click on any component (asset) in the System Asset section to focus on the selected object in the Model Viewer. The component’s properties will be shown on the right side of the page.
The Search Asset section allows searching for components (assets). You can select an Asset or Space or Type option in the first dropdown and to search by that category. For example, you can search for any component that has “VAV” in its name, or all components that are located in a space which name contains “133”. Clicking on the found value will focus on the selected object in the Model Viewer.
The Impact section shows which entities are affected by the selected component.
The Search Space section allows searching for spaces (locations) within the model, and displaying the found spaces as objects in the model while showing all components assigned to the found space in the Room Data Sheet section below. The space properties are displayed on the right side.

The Asset (Component) section shows the component (instance, asset) properties, the same properties that you can edit on the COBie: Component page. The section below is called Type and it lists type properties, the same properties that you can edit on the COBie: Type page. There is a Document section below the Type section for showing the documents assigned to the selected object.
The central part of the page is used for the Model Viewer. You can use the Navigation tools to manipulate the image view. The tools include (from left to right): Select, Walk, Look Around, Zoom, Zoom Box, Pan, Orbit, Fly, Turn Table, Reset Model. Most of the standard navigation tools are familiar. The Reset Model button is used to remove transparency when in a “found object” mode. Since most of the objects can be obstructed from viewing by other objects, the Search function makes the rest of the model semi-transparent and the found object opaque. You can use the Reset Model button to see the model in a standard, non-transparent way.
The Data section above the Model Viewer includes Link to Data, Group Selection, and Add Document buttons. The Link to Data functionality allows assigning database values to graphical objects within the Model Viewer. Select an object in the Model Viewer and click the Link to Data button. The object may have some data already assigned or it may have no data.

The popup will show a grid with the facility components (assets). Find an asset record you need using the Search above the grid. You can search by a value in the component (asset) name, or all components in the space (select the Space option in the dropdown next to the Search textfield), or all components of the type (select the Type option in the dropdown), or search by component’s Tag Number. Select the component by checking the box next to its name and then click the Select button below the grid. The values from the selected record will be shown in the Properties sections on the right from the Model Viewer. You can also notice that the Link Status field for the assigned record now has the value “Y”, which means this database record is linked to a graphical object. The default value for linking data is “Overwrite” (in the dropdown next to the Search button), but you can also choose “Merge” or “Existing” to either merge data or use the current values of the graphical object.
The left arrow button at the top will bring you back to the BIM Server page.
Post your comment on this topic.