
By using Import the existing project to workspace function, you can import the project not existed in the workspace into the workspace.
Import Test
- Click [File] -> [Import].
![]()

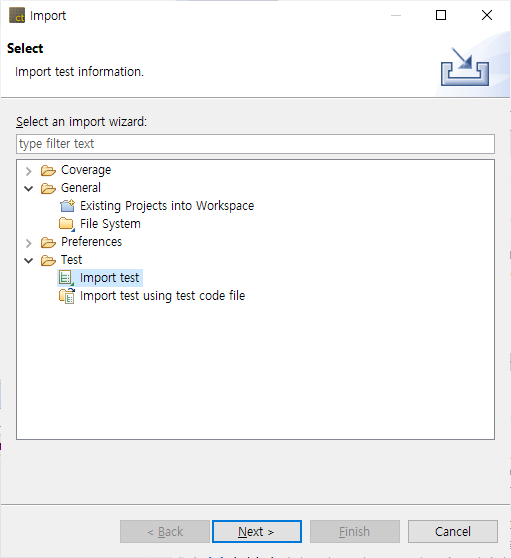
- Select [Test] -> [Import Test] and click [Next].
![]()
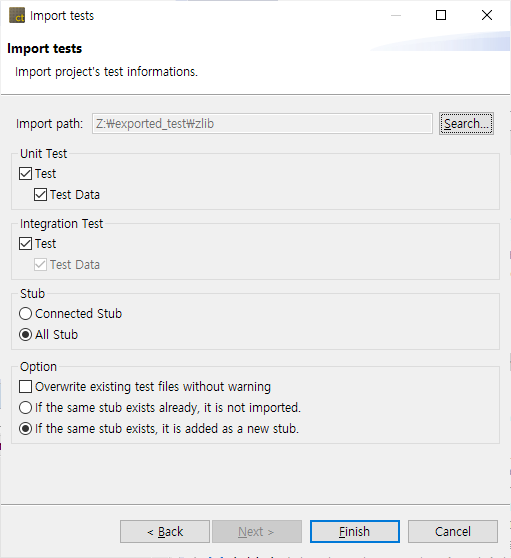
- Enter the information for the test to be imported and click [Finish].
![]()
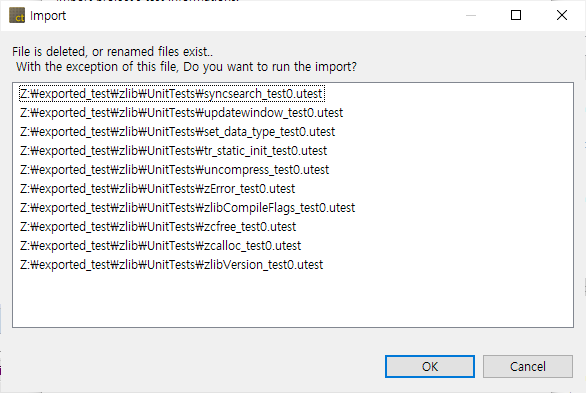
- If there are items that the name has been changed or the file has been deleted when importing the test information, the notification windows is displayed, allowing you to select whether to import the information except for that items. This notification window is displayed only if the information was exported from 2.6.14 or later version at a time. If the information is exported from the other menu and previous version, the notification is not displayed.
![]()
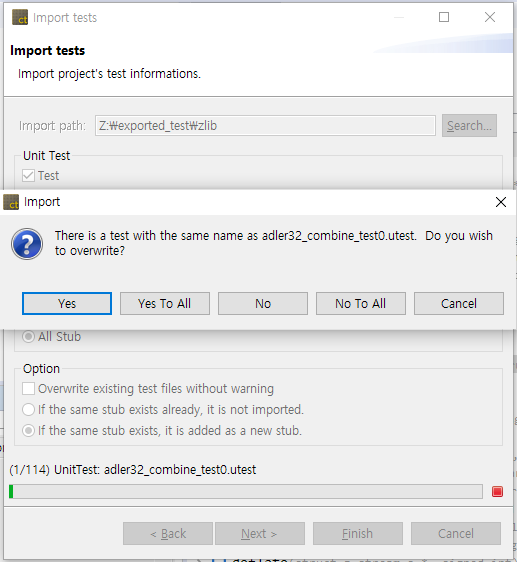
- If the same test exists in the project, select whether to overwrite the test. Select [Yes] to overwrite and select [No] to cancel the import.
![]()
- After the import has completed, it is applied to the selected project.
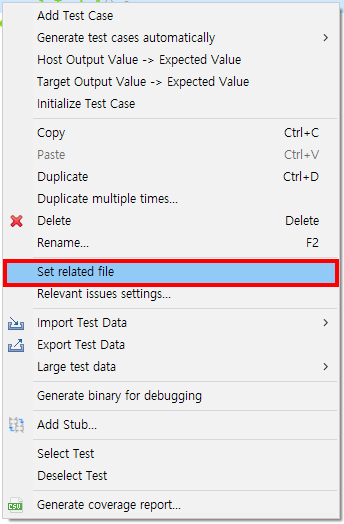
*The status icon(?) ‘the test that cannot find the function to be tested in the source file to be tested’ is displayed, the associated file can be set by using the [Set related file] context menu.
Import information exported from 2.6.14 or earlier
- Enter the path to import the test in [Import path].
![]()
- If [testinfo.export] file exists in the test path to be imported, select the directory containing the file.
If you import the information exported separately from 2.6.14 or less version, select the higher-level directory containing the information exported.
- If [testinfo.export] file exists in the test path to be imported, select the directory containing the file.
- In [Unit Test] group, check whether to import [Test] and [Test data] respectively.
- In [Integration Test] group, check whether to import [Test].
- The test and data must always be in the same directory, and if it is not, the data is not imported.
- In [Stub] group, select the stub to be imported among [Connected Stubs] and [All stubs].
- For the stubs created in 2.3 version, or the stubs migrated to 2.6, if the same stubs exist in the project, the import cannot be carried out.
- For the stubs created in 2.6 version, if the same stubs exist, you can select either not to import them optionally or to create as a new stub additionally.
- There is no feature to link the stubs to the test in 2.3 version, so you need to link directly to the test when migrating to version 2.6 or later.
- In [Option] group, select whether to overwrite the existing test files if they exist and how to handle them when the same stub exists.
Import Test from Test Code file
- Click [File] -> [Import].
![]()
- Select [Test] -> [Import test using test code file] and click [Next].
![]()

- Click [Add…] and select the test to be imported.
![]()

- Click [Finish] to apply the selected test to the selected project.
*The status icon(?) ‘the test that cannot find the function to be tested in the source file to be tested’ is displayed, the related file can be set by using the [Set related file] context menu.
Import Coverage
- Click [File] -> [Import].
![]()
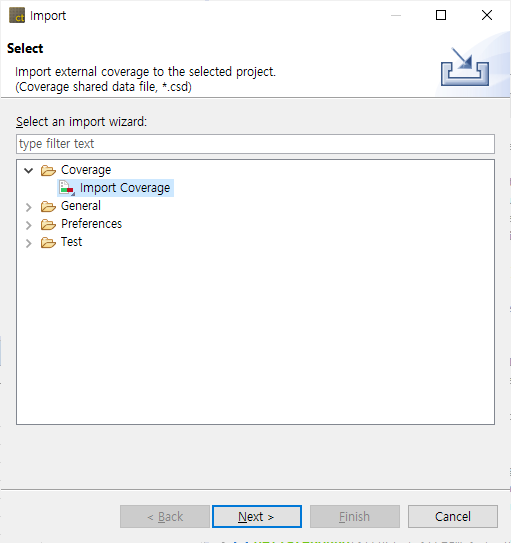
- Select [Coverage] -> [Import Coverage] and click [Next].
![]()
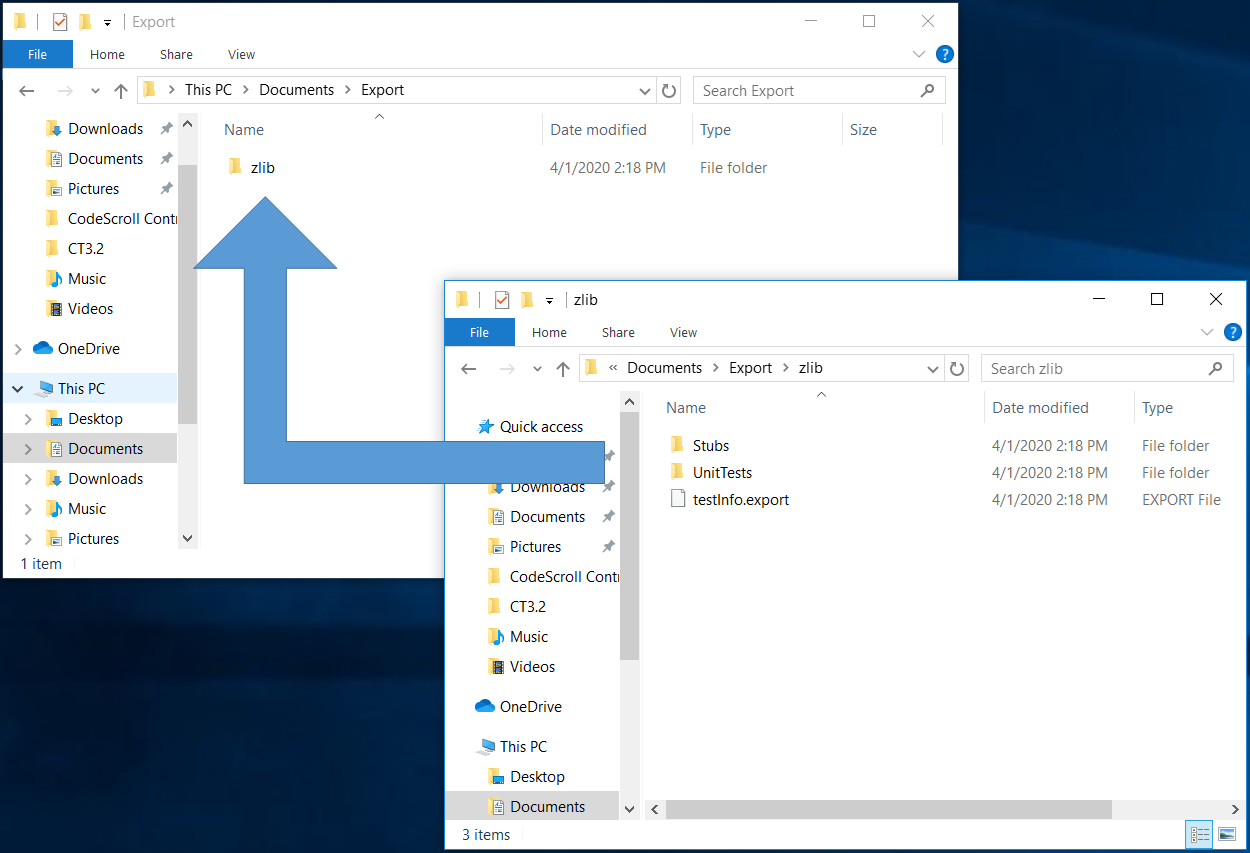
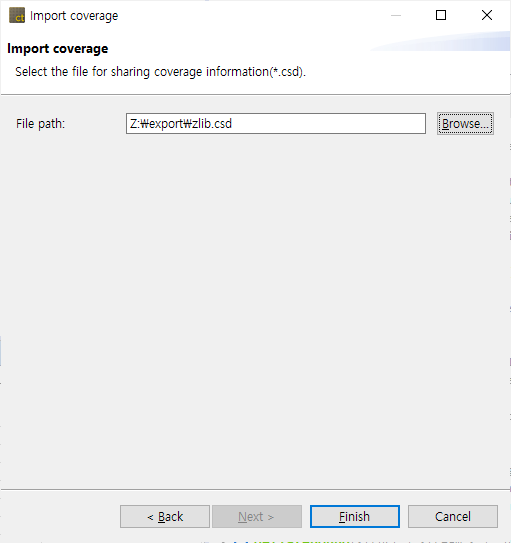
- Enter the path of coverage file to be imported and click [Finish].
![]()
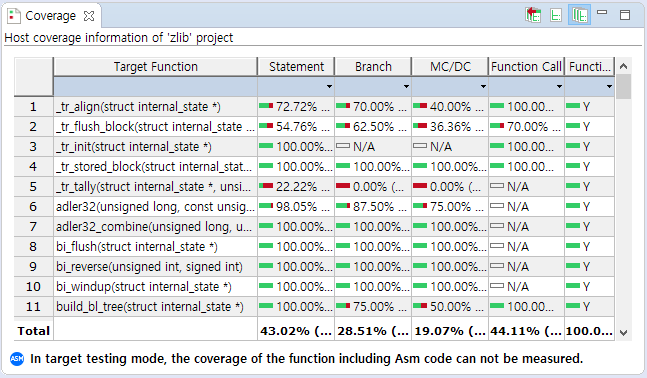
*The imported coverage information can be checked by selecting [Show full coverage (Include External Coverage)] in the toolbar menu of Coverage view.
Toolchain
You can import the toolchain information exported by using the Import function.

- In the main menu, click [File] -> [Import]. The Import wizard is opened.
- Click [Preferences] -> [ToolChain] and click [Next].
- If you select the file (*.tch) to be imported, the list of toolchains included in the selected file are displayed.
- Select the toolchains to be imported from the toolchain list.
- If the toolchain to be imported uses the same compiler as the existing toolchain, or if the toolchain name is duplicated with the name of the existing toolchain, the import status becomes “Need to modify”. You can change the toolchain name to be imported in the [Select how to resolve] window displayed when clicking [Next>] button.
![]()

- Click [Finish].
Import Project
Using the Import Project function, you can import a project exported from another PC.
- Click [File] -> [Import] in the main menu. The Import Wizard opens.
![]()
- Click [General] -> [Import Project] and then click the [Next] button.
- Click the [Browse] button to locate the exported project directory. When you select a directory, the toolchain associated with the project to import is automatically selected. If you don’t have a suitable toolchain, you need to import the toolchain using the toolchain export/import feature before importing the project.
![]()

- Click the [Next] button.
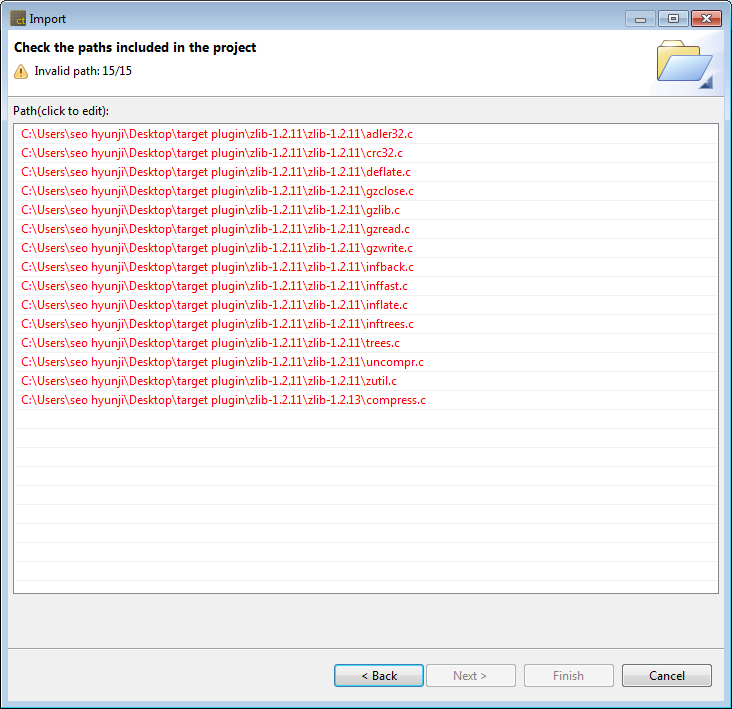
- You can check the path information included in the project to be imported. Invalid paths are marked in red and can be modified by clicking with the mouse or pressing the F2 key.
![]()
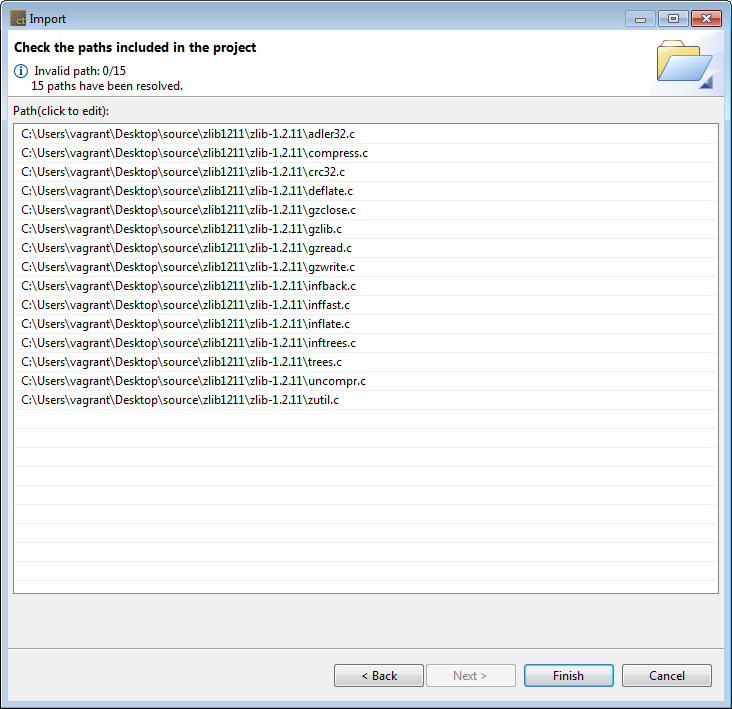
- If you edit one path, all paths that can be found in the relative path are automatically corrected. The number of modified paths is displayed at the top of the wizard.
![]()
- Click the [Finish] button.
File System
You can add the source files to the project by using Import File System function.
- In the main menu, click [File] -> [Import]. The Import wizard is opened.
![]()
- Click [General] -> [File System] and click [Next].
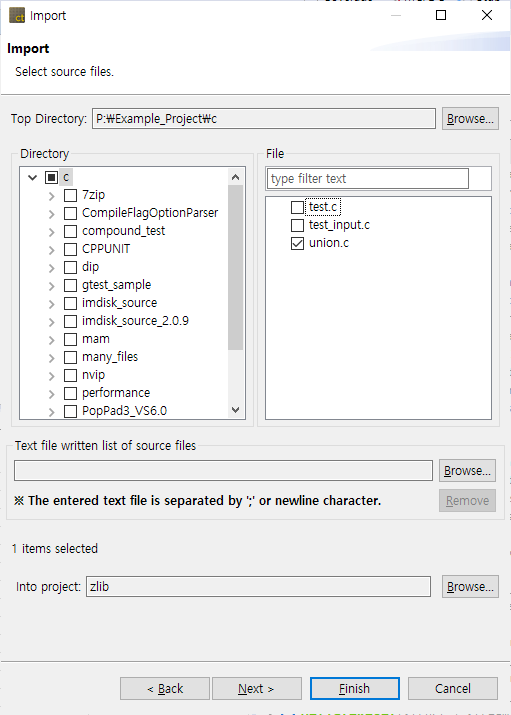
- Select the top-level directory path containing the source file to be added by clicking [Browse…] button.
- Select the source file to be added.
- Select the target project that the selected source file will be added to by clicking [Browse…] button.
![]()
- Click [Next].
- Select the module that the source file will be added from the list of modules included in the project.
![]()

- Click [Finish].
Need more help with this?
Don’t hesitate to contact us here.