
This adjustment is done in 4 steps:
- Setting the duration of the upper alarm limit
- Setting the temperature of the upper alarm limit
- Setting the duration to the lower alarm limit
- Setting the temperature of the lower alarm limit
1. and 3. Setting the HI and LO alarm durations, they are completed in the same manner
| The 1st digit of the duration of the alarm limit is flashing. |  |
|
| The 2nd digit of the duration of the alarm limit is flashing. |  |
|
| The 3rd digit of the duration of the alarm limit is flashing. |  |
|
| The 4th digit of the duration of the alarm limit is flashing. | 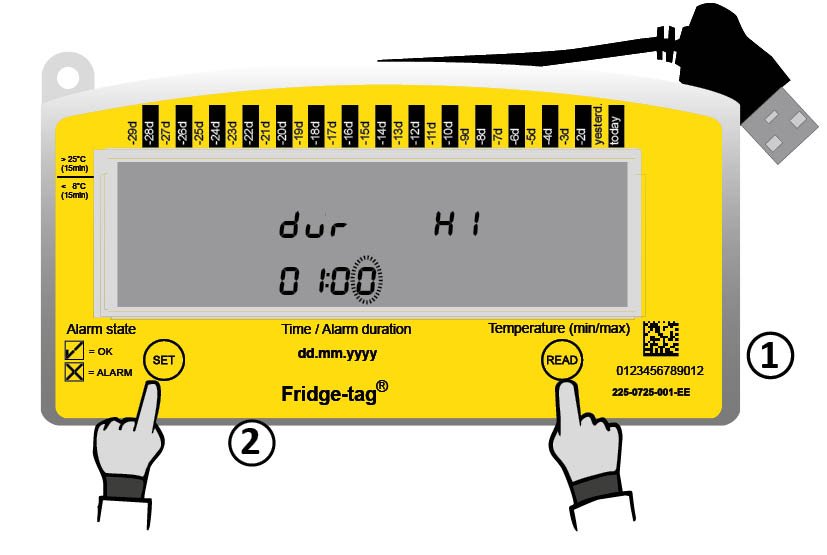 |
|
The duration of the alarm limit is now set.
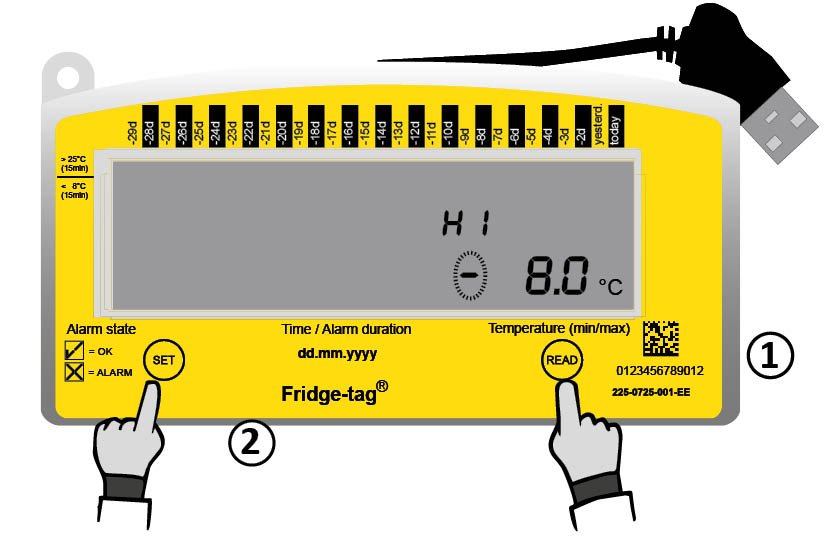
2. and 4. Setting the HI and LO alarm temperatures, they are completed in the same manner
First you have to choose the range of the desired temperature limit. You have the choice between negative and positive temperatures. In case of a positive limit in Fahrenheit you may further choose if the limit shall be equal or above +100°F. This choice is done by repeatedly pressing READ until the desired range is indicated.
Note: The temperature measurement unit (°C/°F) can only be changed after the device is activated in the menu. Learn more.
Instruction for setting a positive temperature limit between 0°C/0°F and +55°C/+131°F (external sensor)
 |
|
The next digit can now be set. Press READ until you reach the desired number. Then press SET to confirm it. Then the next digit will start flashing. Continue until all digits of the alarm temperature
are set.
Setting a negative temperature limit below 0°C/0°F
 |
|
The next digit can now be set. Press READ until you reach the desired number. Then press SET to confirm it. Then the next digit will start flashing. Continue until all digits of the alarm temperature limits are set.
As soon as the parameters of the upper alarm limit are set, the first digit of the duration of the lower alarm limit will start flashing. Proceed the same way as you did with the upper alarm limit.
As soon as the last digit of the lower alarm limit is confirmed, the activation is completed.
Connect the device with the external sensor.
Note: In case the desired temperature limit cannot be confirmed, check if the temperature is set within the allowed operating temperature range.