
How to load user configuration settings into a Q-tag® CLm doc device and back up of PDF files
| Step | Image | Description |
| 1 | 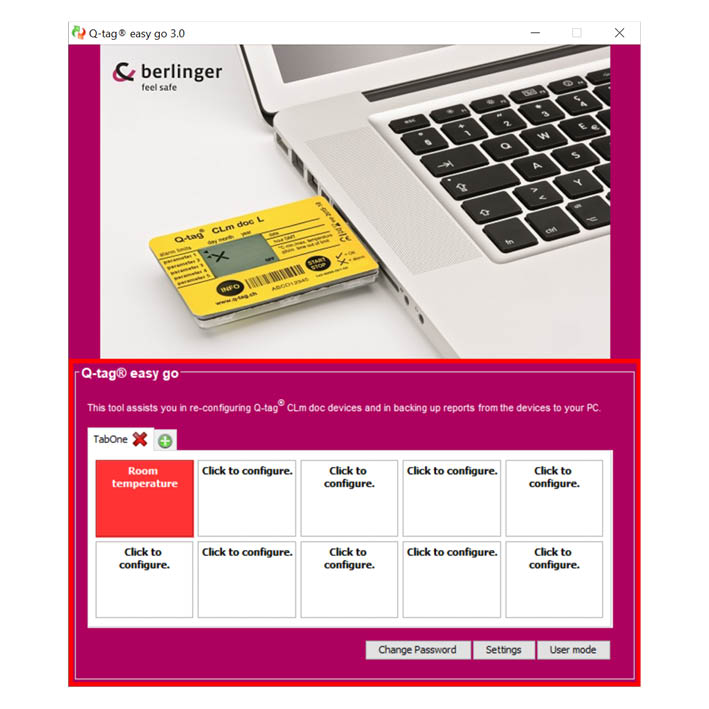 |
1.1 Now insert a Q-tag® CLm doc device to a USB port of your computer 1.2 Click on the desired configuration button in the Q-tag® easy go software. Attention: If you are using the reusable Q-tag® CLm doc LR device any data will be automatically stored in the back up file created in step 1.1. The file will be named by the serial number + a number determined by the number of times the device has been used (e.g. second use will add a 2 to the end of the serial number). |
| 2 | 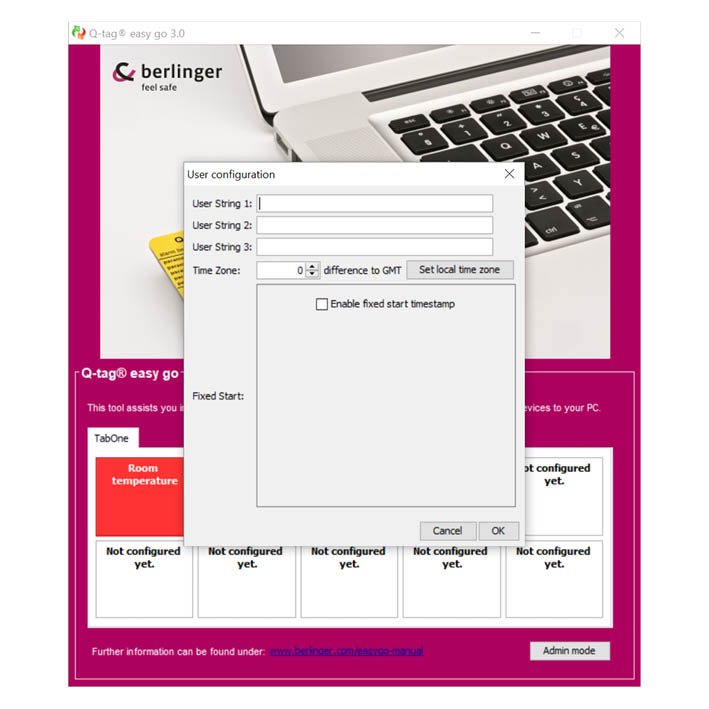 |
2.1 Once you clicked on the requested tab, the window on the left will open. 2.2 The following information can now be set, provided that your device was ordered with any of these extra functionalities:
If your device was not ordered with changeable settings, you are still able to change the information in this window in Q-tag® easy go program but none of these entries will be loaded to your Q-tag® CLm doc device. |
| 3 | 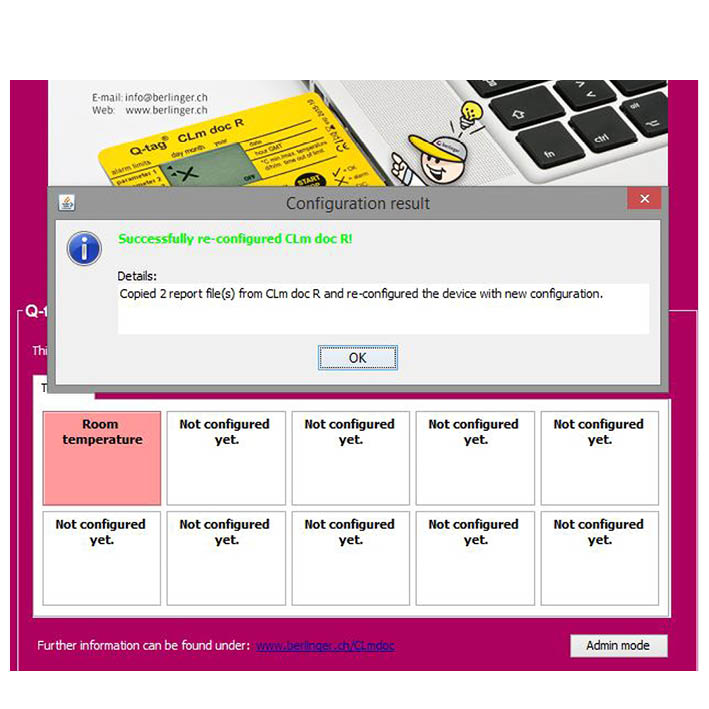 |
3.1 After pressing OK, you will see the following screen with the confirmation of a successful upload of the configuration. The message also gives you the information about how many files the Q-tag® easy go has uploaded from the device to the PDF folder on your computer. |
| 4 | 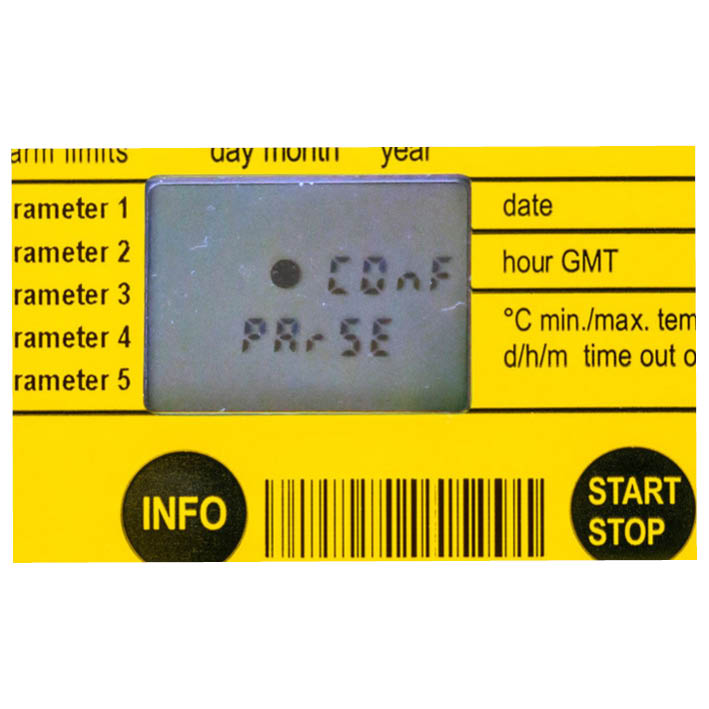 |
Note: The above message is only the confirmation from the computer that it delivered the new file to the device successfully. 4.1 Make sure to always check the devices display after disconnecting it from the computer for the information (Conf PArSE) as shown in the picture. This means that the device is processing the new configuration. |
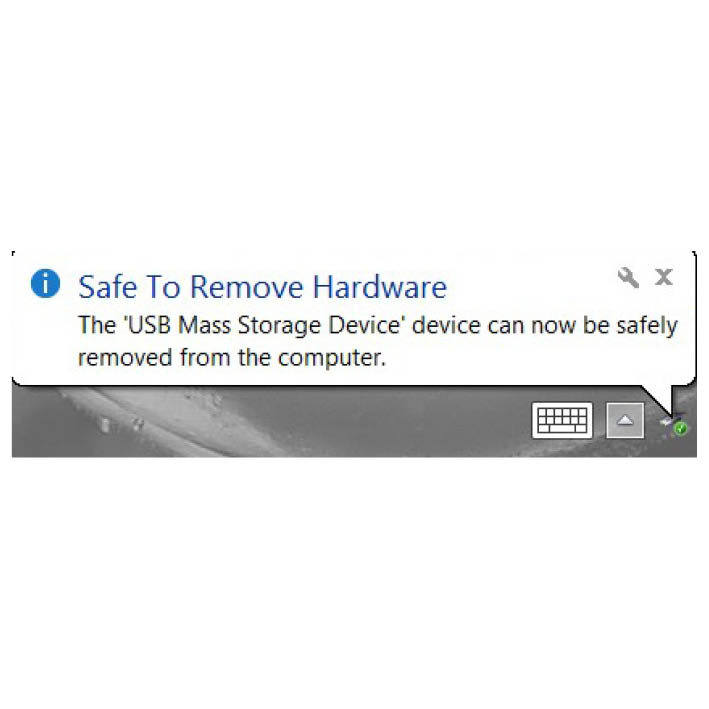 |
Attention: To ensure a successful upload, always use the „safely remove hardware“ function () on your computer in the same way you would remove a standard USB memory stick. |
|
| 5 | 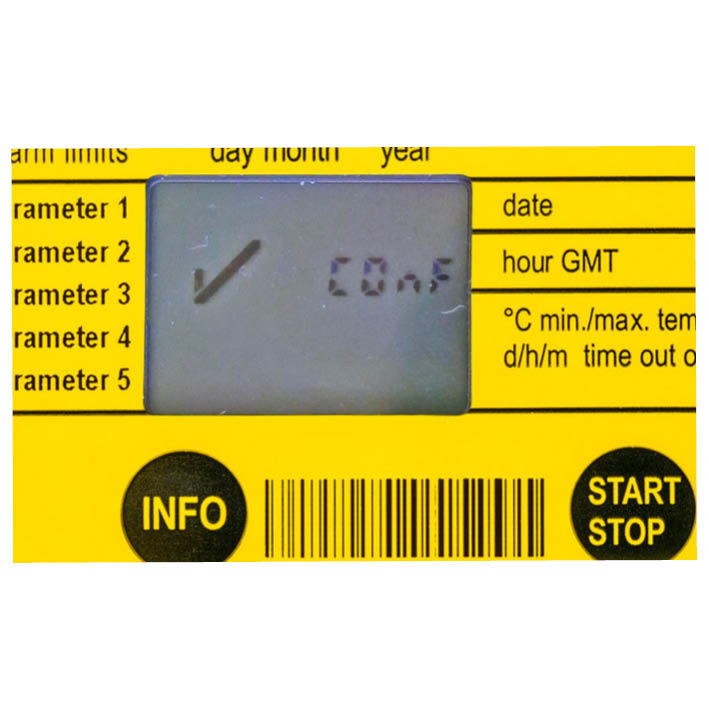 |
5.1 Once the program is uploaded completely the check mark and the word „COnF“ appears on the display for 10 seconds. This means that the upload worked properly and the device can now be used. Note: The display of the device will turn blank after this screen until you start the device again. (To start the device please go to www.berlinger.com/usermanuals) Attention: If a cross instead of the check mark appears, please check if you uploaded an appropriate configuration file for the device. |
If you have further questions of the Q-tag® easy go or your devices, please do not hesitate to contact our support team under: support@berlinger.com
Feedback
Copyright © 2025 Berlinger & Co. AG
—
Powered by 
Post your comment on this topic.