On this page, you will learn how to insert information into your assessment for a property. Below is the list of topics that this article will consist of -
-Property
-Support Document
-Assessment Info
-Occupancy
-Previous Fire Incidents
-Questionnaire
-Risk Assessment
-Fire Equipment
-Actions
Property
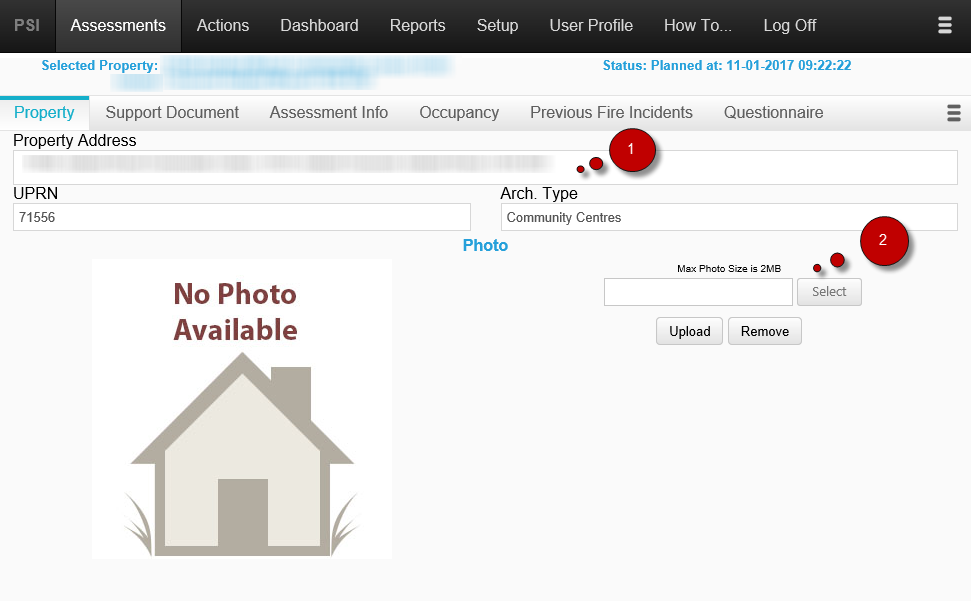
This tab shows the property information this assessment is being made on.
2. You can insert and update a property photo by clicking here and selecting a photo to upload. After you have selected a photo, please press the upload button to upload the photo to the system.
Support Document
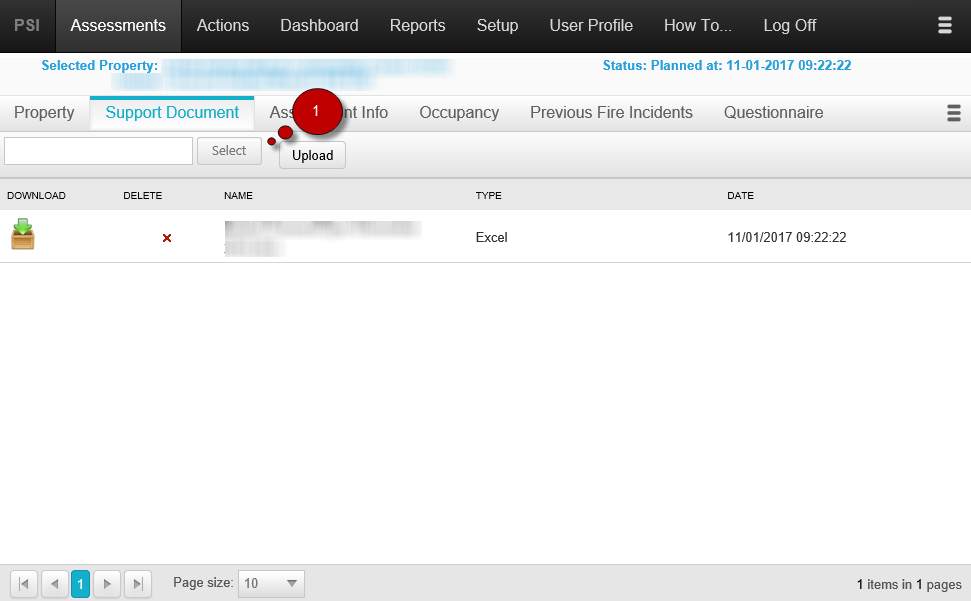
In this tab, you can insert the support documents you would like. These will be attached onto this assessment
1 Press Select
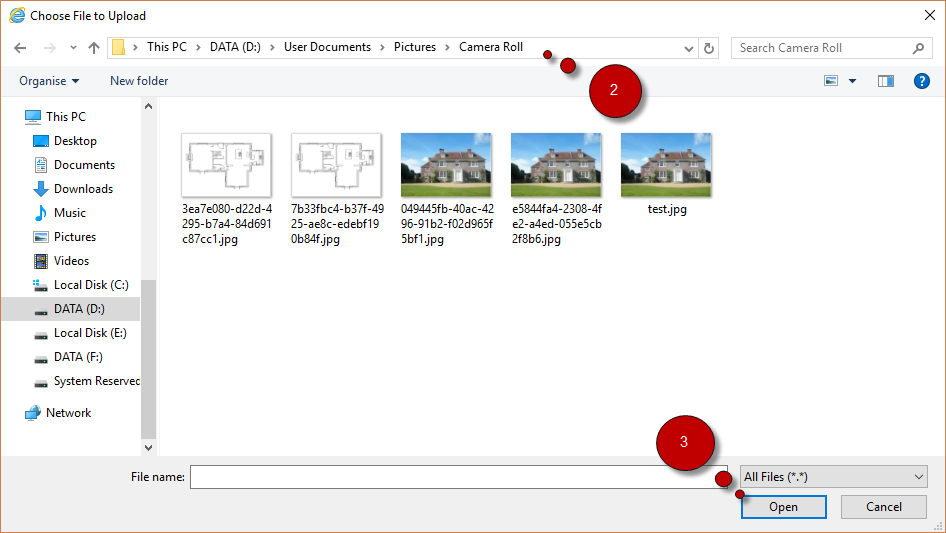
2 Locate the file you would like to attach, and press open.
3 After the photo has been selected, press upload to upload the file to the system.
Assessment Info
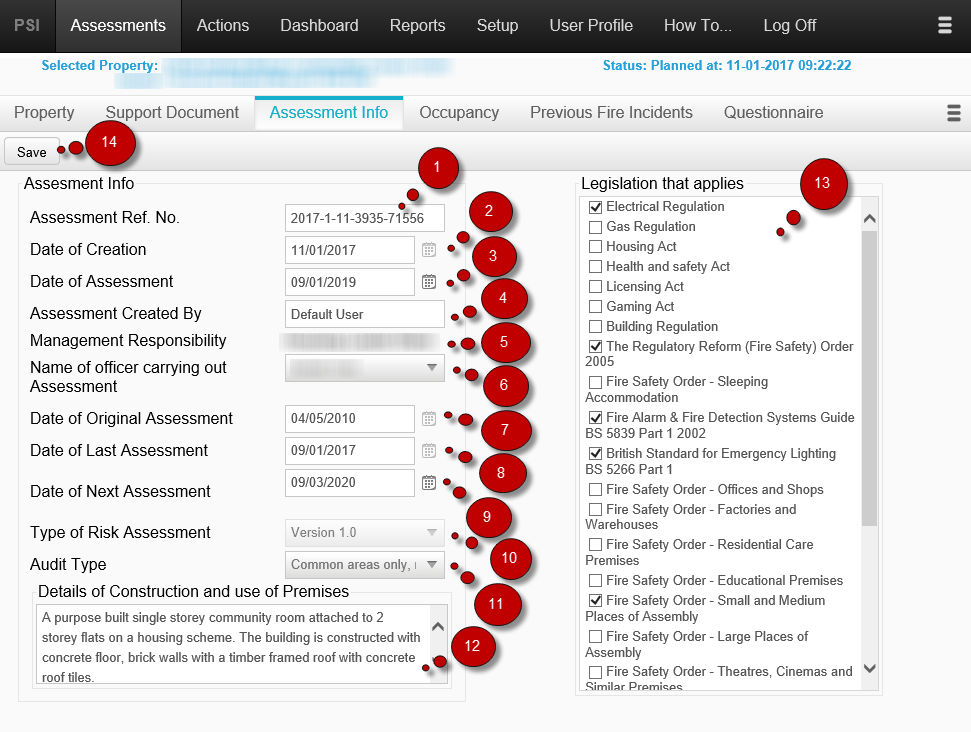
Assessment Information is displayed that was entered during Creation. Some of this information can be altered in this section.
- Assessment Ref.No – This number is automatically generated by the system and cannot be changed.
- Date of Creation – This is the date when the assessment for this property was created, this cannot be changed.
- Date of Assessment – This is the date of the actual assessment, this can be altered by pressing on the calendar sign and selecting a new date.
- Assessment Created By – This field shows who created the assessment, it cannot be changed.
- Management Responsibility – This field cannot be changed.
- Name of officer carrying out Assessment – This displays who will be carrying out the assessment, this field can be altered.
- Date of Original Assessment – This field cannot be changed.
- Date of Last Assessment – This field cannot be changed.
- Date of Next Assessment – This field can be changed by selecting the calendar icon and choosing a new date for the assessment.
- Type of Risk Assessment – This cannot be changed.
- Audit Type – This can be changed.
- Details of Construction and use of Premises – This can be changed and more information can be added.
- Legislation that applies – New options can be selected here and updated, or de-selected.
- Save button – After you have made your changes, press the save button to update the assessment with the latest information.
Occupancy
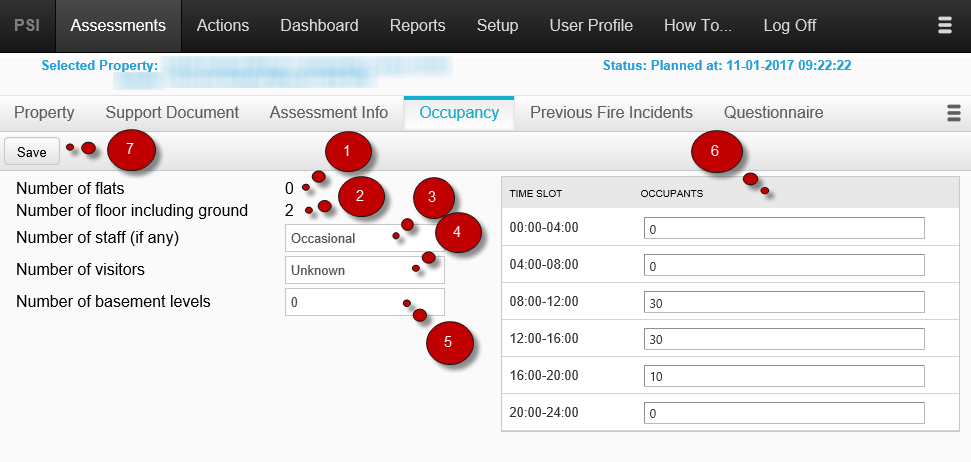
- Displays the number of flats for the selected property. This cannot be changed.
- Displays the number of floors within the selected property. This cannot be changed.
- Displays the number of staff for the selected property. This can be altered by simply entering a new value in.
- Displays the number of visitors for the selected property. This can be altered by simply inputting a new value in.
- Displays the number of basement levels for the selected property. This can be altered by simply inputting a new value in.
- Displays the number of people using the property at different times during the day. This can be altered by simply entering values in each time slot.
- After you have inputted all the information, do not forget to press save to update or save the information on this tab.
Previous Fire Incidents
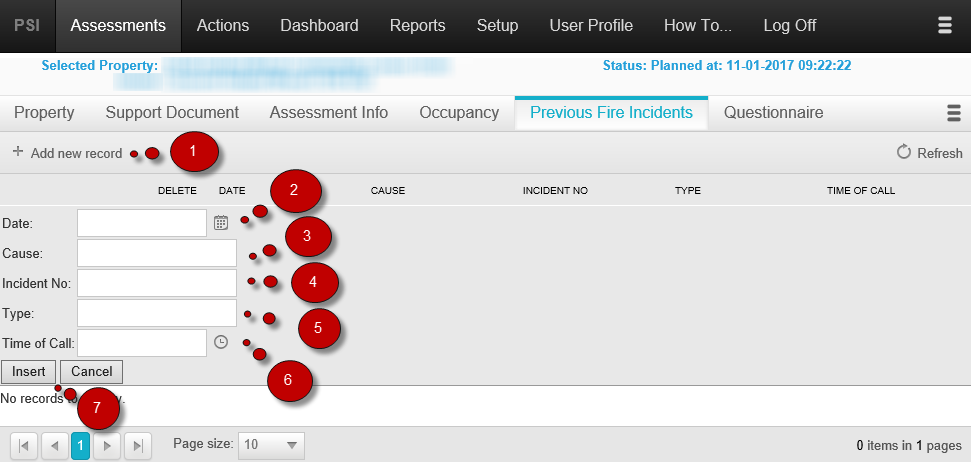
- To insert a new record, press the add new record label
- Insert the date of the incident
- Insert the cause of the incident
- Insert the incident Number
- Insert the type of incident.
- Insert the time of call of the incident.
- After you have completed entering the data, press the insert button
Your fire incident should be populated in the system.
Questionnaire
View the following topic to know how to enter the Questionnaire: Enter Questionnaire
Risk Assessment
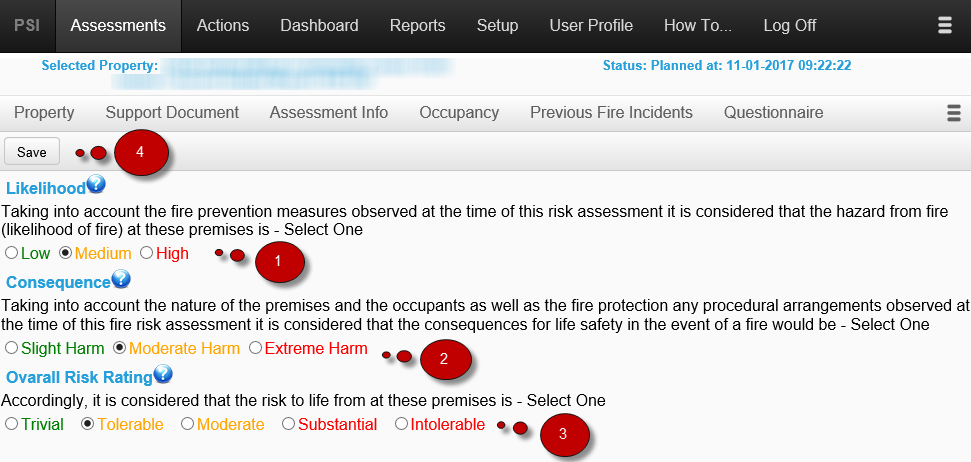
- Select the Likelihood for the risk
- Select Consequence
- Select Overall Risk Rating for the Assessment
- Click ‘Save’
Fire Equipment
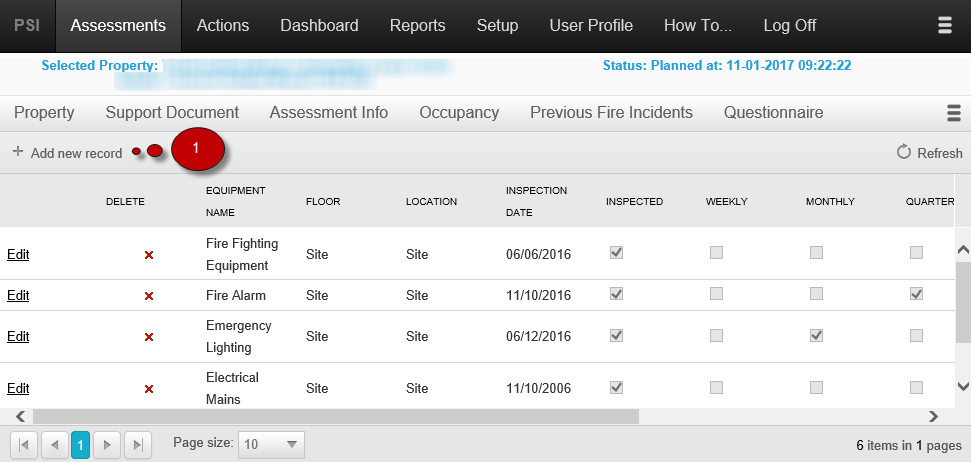
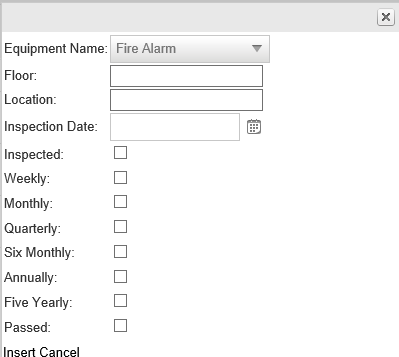
- To add new fire equipment press the add new record label.
After inserting all the information about the equipment, press the insert button and the item will be stored in the database
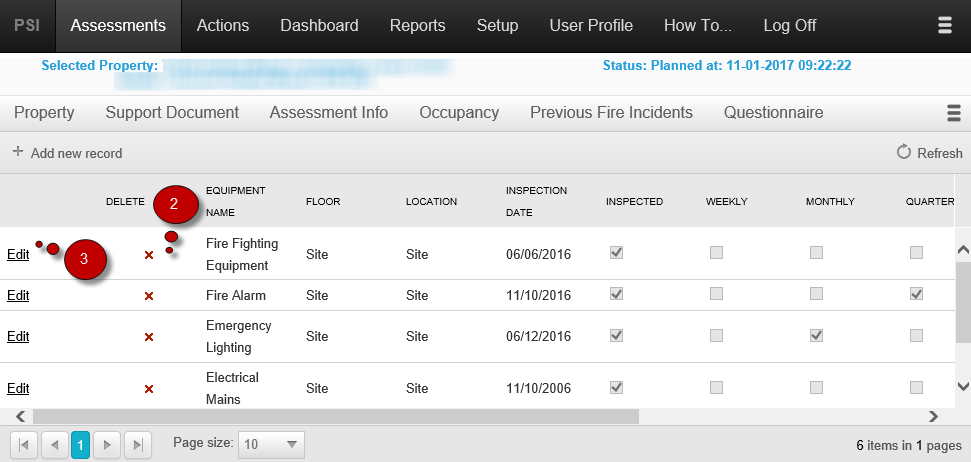
2. You can delete your fire equipment item by clicking the red x button next to it.
3. You can edit your fire equipment item by clicking the edit button.
Actions
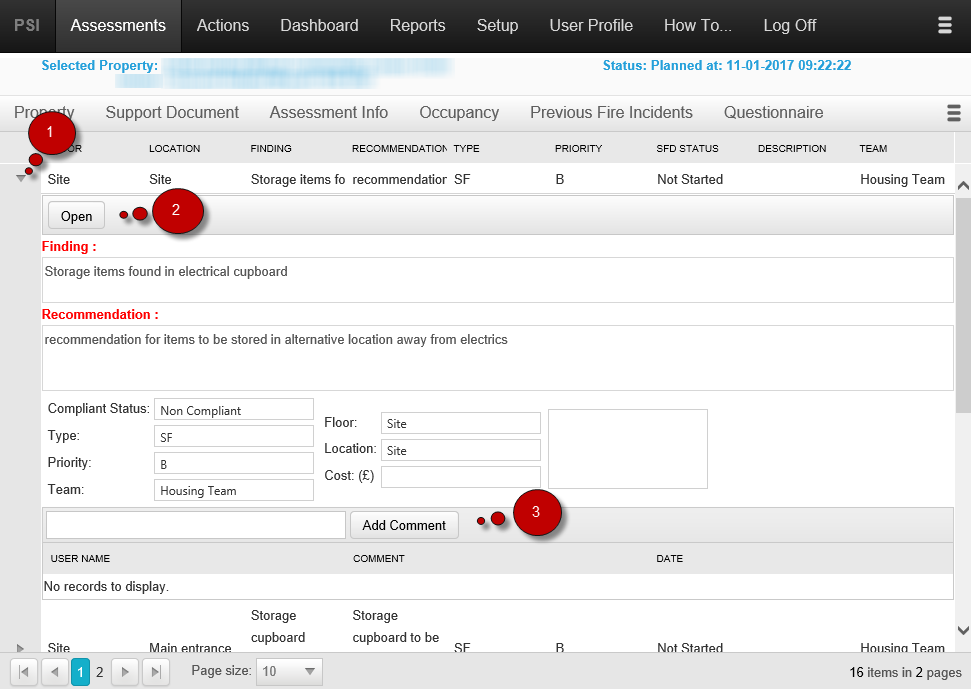
- Press the triangular icon to expand the Action
- Press Open to open the Action
- You can add a comment onto the action by inserting text here and pressing the add comment button


Post your comment on this topic.