
- Limit requisitions to no more than 25 lines of items
- All requisitions should be completed with detailed information. Since the system emails/faxes purchase orders to vendors, attachments are not forwarded. Most information can be added in the Items section of the requisition.
- After receiving the goods/services in Alio, if you receive an invoice, please scan and submit it to the BOSC (Business Office Support Center). Packing slips are not an acceptable backup for making payments. An invoice is required to release payment.
- Do not print or send copies of requisitions to the Business Office. Approval signatures are stored electronically in the system.
- Select vendors carefully. A check will be issued for the vendor name printed on the purchase order. Vendors cannot be changed after a requisition is approved. If you are unsure which vendor to use, submit a ticket to the BOSC (Business Office Support Center).
- Requisitions cannot be issued for less than $50
- All standard good orders must contain a separate line for shipping. Please estimate approximately 10% of the total order if the amount is not known. If shipping is free, you can create a line item with a zero-dollar amount.
- All purchase orders greater than $3,300 require 2 quotes. Please complete the quote form, scan in and submit to the BOSC (Business Office Support Center).
- Quotes for items less than $3,300 are not required to be maintained by the Business Office; please do not forward them. Retain these quotes for your records.
- * To create a new requisition, click on Requisition Entry/Approval under the Main Menu.*
![]()
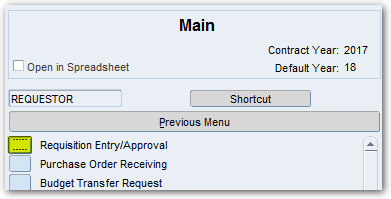
- Generate a requisition number by clicking the blue requisition number button and tab over to the Vendor field.
![]()

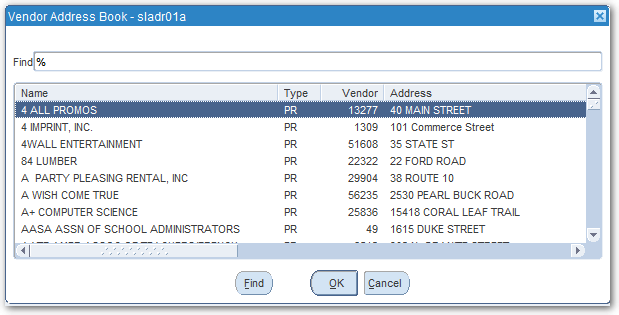
- If you know the number of the vendor you’re using, you can enter it into the first vendor field and then tab, a dialog box will come up to confirm your selection and intended address. The vendor’s information will automatically populate. If you type it incorrectly, the search list will appear. Tab over to the Order field.
![]()
![]()

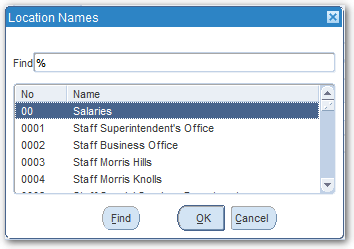
- Enter an Order Location and a Ship Location. Both fields must be completed for your requisition to be approved. Use the black arrow next to the field to display a list to choose from. Tab over to the Requestor field.
![]()
![]()

- The requestor field should be the contact person for the order if the vendor has questions. Tab over to the Phone field. Enter the phone number of the person you listed in the Requestor field. This will print on the PO. Tab down to the Order Type field.
![]()
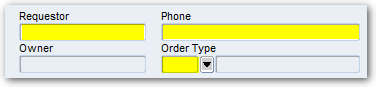
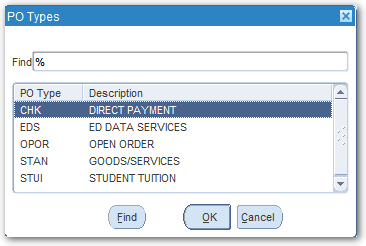
- There are multiple Order Types; a complete list is included in this manual. Select the appropriate type. Tab down to the Internal field.
![]()
- Use this field to enter internal notes, which the Business Office sees. If you are entering a direct check requisition, a BOSC ticket number is mandatory in this field. The notes in this field are NOT printed on the PO. Tab over to the Header Code field.
![]()

- There are multiple Header Codes. A complete list is included in this manual. Select the appropriate type. Tab down to the PO field.
![]()
![]()

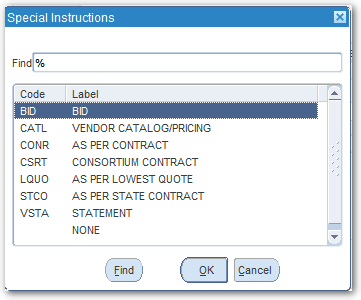
- Use this field to enter anything required or necessary. See the Order/Header Type and Special Instructions table for reference. This field WILL print on the PO. Tab over to the Footer
![]()

- Use this field to communicate to the vendor any packaging or labeling instructions. This field WILL print on the PO.
![]()

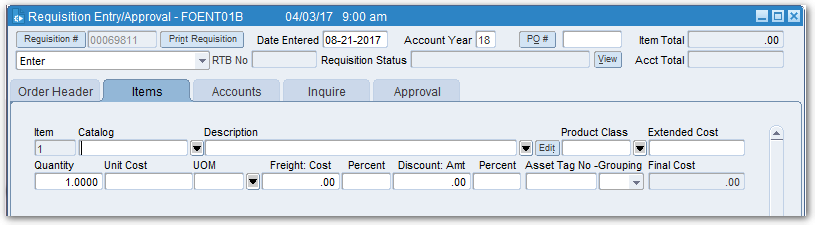
- Once everything is complete on the Order Header Tab, click on the Items tab.
Once on the Items tab, you will enter the details of your order – you can move from field to field by using the Tab key.
Use the following as a guide when entering your items. If your requisition is not entered correctly, it will be disapproved.
- The description of your item must be as detailed as possible.
- Requisitions with multiple sizes or styles (custom garments) must be broken down by size, color, style, etc.
- When inputting anything for recurring annual fees/dues, make sure to denote the school year, i.e., 2017-2018.
- All requisitions for goods/tangible services MUST include shipping, whether actual, estimate, or free. %
- ACTUAL is when you use the amount listed on a quote, proposal, catalog, or website.
- ESTIMATE is when you estimate 10 percent of the total order for shipping.
- FREE is used when quoted free shipping or free shipping is provided as part of the agreement.
- When you enter a zero-dollar line item (i.e., free shipping), you will get a warning, but you can bypass it.
- If you need an additional line item, you can press the + sign icon or press enter at the end of an entry. If you need to delete a line item, you will use the trash can icon.
- When you’ve entered all of your items, click on the Accounts tab to move on.
Item
This is the line item field; it will be used later when on the Accounts tab or in the Receiving Module
Catalog
You will use this field when ordering from the three school supply companies whose catalog is auto-loaded into Alio. When you enter the catalog number and press the Tab key, the description will autofill.
Description
This field is required for all line items. You must be descriptive when filling this out. Be sure to reference color, size, weight, event date, event title, attendees, etc., when applicable. If you need more room to type, use the Edit button.
Quantity
Self-explanatory. Note that this will multiple against your per-unit cost
Unit Cost
Price per item (extended cost will automatically calculate based on Quantity + Unit Cost)
UOM
Unit of measurement – this is helpful when differentiating between case, carton, pack, each, etc.
Slider
You can use this to move up or down the line items when you have 3+.
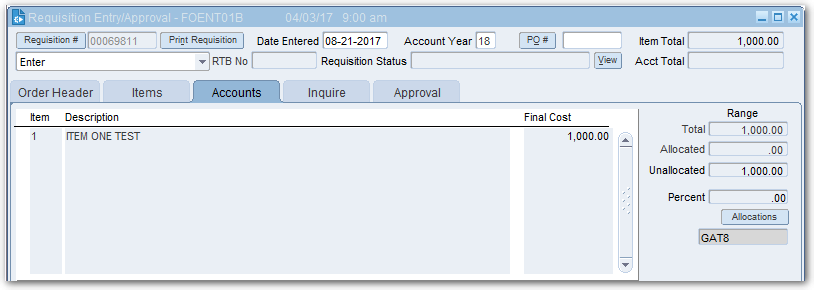
The third tab, Accounts, identifies the account number that will be used for the order. The account selection will also dictate the appropriate approval chain for the requisition.
The top of the screen recaps the items previously entered and identifies the line numbers. The lower portion of the screen requires your input.
- Use the drop-down arrow to select from a list of accounts
![]()
- If you want to split the expense across multiple accounts, you can achieve that by selecting multiple account numbers using the additional lines provided. You will need to break down the amount to be allocated per account number used. The total percentage must equal 100 to submit for approval.%
- If you want to use a specific account number for a specific line item, you can use the Front to Line fields to achieve this.

- Tab to the Amount field and enter it (if you are paying everything out of one account, it will automatically appear.
- The calculated amount will automatically populate, and under the “Range,” all amounts will be allocated. You will not be able to finish a requisition if your Item Total and Account total don’t match if you have any amount Unallocated, and if your Total Distribution doesn’t match your item Total.
- Then select the Finish button below the accounts.
![]()

The Requisition status will change to “Needs Approval By:…” and the next Approver in the chain will be identified by their role.
Post your comment on this topic.