
Orchid Fusion VMS now supports Single Sign-On with SAML. One of the Identity Providers (IdPs) supported by SAML is Google Workspace. By performing some configuration work on the front end, your Orchid Fusion VMS users will be able to sign in with their Google credentials.
Configuring a SAML App in Google Workspace
The steps below should help you create and configure an application in Google Workspace.
- First, review the Google Workspace Admin Help article linked here: Set up your own custom SAML app. This article includes detailed steps for creating and configuring your app.
- As you configure your SAML app in Google Workspace, select Option 1: Download IdP metadata. Click the Download Metadata button.
- Once downloaded, you will need to copy this file into the Orchid Fusion VMS configuration directory, and add the filename to the fusion.properties file (as detailed in Modify the Fusion Config File).
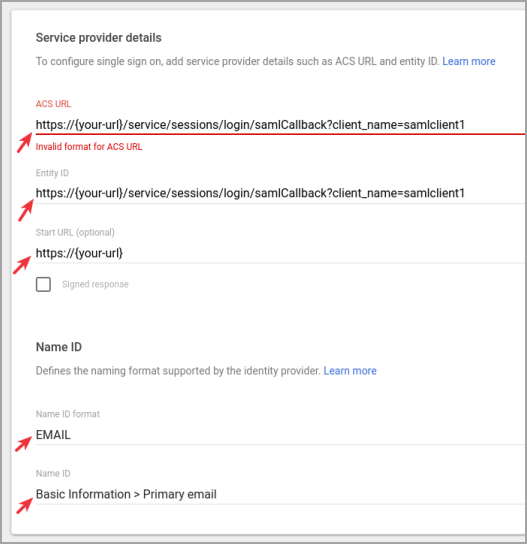
- Now you need to configure the Service Provider Details.
- The example pictured below shows which fields you need to complete.
- For the Name ID format, use the drop-down list to select EMAIL.
- Now, go to Attribute mapping to configure the Google Workspace fields that Orchid Fusion VMS will use to identify a user’s username and permission group(s). This will also configure the Google Workspace groups that are allowed to sign into Orchid Fusion VMS.
- The example pictured below will help you complete the Attributes and Group membership sections.
- The Google groups that you specify here will also need to be assigned to Permission Groups in Orchid Fusion VMS. (More details on this in the last SAML section.)
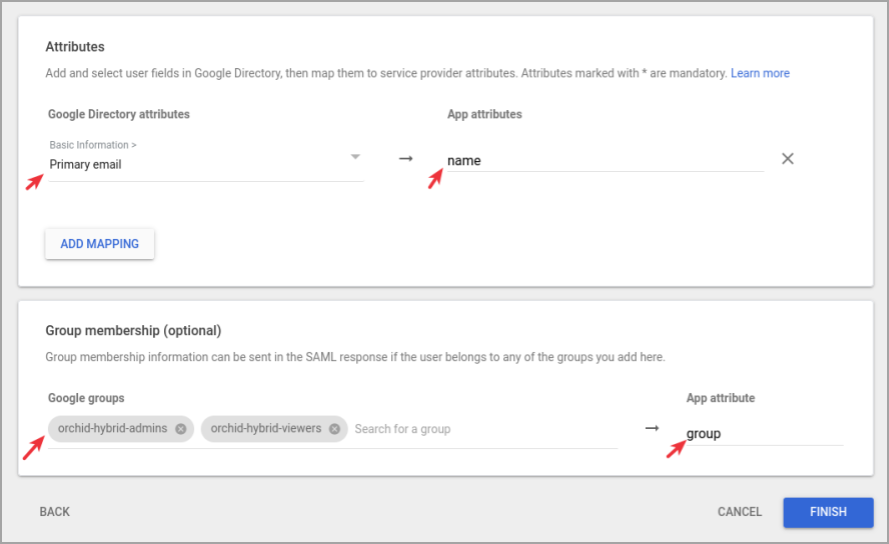
- Based on the example above, the attribute key name and attribute key group properties would look like this when you add them to the fusion.properties file:
saml.provider.samlclient1.attr.key.name=name
saml.provider.samlclient1.attr.key.group=group
Turning on the SAML Web App
By default, the SAML web app will be marked as OFF for everyone in the Google Admin Interface. Before you continue, make sure to enable the app for one or more organizational units.
Complete the Configuration
- After all of the configuration steps have been completed, you’ll need to do the following:
- Restart the Orchid Fusion VMS service. For extra help, please refer back to the How to Manage the Orchid Fusion VMS Services section that corresponds to the operating system in which you are working.
- Go to Fusion and associate your Permission Groups with your IdP (Google) groups. Please refer to the last SAML section for details.
Post your comment on this topic.