
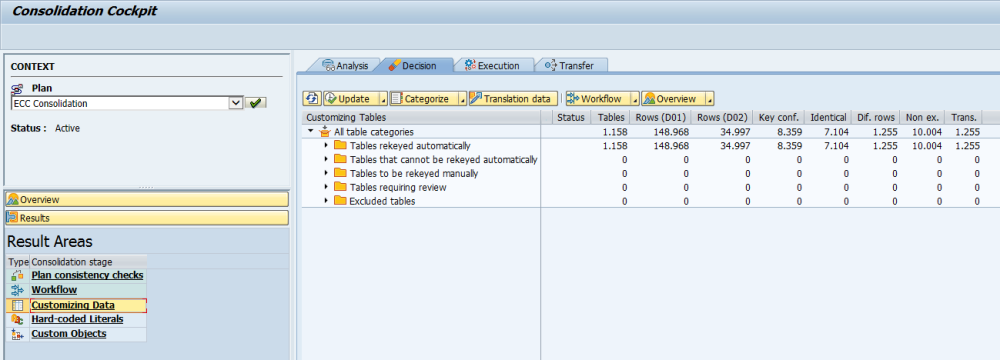
The Decision phase of the Customizing Data stage will provide the number of configuration tables from each system, the number of rows of data involved and involves choices from the user to categorise the tables and confirm translations are correct.
Once the Analysis programs have run from the Operation section it is time to view the results, go to the ‘Results’ drawer and select the ‘Customizing Data’ and click the ‘Decision’ tab.
The results are broken down by the following categories, this phase only includes the root tables identified by Consolidator.
Tables rekeyed automatically – The table can be rekeyed automatically without any involvement from the user
Tables that cannot be rekeyed automatically – The table has a limit of keys that can be added, for example, tables that only have a key of client (MANDT) so only one entry per client is allowed
Tables to be rekeyed manually – The table has been identified as being required to be rekeyed manually
Tables requiring review – The table can be rekeyed automatically, however, it should be reviewed to ensure the integrity of the system
Excluded tables – Tables that were excluded during the Analysis phase
The buttons on this screen operate by clicking the right hand down arrow ![]() details on what each button does are as below.
details on what each button does are as below.
The ‘Update’ button  allows the user to run the programs for this phase individually, however, it is recommended the user does not use this and completes this through the operation drawer as this adds greater clarity.
The ‘Categorize’ button  allows to to re-categorize a table by highlighting it and selecting the new category you require from the list.
The ‘Translation Data’ button ![]() shows the data that has been translated during this phase as below, the most important part here is the old value and new value. The export option provides an extract of the grid in mandatory CSV format this allows a record of the translated data to be easily exported.
shows the data that has been translated during this phase as below, the most important part here is the old value and new value. The export option provides an extract of the grid in mandatory CSV format this allows a record of the translated data to be easily exported.
![]()
The ‘Workflow’ button 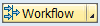 allows the user to open and close this phase.
The ‘Overview’ button  allows the user to view the reports for this phase, see the Reporting section for more details.
The tab holds information on all the table contents required to be translated, explanations for what each column represents are provided below the screenshot.

Status – This contains the status of the translation, all of the options are seen in the screenshot above with explanations below
- Not Translated – this has not been translated
- Translated – this has been translated
- Failed – the translation failed
- Ignore – this can be ignored
- To confirm – Acts as a reminder that details are to be confirmed
- Manual – to be completed manually
Tables – This contains the number of tables
Rows – This contains the number of rows of data
Key Conflict – This contains the number of rows with a conflicting key
Identical – This counts the number of identical rows between the two systems
Different Rows – Rows where the key conflicts, but the data is different
Non Ex. – Lines not existing in the target system
Trans. – The number of translations
On a table row all of the numbers in the columns apart from ‘Table’ the data can be clicked and reviewed.
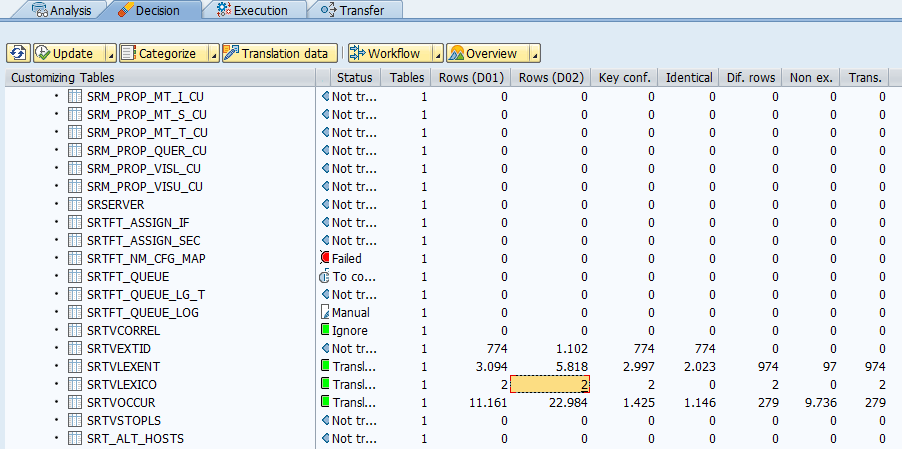
Example of results retrieved.
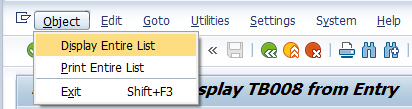
Note that the standard SAP display does not display large numbers of entries, to see all entries, select ‘Object’ then ‘Display Entire List’ as below.
There are also a number of options seen by using a right mouse click on a table.
The ‘Display’ option allows the user to display the table structures in each system or to compare the structures.
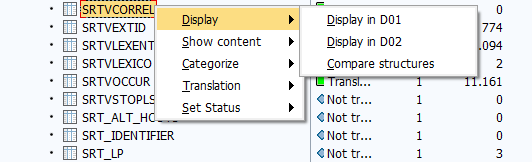
The ‘Show Content’ option allows the user to view the entries in each system or compare data.

Data comparison option as below:

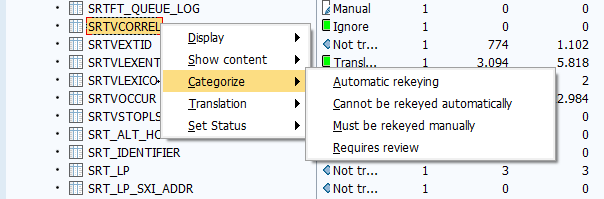
The ‘Categorise’ option allows the user to re-categorize a table by highlighting it and selecting the new category you require from the list. This is the same as the ‘Categorize’ button .
The ‘Translation’ option allows the user to view the data that is going to be translated.
![]()
When selecting ‘Maintain translations’ the translations for this table are displayed and translated can be created and changed, this is similar to the ‘Translation Data’ button ![]() which shows all the data translated in this phase.
which shows all the data translated in this phase.
![]()
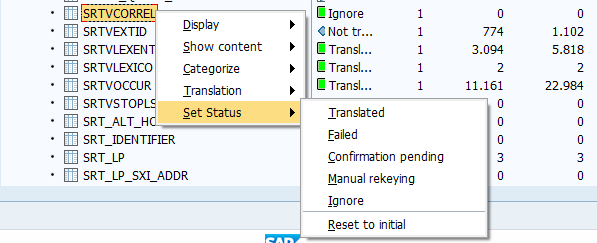
The ‘Set status’ option allows the user to set the status for this table, the details for each option are as below:
- Translated – this has been translated
- Failed – the translation failed
- Ignore – this can be ignored
- To confirm – Acts as a reminder that details are to be confirmed
- Manual – to be completed manually
- Reset to initial – resets the value to the original one
When you have reviewed the translations and are certain you are ready to close the phase use the ![]() option on the ‘Workflow’ button and select close phase. Continue to the next phase Execution Phase
option on the ‘Workflow’ button and select close phase. Continue to the next phase Execution Phase
Upon closure of this phase the Hard Code Literals stage can start.
Post your comment on this topic.