
The change header consists of two sections: an upper and a lower section.

Upper section
The upper section contains information about the person who requested the change, which company the requester works for and the change request id. The Save button is disabled until you have made changes to the request.

Change Template
Press  to open the template menu.
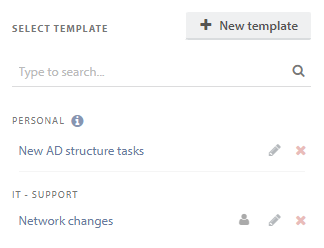
You can choose to either create a new template, or use/edit an existing one. Using a template will overwrite the Change you are working on.
If you want to delete a ticket template, simply press  .
.
If you want to edit an existing template, use the  button.
Create new template
In order to create a new template, you have to give it a name, decide what zone it should be attached to and its availability. It can either be a personal template that only you can use, or you can make it available to a specific team in the selected zone.
You then fill out the fields for the template. These are the values that will automatically be filled out in the Change when the template is used.
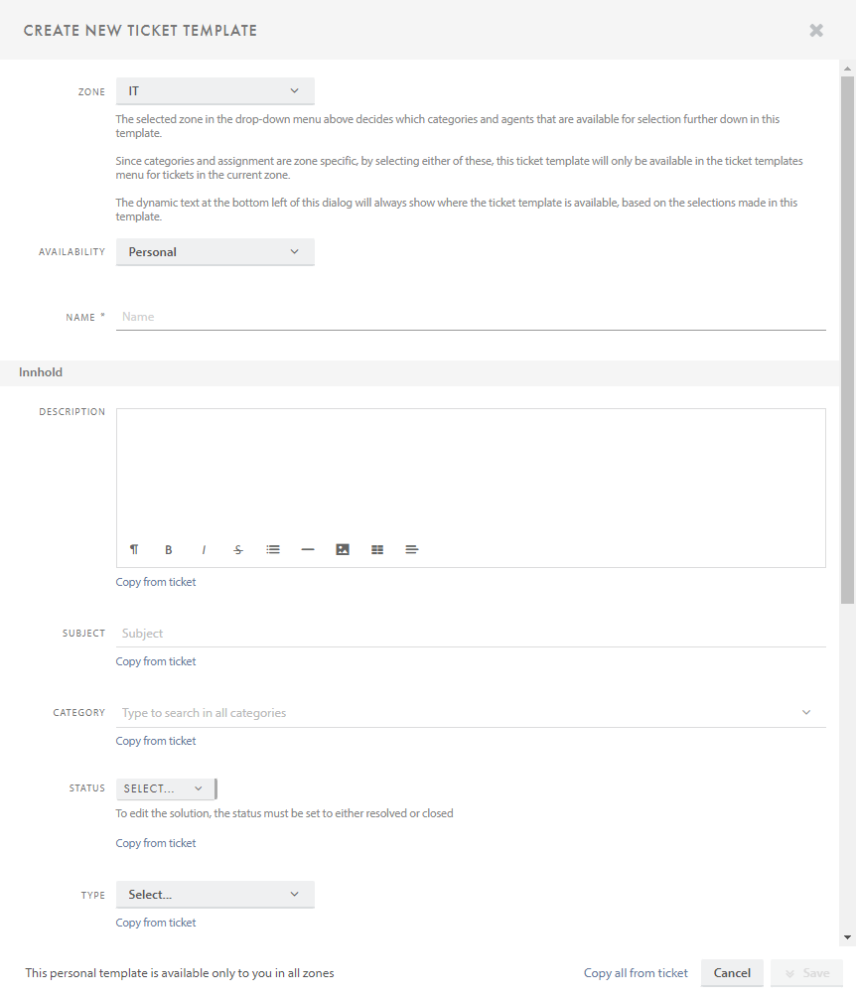
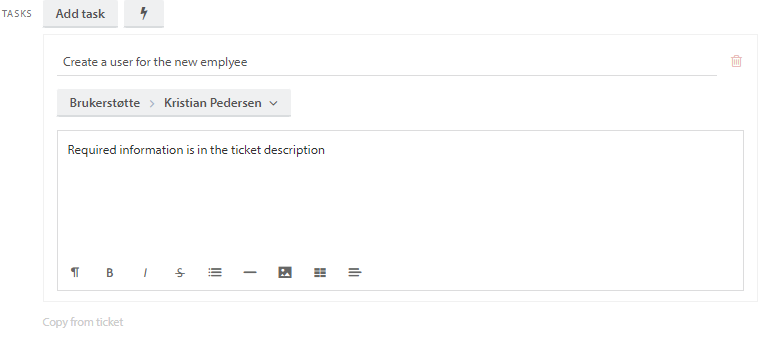
When creating a template you can add tasks that will automatically be added to the Change. If the template is created from an existing Change, you can copy all tasks from this ticket into the template.
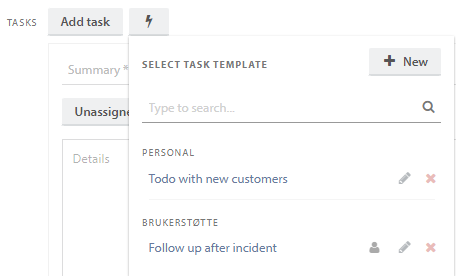
You can also use Task templates to add a number of already prepared tasks to the ticket template
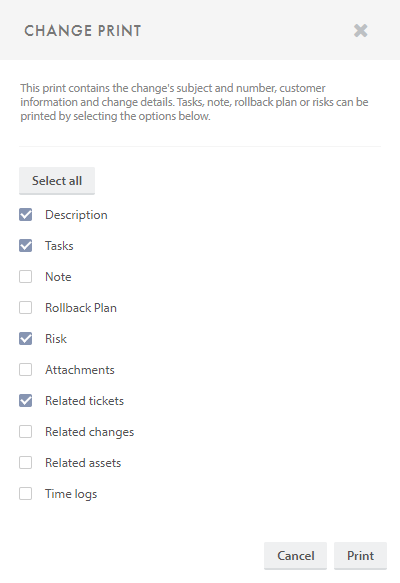
Click the  button to print out select information about the change.
Lower section

The lower section contains information about the user who requested the change, the request subject, status, and change request coordinator.
Requester
If you click on the name of the requester, a small window with his/her contact information appears.
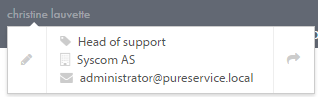
It is possible to switch requester. Simply do so by clicking on the pencil  .
.
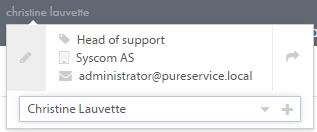
You can search for a user, find a user in the drop-down list or create a new user.
To open the users’ profile page and make changes to his/her contact information, click on the arrow ![]() . You can read more about the user profile page in the next chapter: Contacts: User profile page.
. You can read more about the user profile page in the next chapter: Contacts: User profile page.
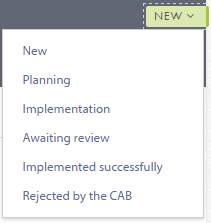
Status
It is easy to change the status on a change request. Simply click on the status field in the top-right corner, and a drop-down list with available options will appear.
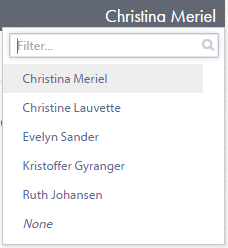
Coordinator
The coordinator field is automatically set to None when you create a new change request. Clicking on the field will open a drop-down menu with a list of agents you can set as coordinator. A change request can be assigned to an agent by typing the name, or by navigating through the menu.
Need more help with this?
Ta kontakt med oss for videre spørsmål her!