
Once a linear conveyor has been commissioned by Auto-Configuration Procedure, the ConveyLinx-Ai Family Module store configuration data about its upstream and downstream neighboring modules. This configuration data is automatically updated even if the linear conveyor has had its parameters modified by the EasyRoll software. The ConveyLinx-Ai Family Module firmware uses this feature to allow for easy module replacement so that the entire linear conveyor does not have to be Auto-Configured again in order to replace a single ConveyLinx-Ai Family Module.
Module Replacement Using EasyRoll
1. Disconnect existing module’s motor(s), network, photo-sensor(s), and power connections. The order of disconnection does not matter.
2. Connect new module’s motor(s), sensor(s), network connections and power connections.
3. Start EasyRoll V4.04 or higher. Invoke the Advanced Dialog and go to the Network Services tab, click on the Discover button. All modules in the network should be display. Click on AutoConfig button and after a few seconds the topology of the ConveyLinx modules will be displayed.
4. Click on the module in the Tree View you want to add as the replacement module
5. Right-Click and select Replace this Node from the menu to begin the replacement process as shown in Figure 35. Note that you can also select the node from the list of modules on the left-hand side and then click the Replace Selected Node button.
6. Wait until Module performs its internal boot-up procedures which will be indicated when the Module Status LED blinks on and off green.

Module Replacement Using Replacement Button
| Disconnect existing module’s motor(s), network, photo-sensor(s), and power connections. The order of disconnection does not matter. Connect new module’s motor(s), sensor(s), network connections and power connections. The Module Replacement Button is located in the Left Ethernet cable compartment. Remove the compartment cover to gain access to the button |  |
| With a pointed instrument (pencil or small screwdriver) press and hold the button for 2 seconds until the Status LED flashes red and then release the button | 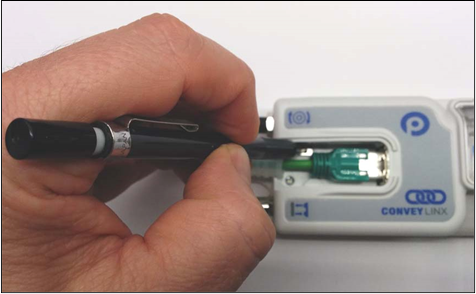 |