
| |
This is the Microphone icon that will appear in the header. Click this icon to open the Microphone toolbar. |
| |
Click this icon to close the Microphone toolbar. |
| |
Click this icon to select which microphone you want to use. |
| |
This icon indicates that the microphone is off. Click this icon to turn the mic on and begin speaking. |
| |
This icon indicates that the microphone is in use. Click this icon to turn the mic off. |
Starting in version 24.6, Orchid Recorder now supports Camera Talk Down on cameras that feature an audio backchannel via ONVIF Profile T. This means that you can actually transmit audio through the camera using a WebRTC Player on the Stage. This new feature is currently available on more recent camera models available from Axis, Hanwha, Bosch, and Vivotek, among others.
- To get started, position the mouse over the Player; this will activate the header. If the microphone icon appears in the header, this indicates that the camera supports Talk Down.
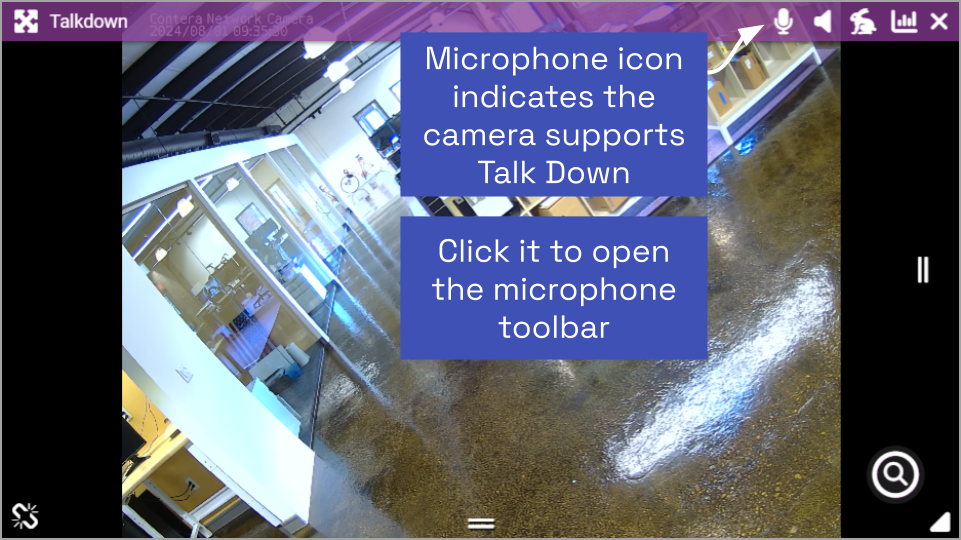
- Click the Microphone icon to open the microphone toolbar.
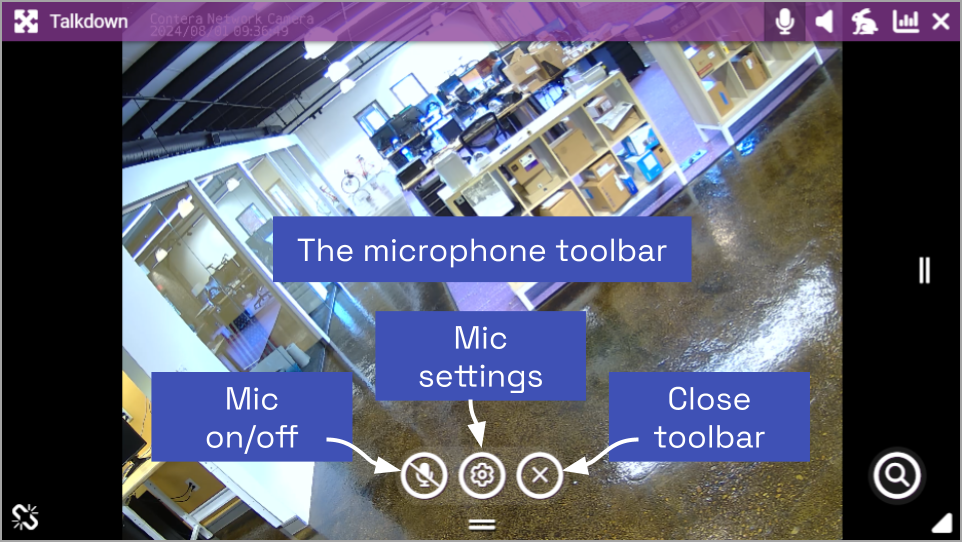
The toolbar allows you to select a microphone and then turn the microphone on and off.
- Click the Settings icon to open the microphone settings.
- Use the drop-down list to select the microphone you want to use for Talk Down.
- Click the X to close microphone settings.
- Click the Microphone icon to turn the microphone on and off.
- When the microphone is marked out, the microphone is off.
- When the microphone is red, the microphone is on and transmitting audio to the camera. (Speak now.)
In addition to the red microphone icon, the Player’s appearance will indicate that the microphone is on. A red “light” will appear in the upper-left corner of the Player. This “light” will display a simulated waveform when you are speaking. The Player’s header and border will also turn red when the microphone is on.
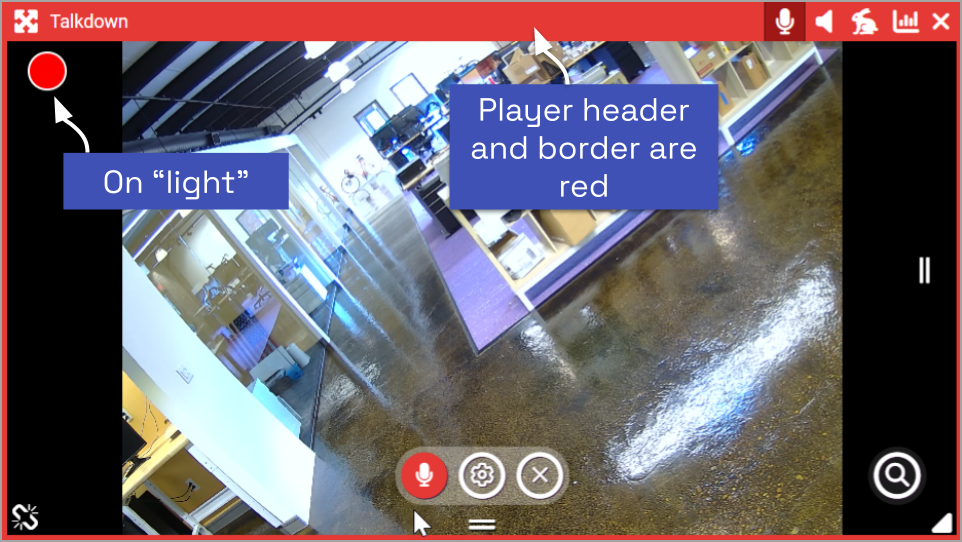
- When the microphone is red, click the Microphone icon on the toolbar to turn the microphone off.
- Click the X icon to close the microphone toolbar.
Post your comment on this topic.