
Installing Orchid Core VMS on Ubuntu 14.04 LTS
IPConfigure distributes Orchid Core VMS for Ubuntu through debian package files (.deb files). The recommended method for installing the package file is through GDebi Package installer. GDebi can be used either through command line, or through the Graphical User Interface (GUI).
- Download the Orchid .deb file. You can find the latest version of Orchid Core VMS on IPConfigure’s website at http://www.ipconfigure.com/products/orchid#download.
- Once you’ve downloaded the Orchid Core VMS installation package, decide whether you want to perform the installation via the Command Line or the GUI.
Installing through the Command Line (Ubuntu Server)
- Open the Terminal program (CTRL+ALT+T) and navigate to the directory where you downloaded the Orchid Core VMS installation package. (The package is probably stored in the Downloads folder.)
- Unless GDebi has been installed manually, it will need to be installed using the following command: sudo apt-get install gdebi-core
It may take a few minutes for GDebi to install, depending on the speed of your system.
- The GDebi command can now be used to install the Orchid Core VMS debian package. The syntax is sudo gdebi (package-name).deb. For example, if the name of the package is ipc-orchid-x86_64_2.6.0-sysvinit.deb, the following command would be used: sudo gdebi ipc-orchid-x86_64_2.6.0-sysvinit.deb
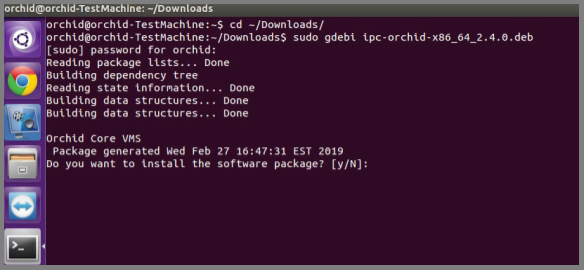
- The system may ask for your Ubuntu user password. Type in the password and press Enter.
- The system will then ask if you want to install the software. Enter Y for yes, and press Enter.
- If this is a software upgrade, the installer will give you the opportunity to optimize the database. Optimization is recommended (since it will improve the overall performance of the system, especially notable in larger systems with video archives greater than 40 TB). Be aware, however, that the optimization process may take a while to complete (and Orchid Core VMS will be unavailable during this time).
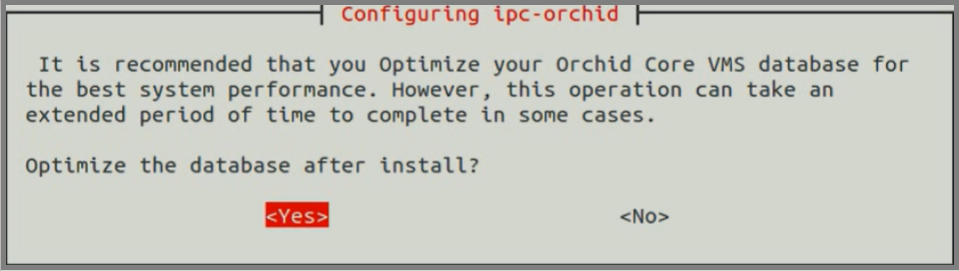
- To proceed with optimization, use the Tab key to highlight Yes, and press Enter. (Skip ahead to step 10.)
- On a new installation, you will be asked to accept the End User License Agreement. After reading the agreement, press the Tab key to select Ok, then the Enter key to accept it.
- You will then be asked to accept the agreement in a separate prompt. Use the Left Arrow or Tab key to select Yes, and press Enter to accept it.
- Next, the installer will ask you to set the Web Server Port, Admin Password, and the Archive Directory for storage.
- By default, the web server port is set to port 80 (which is the recommended port for most installations). If Orchid Core VMS needs to use a different port, update the port, then press the Tab key to select Ok, and press Enter.
- Enter the password you would like to set for the default admin account, then press the Tab key to select Ok, and press Enter.
- Set the directory for video archives. The default folder is /orchives. Enter a new archives location, if needed, then press the Tab key to select Ok, and press Enter.
- The installation will complete automatically without any additional prompts. This process may take a few minutes (and perhaps longer if the optimization process was selected). The Orchid Core VMS services start automatically once the package installation is done, after which you can access the Orchid Core VMS user interface in your web browser. (Please refer to the Sign in topic in the Orchid Core VMS Administrator Guide for more details.)
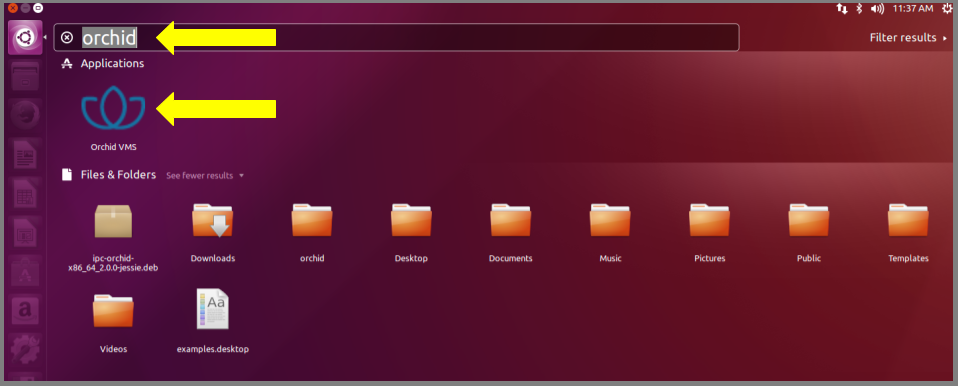
- You can automatically launch a browser to Orchid Core VMS using the menu link installed on your server:
- Click on the Launcher icon in the top left corner of the screen.
- Type Orchid in the search box, then click the Orchid VMS icon listed under Applications.

Installing through the GUI (Ubuntu Desktop)
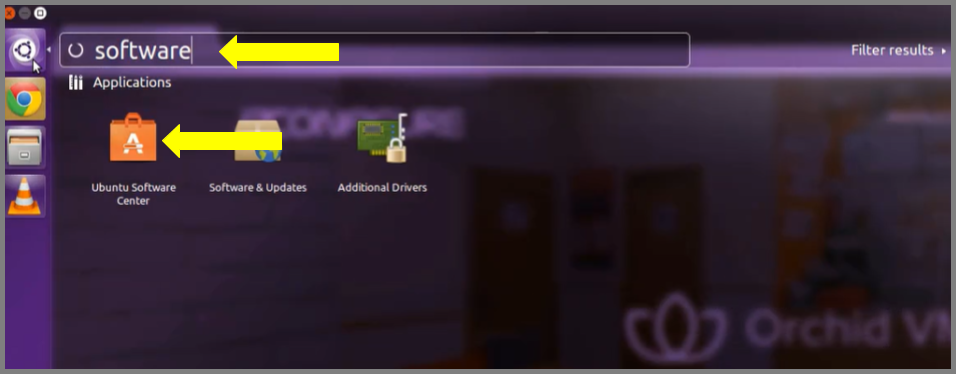
- Click on the Launcher icon and then type in Software Center.

- Click the Ubuntu Software Center icon to open it.
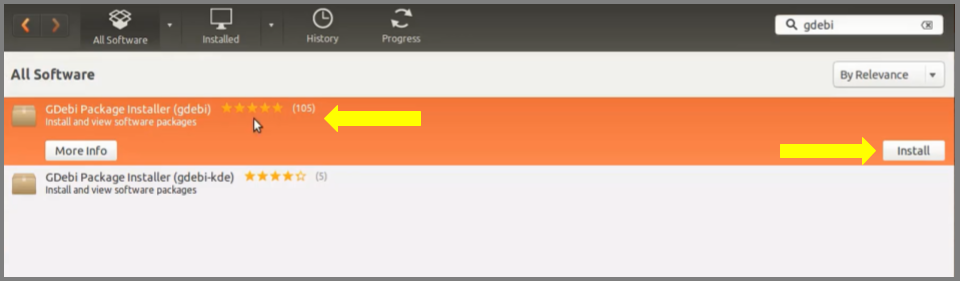
- In the search bar in the top right-hand corner of the Software Center, type gdebi.
- Select GDebi Package Installer (gdebi) (which should be the first result), and then click the Install button.
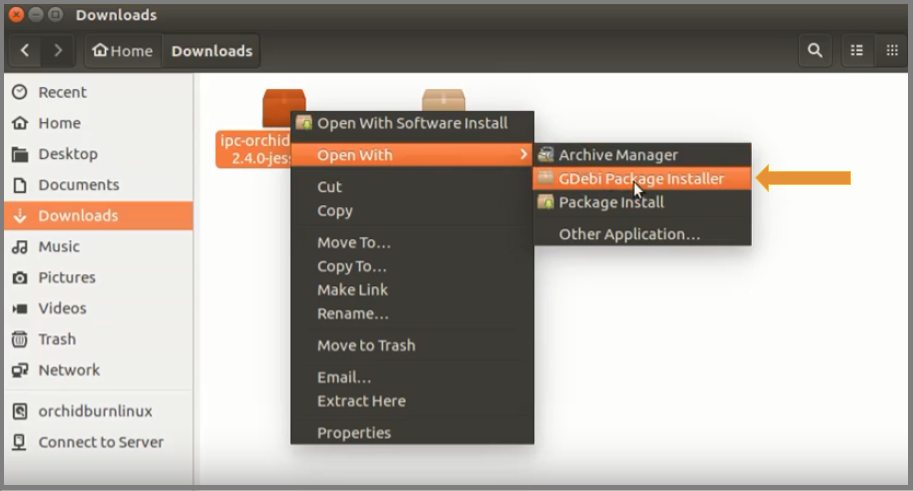
- After GDebi has finished installing, click the Files icon to open the Files Explorer, then navigate to the folder storing your Orchid Core VMS package (.deb file). (The package is probably stored in the Downloads folder.)
- Right-click on the Orchid Core VMS package, hover over Open With with the mouse, then select the GDebi Package Installer option.
- Once the GDebi package installer loads, click the Install Package button in the top right-hand corner of the window.
- You may be asked for your system password. Type it in and click OK.
- If this is a software upgrade, the next screen will give you the opportunity to optimize the database. Optimization is recommended (since it will improve the overall performance of the system, especially notable in larger systems with video archives greater than 40 TB). Be aware, however, that the optimization process may take a while to complete (and Orchid Core VMS will be unavailable during this time).
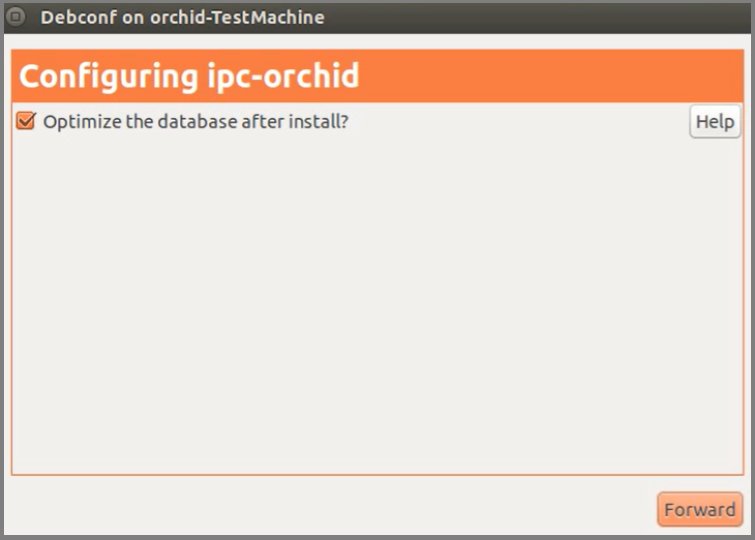
- To proceed with optimization, mark the checkbox and click the Forward button. (Skip ahead to step 12.)
- If this is a new installation, you will be asked to accept the End User License Agreement. After you read the agreement, mark the Do you accept the terms of agreement checkbox and click the Forward button.
- Next, the installer will ask you to set the Web Server Port, Admin Password, and the Archive Directory for storage.
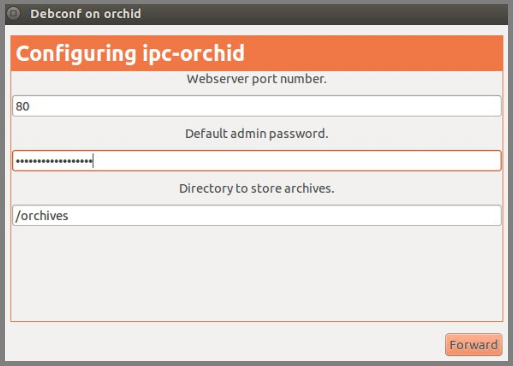
- By default, the web server port is set to port 80, which is recommended for most installations. Update the port number only if Orchid Core VMS needs to use a port other than 80.
- Enter the password you would like to set for the default admin account.
- The default folder for video archives on Linux is /orchives. Enter a new archives location, if needed.
- When finished, click the Forward button.
The installation will complete automatically without any additional prompts. This may take a few minutes (and perhaps longer if the optimization process was selected). - Once the package installer displays an “Installation Finished” message at the top of the screen, click the Close button to close the installer and complete the installation. The Orchid Core VMS services will start automatically once the package installation is done, after which you can access the Orchid Core VMS user interface in your web browser. (Please refer to the Sign in topic in the Orchid Core VMS Administrator Guide for more details.)
- You can automatically launch a browser to Orchid Core VMS using the menu link installed on your server:
- Click on the Launcher icon in the top left corner of the screen.
- Type Orchid in the search box, then click the Orchid VMS icon listed under Applications.
How to Edit a Configuration File in Ubuntu 14.04 LTS
Beginning with version 2.10, some of the configuration settings can be edited from within the Orchid Core VMS software. (This is done using the Advanced Settings feature which is explained in the Orchid Core VMS Administrator Guide.) There are some settings, however, that will still need to be changed by editing the configuration file directly. These settings need to be protected from unauthorized changes because they are critical for program stability and reliability. These critical settings include the following:
|
|
|
|
|
|
|
|
|
|
|
|
|
|
|
|
|
|
|
|
|
|
|
If it becomes necessary to change one of these critical settings, you can edit the Orchid Core VMS configuration files using standard text editors in Linux. This section will describe two methods for editing the configuration files: using the Command Line and using the Graphical User Interface.
The default locations for Orchid Core VMS’s configuration files in Linux are:
- Orchid Server Properties: /etc/opt/orchid_server.properties
- Stores all of the Orchid Core VMS settings and can be used to update things like the port number, manually update the admin password, etc.
- Settings entered in this file will override the default settings in the Orchid Server Default Properties file (described below).
- Orchid Server Default Properties: /etc/opt/orchid_server.properties.default
- Stores all of the Orchid Core VMS default settings and may serve as a good reference. [Any changes made to this file will be ignored.]
- Orchid ONVIF Auto-Discovery: /etc/opt/orchid_onvif_autodiscovery.properties
- Used to edit the default settings for the ONVIF auto-discovery service used by Orchid Core VMS.
Refer to the Installation Support Topics section for a complete list of available properties.
Editing Configuration Files through the Command Line:
- Open the Terminal program (CTRL+ALT+T) and open Orchid Core VMS’s configuration file in the nano text editor by typing the following command: sudo nano /etc/opt/orchid_server.properties. Then press Enter.

- After running that command, you will be prompted to enter the [sudo] password for your user. Type the password used to sign in to your computer, then press Enter. The configuration file will open.
- Use the arrow keys to move the cursor around the screen and update any default settings. You may also add new settings to the end of the file.
- When you are ready to save the file, click CTRL+X on the keyboard, then type Y to save the file and close the text editor. If you do not want to save the file, type N (instead of Y) after typing CTRL+X.
- Restart the Orchid Server service in Linux to implement the new settings.
Editing Configuration Files through the Graphical User Interface (GUI):
- Open the Terminal program (CTRL+ALT+T) and open Orchid Core VMS’s configuration file by typing the following command: sudo gedit /etc/opt/orchid_server.properties. Then press Enter.

- After running that command, you will be prompted to enter your password to perform administrative tasks. Type the same password you use to sign in to your computer, then press Enter.
- A text editor will open in a new window allowing you to edit the configuration file. Update default settings as needed. You may also add new settings to the end of the file.

- When you are ready to save the file, click File/Save to save the configuration file.
- You must restart the Orchid Server service in Linux to implement the new settings.
How to Manage the Orchid Core VMS Services Through the Command Line
Orchid Core VMS runs on Linux as a service. If you need to check the status, start, or stop one of these services, you can do this from the command line.
There are two main services used by Orchid Core VMS on Linux:
- Orchid Server Service: The main Orchid Core VMS service that records and archives video.
- Orchid ONVIF Auto-Discovery Service: Used by Orchid Core VMS to automatically find cameras that support ONVIF.
Tips
- After you’ve configured your Orchid Core VMS properties and started the services, you should check the status of both services to verify Orchid Core VMS is running.
- You will need to restart the services whenever a change has been made to the Orchid Core VMS configuration files.
To manage the Orchid Server service from the command line:
- Open the Terminal program (CTRL+ALT+T).
- Type the following command: sudo service orchid (command) (where the command is start, stop, restart, or status). Then press Enter.


How to Manage the Orchid Core VMS Services Through the GUI
Orchid Core VMS runs on Linux as a service. If you need to check the status, start, or stop one of these services, you can do this from the GUI.
There are two main services used by Orchid Core VMS on Linux:
- Orchid Server Service: The main Orchid Core VMS service that records and archives video.
- Orchid ONVIF Auto-Discovery Service: Used by Orchid Core VMS to automatically find cameras that support ONVIF.
Tips
- After you’ve configured your Orchid Core VMS properties and started the services, you should check the status of both services to verify Orchid Core VMS is running.
- You will need to restart the services whenever a change has been made to the Orchid Core VMS configuration files.
To manage the Orchid Core VMS services from a web browser running on the same computer as the service:
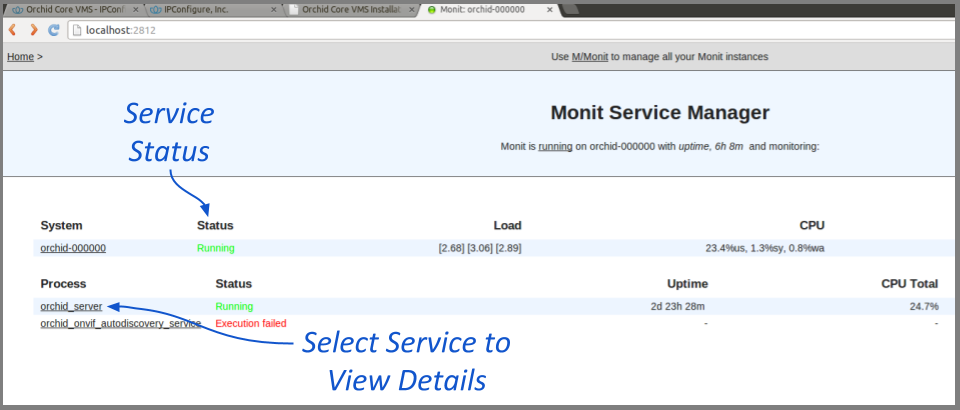
- Open a web browser and type http://localhost:2812 into the address bar to access Monit (Orchid Core VMS’s process monitor).
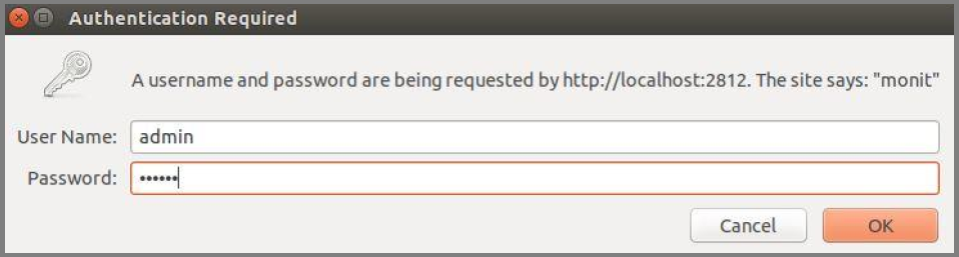
- You will be asked for a username and password. The username is admin and the password is 0rc#1d (unless it was manually changed through Monit’s configuration file).
A list of the services setup with Monit will appear, which will include orchid_server and orchid_onvif_autodiscovery_service. The status of each service is listed in the Status column.
- Click the name of the service you need to stop, start, or restart. A detailed information screen for the monitored service you selected will appear.
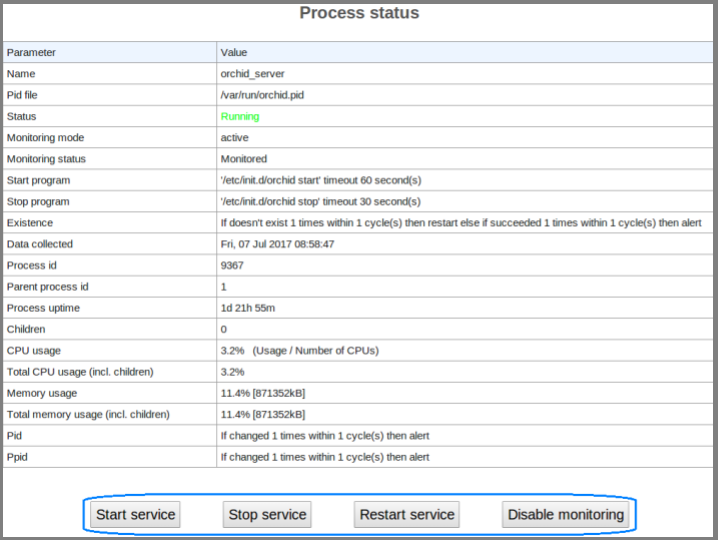
- Click the Stop Service button to stop the selected service. This action will keep the service off until the Start Service button is clicked.
- Click the Start Service button at the bottom of the screen to start the selected service.
- Click the Restart Service button to restart the service. The status of the service will update from Running to Running-restart pending. Once the service has restarted successfully, the status will return to Running.
Uninstalling Orchid Core VMS in Ubuntu 14.04
There are a couple of options for removing the Orchid Core VMS software. The Remove command will uninstall all files installed and created by Orchid Core VMS except the configuration files and the /orchives directory. The Purge command will uninstall all files installed and created by Orchid Core VMS except the /orchives directory.
- Open the Terminal program (CTRL+ALT+T).
- To uninstall Orchid Core VMS, do either of the following:
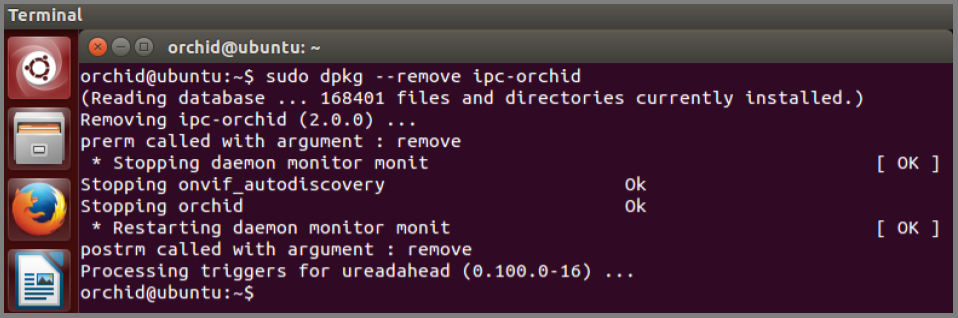
- To uninstall Orchid Core VMS (while keeping the configuration files and the archives), type the following command, then press Enter, and enter the password when prompted to do so: sudo dpkg —remove ipc-orchid
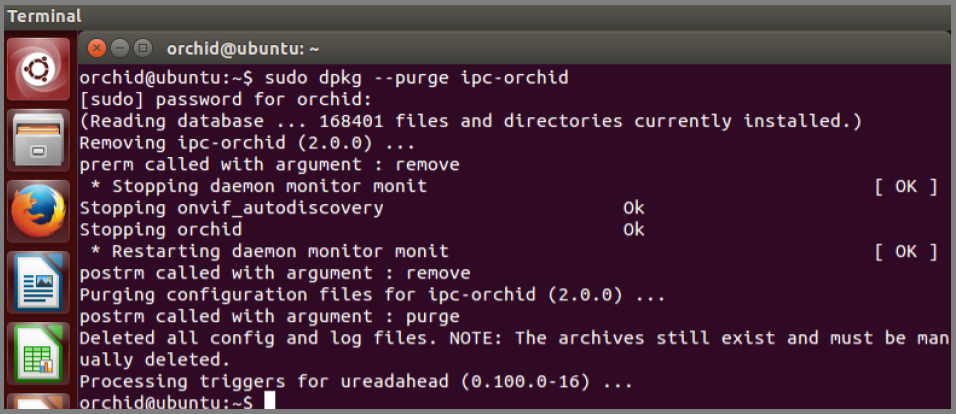
- To uninstall Orchid Core VMS (keeping only the archives), type the following command, then press Enter, and enter the password when prompted to do so: sudo dpkg —purge ipc-orchid
Post your comment on this topic.