
Installing Orchid Core VMS on Red Hat Enterprise Linux 7 and 8
IPConfigure distributes Orchid Core VMS for Red Hat using an .rpm file. Use this file to install Orchid Core VMS on systems running Red Hat Enterprise Linux versions 7 and 8, and CentOS versions 7 and 8.
The following installation instructions provided for Red Hat Enterprise Linux 7 and 8 also apply to CentOS 7 and 8.
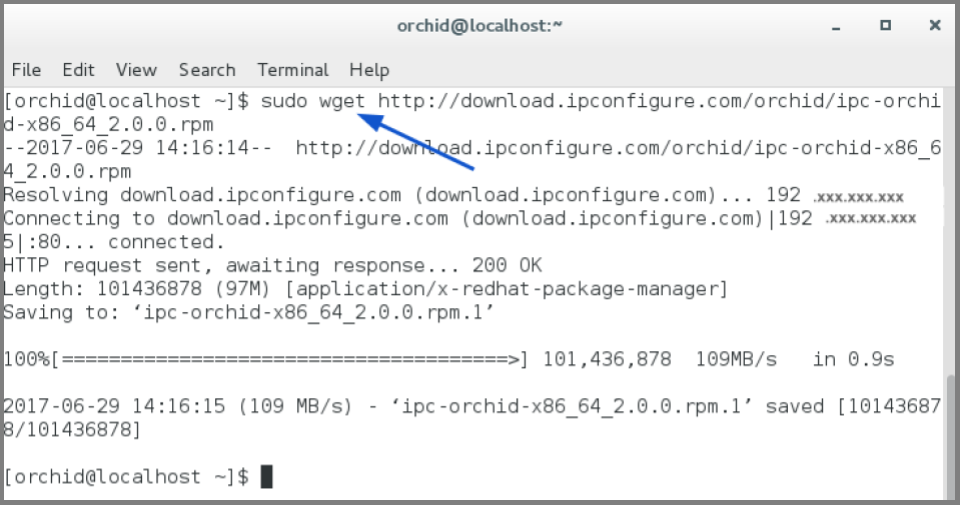
- Download the Orchid Core VMS installation package (.rpm file) with a web browser, or from the command line by typing the following command: sudo wget http://download.ipconfigure.com/orchid/ipc-orchid-x86_64_(VERSION).rpm. Then press Enter.
- Install some additional packages for Enterprise Linux by typing the following command: sudo yum install epel-release. Then press Enter.
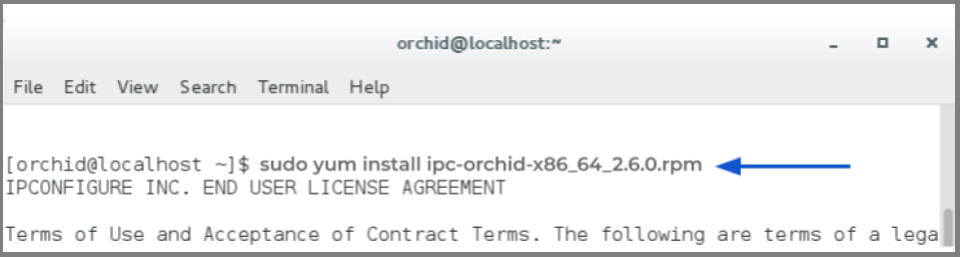
- Install Orchid Core VMS by typing the following command: sudo yum install ipc-orchid-x86_64_(VERSION).rpm. Then press Enter.
This will install all necessary files for the Orchid Server service and Orchid ONVIF_autodiscovery service. By default, these programs will not be started.
- Press the Y key to accept the EULA, or N to decline.
- After the installation is complete:
- You must set the admin password and the archive directory. (Refer to the next section for details.)
- If this was an upgrade, you should consider optimizing the database. (For more details and instructions, refer to the Optimize section.)
How to Edit a Configuration File in Red Hat
Beginning with version 2.10, some of the configuration settings can be edited from within the Orchid Core VMS software. (This is done using the Advanced Settings feature which is explained in the Orchid Core VMS Administrator Guide.) There are some settings, however, that will still need to be changed by editing the configuration file directly. These settings need to be protected from unauthorized changes because they are critical for program stability and reliability. These critical settings include the following:
|
|
|
|
|
|
|
|
|
|
|
|
|
|
|
|
|
|
|
|
|
|
|
Immediately after installation, and if it becomes necessary to change one of these critical settings later, you can edit the Orchid Core VMS configuration files using your favorite text editor. (If you don’t have a favorite, try nano.)
The default locations for Orchid Core VMS’s configuration files in Linux are:
- Orchid Server Properties: /etc/opt/orchid_server.properties
- Stores all of the Orchid Core VMS settings and can be used to update things like the Orchid Core VMS port number, manually update the admin password, etc.
- Settings entered in this file will override the default settings in the Orchid Server Default Properties file (described below).
- Orchid Server Default Properties: /etc/opt/orchid_server.properties.default
- Stores all of the Orchid Core VMS default settings and may serve as a good reference. [Any changes made to this file will be ignored.]
- Orchid ONVIF Auto-Discovery: /etc/opt/orchid_onvif_autodiscovery.properties
- Used to edit the default settings for the Orchid ONVIF auto-discovery service used by Orchid Core VMS.
Refer to the Installation Support Topics section for a complete list of available properties.
- Open the text editor, then type the following command: nano /etc/opt/orchid_server.properties. Then press Enter.
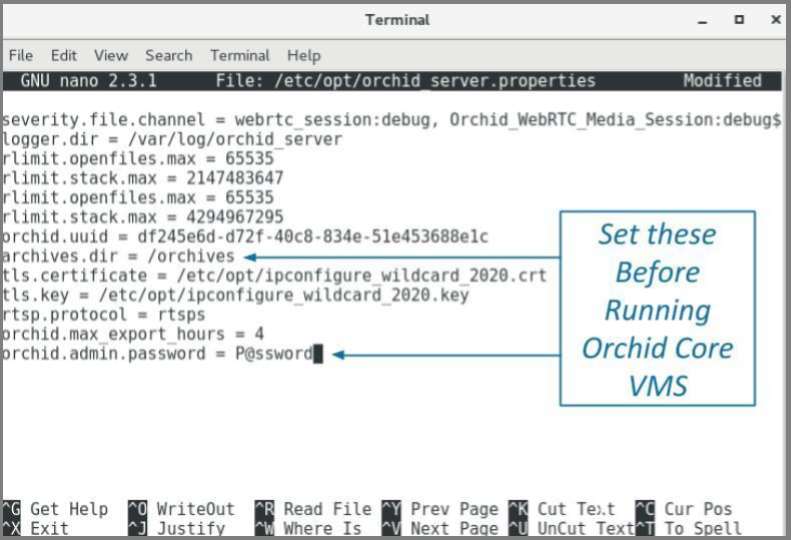
- Set the two parameters below. They take effect only when Orchid Core VMS is started for the first time [typically meaning that the Orchid Core VMS database (at /var/lib/orchid_server/orchid.sqlite) does not exist when Orchid Core VMS starts].
orchid.admin.password
Sets the admin password used upon first signing in. After the first sign in, the admin password can be configured via the user interface.
archives.dir
Specifies the directory to which video files are saved. After the first sign in, this property can be changed by editing the configuration file.
The following parameters may be changed at any time and take effect upon restarting Orchid Core VMS.
webserver.port
Controls the port on which the Orchid Core VMS user interface is accessed. The default port is 80, but if your RHEL system is running an HTTP server such as Apache or Nginx, you will likely need to change this value.
archivecleaner.usedspace.percentage
Controls the percentage of disk space Orchid Core VMS will use. Find it on the volume specified in webserver.archives.rootpath.
If, during the course of your modifications, the properties file becomes malformed, Orchid Core VMS may fail to start. If this happens, check the Orchid Core VMS logs (at /var/log/orchid_server/) for error details.
- After you edit the configuration file, you must enable and start the Orchid Core VMS services. (Refer to the next section for instructions.)
How to Manage the Orchid Core VMS Services in Red Hat
The two main services used by Orchid Core VMS are listed below. If you need to enable, check the status, start, or stop either service, you can do this from the command line.
- Orchid Server Service: The main Orchid Core VMS service that records and archives video.
- Orchid ONVIF Auto-Discovery Service: Used by Orchid Core VMS to automatically find cameras that support ONVIF.
Tips
- In Red Hat, you have to enable the Orchid Core VMS services. This will allow the services to automatically start on bootup and restart in the case of failure.
- After you start the services, you should configure the firewall.
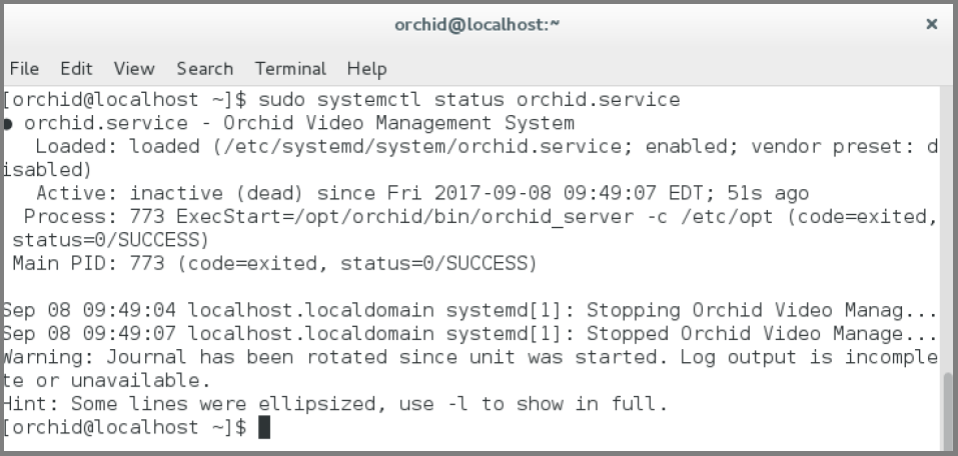
- After you’ve configured your Orchid Core VMS properties and started the services, you should check the status of both services to verify they are running.
- You will need to restart the services whenever a change has been made to the Orchid Core VMS configuration file.
To enable the Orchid Core VMS services:
- Type each of the following two commands:
- sudo systemctl enable orchid_onvif_autodiscovery.service. Press Enter.
- sudo systemctl enable orchid.service. Press Enter.


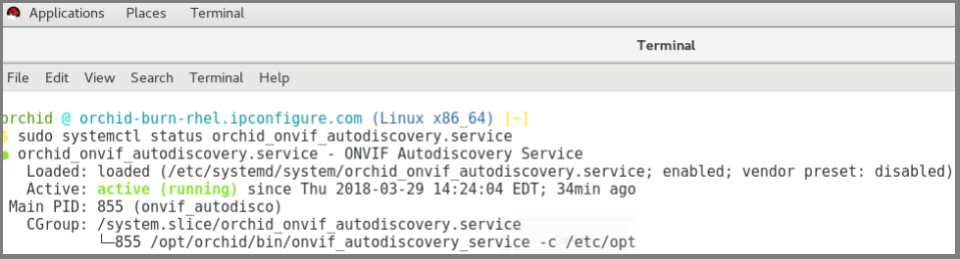
To manage the Orchid Core VMS service:
- Type the following command: sudo systemctl (command) orchid.service (where the command is start, stop, or status). Press Enter.


To manage the Orchid ONVIF Autodiscovery service:
- Type the following command: sudo systemctl (command) orchid_onvif_autodiscovery.service (where the command is start, stop, or status). Then press Enter.


How to Optimize the Database in Red Hat
Although the Red Hat installer does not prompt users to optimize the database, optimization is recommended after a software upgrade. This process will improve the overall performance of the system, especially notable in larger systems with video archives greater than 40 TB.
Be aware that the optimization process may take a while to complete (and Orchid Core VMS will be unavailable during this time).
- First stop the Orchid Core VMS server service. Type the following command: sudo systemctl stop orchid.service. Then press Enter.
- To run the optimization, type the following command: sudo /opt/orchid/bin/orchid_server —optimize-database. Then press Enter.
- When the optimization is complete, start the Orchid Core VMS service. Type the following command: sudo systemctl start orchid.service. Then press Enter.
Configure the Firewall
By default, the firewalld service will block access to Orchid Core VMS. Refer to the Installation Support Topics section for a list of the ports used by Orchid Core VMS, and consult your RHEL 7 documentation for configuring firewalld. The following example will open default ports used by Orchid Core VMS, but you should understand the security implications of modifying your firewall settings before proceeding.
sudo firewall-cmd —zone=public —add-port=80/tcp —permanent
sudo firewall-cmd —zone=public —add-port=554/tcp —permanent
sudo firewall-cmd —zone=public —add-port=40000-50000/udp —permanent
sudo firewall-cmd —zone=public —add-port=5565/tcp —permanent
sudo firewall-cmd —reload
How to Sign in to Orchid Core VMS in Red Hat
Sign in to Orchid Core VMS using a web browser pointed to your server’s IP address at the port specified above (default is 80). Unless changed during the configuration process, the default sign in credentials are admin and password.
Uninstalling the Orchid Core VMS Package in RedHat
- To remove the Orchid Core VMS package, use the following command: rpm -e ipc-orchid-(version).x86_64.
(This will remove all files installed and created by Orchid Core VMS except the /orchives directory specified at webserver.archives.rootpath in the properties file.)
Post your comment on this topic.