
From this important section of the Business profile, the user can carry out the following operations:
- VIEWING THE EXISTING AGREEMENTS
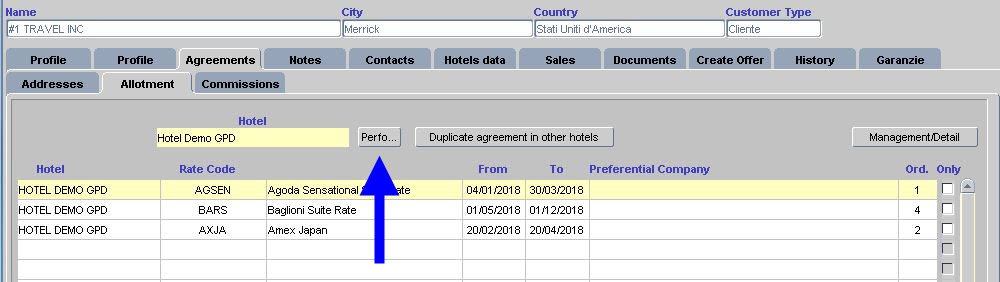
By clicking the RUN button, it is possible to view the preferential contract codes used for each hotel together with their validity period.
- ATTACHING AN AGREEMENT
In order to attach a preferential contract/agreement to a specific business profile, do as indicated:
- Select the name of the hotel for which the agreement is valid.
- Click the RUN button followed by ‘MANAGEMENT/DETAIL’ button.

- Click on the box that appears on the left of the screen displayed and upload the selected agreement (F9 menu on the Contract section).
From To fields refer to the agreement validity period.
The Order field enables the user to number by importance any agreement signed with the company in question.
The fields that appear to the right are to be filled in only if the selected agreement is referred and is applicable to a specific allotment room quota (see the following paragraph “Inserting an allotment”).
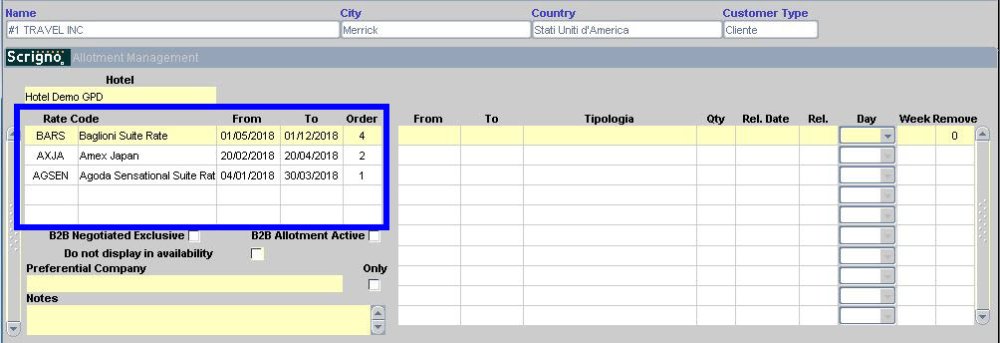
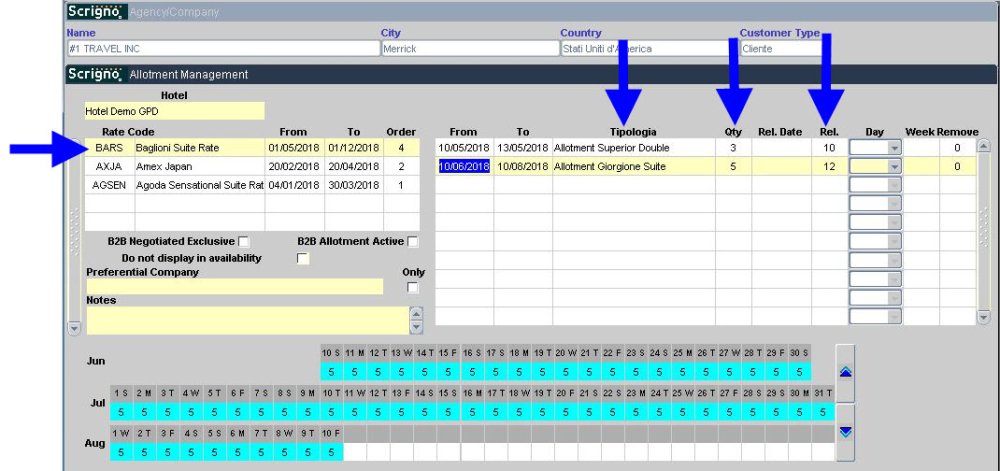
- INSERTING AN ALLOTMENT
After having chosen the hotel for which a room quota allotment will be defined,
- Click the button placed to the right of the ’MANAGEMENT/DETAIL’ screen
- Click on the box displayed to the left of the screen and charge the selected agreement (F9 menu on Contract field).
From To fields refer to the agreement/allotment validity period.
The Order field enables the user to number by importance any agreement/allotment signed with the company in question. - Click on the box displayed to the right of the screen and enter the details regarding the allotment being inserted (number of rooms, type, type of release signed)
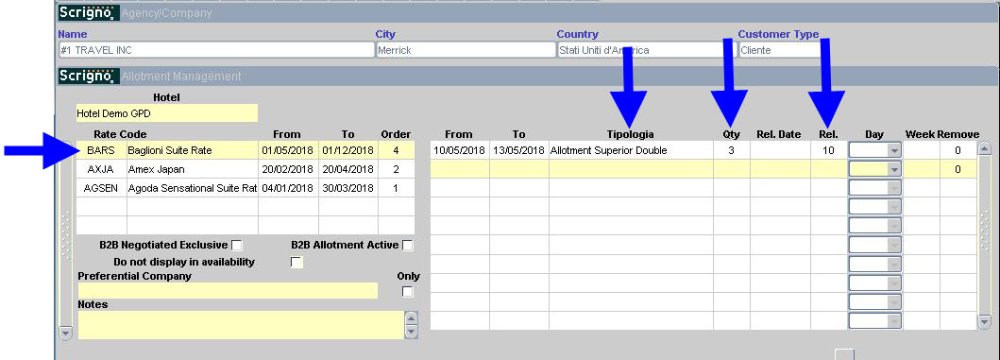
Example 1: the allotment is linked to the TRAV2 agreement and it includes a different number of rooms according to the chosen type and a different number of days of release from the arrival according to the period.
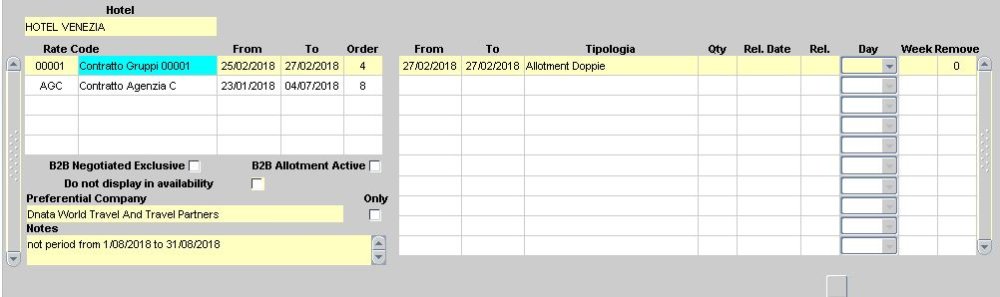
Example 2: the allotment is uploaded in a line without an agreement code: this means that the allotment is ‘generic’. In case of a generic allotment, each booking relating to this profile contributes to the reduction of remaining rooms, regardless of the agreement code indicated during the booking stage.
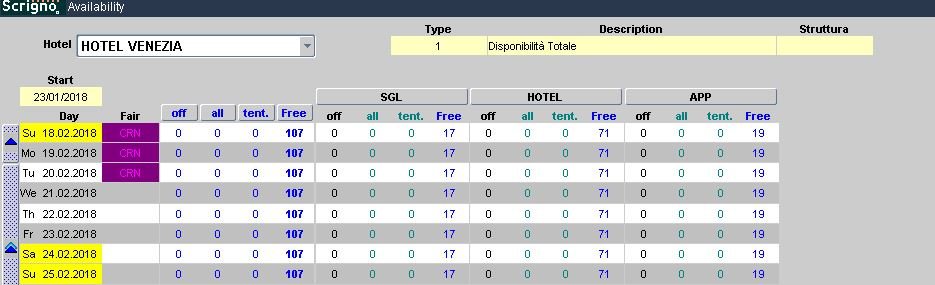
- The status of the allotment quota available is summed up on the screen that shows the general availability. By clicking ‘All’, it is possible to see in detail any allotment for each Agency.
![]()
- MODIFYING AN EXISTING ALLOTMENT
After having chosen the facility, click the ‘MANAGEMENT/DETAIL’ button located on the left side of the screen (see the following picture).

- Select the lines relating to the allotment rooms quota to be modified.
The system will propose, on the coloured form below, the preview of the quota type currently reserved for the allotment.
- Click the buttons located on the lower part of the screen.
![]()

Consider the function of each button:
 |
This button is useful for editing. Example: remove 2 rooms from all the days selected on the system as Fair. 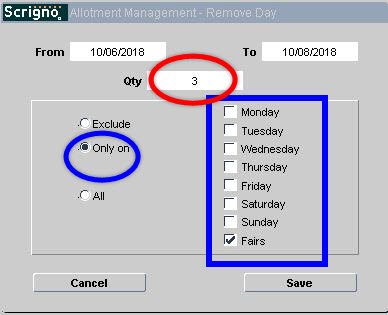 At the end of the operation, the summing up form will display the decrease of the quotas only for the days indicated. Fair days are reported on the form with specific colours. For the Set Up of these periods and colours, return to the menu. Tables > Hotel > Fair. |
 |
This button is useful for resetting the allotment room quota previously agreed on Mondays. |
 |
This button is useful for resetting the allotment room quota previously agreed on Tuesdays. |
 |
This button is useful for resetting the allotment room quota previously agreed on Tuesdays. |
 |
This button is useful for resetting the allotment room quota previously agreed on Thursdays. |
 |
This button is useful for resetting the allotment room quota previously agree on Fridays. |
 |
This button is useful for resetting the allotment room quota previously agreed on Saturdays. |
 |
This button is useful for resetting the allotment room quota previously agreed on Sundays. |
 |
This button is useful for resetting the allotment room quota previously agreed only for ‘Fair’ days. |
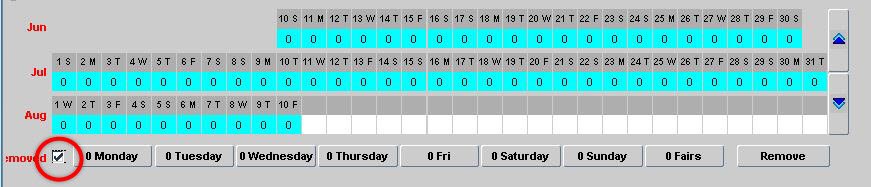
- To save modifications, click on the icon, or press the F10 key.
![]()

The tick on the ‘Removed’ field enables to view possible reductions relating to the original setting.
Post your comment on this topic.