
Registering an account allows you to monitor multiple patients from a single interface, specifically designed for this purpose.
You can register as a clinician or nutritionist. The registration is separated in three main steps, in order to prevent abuse of the system:
- Select a pricing plan
- Fill in the details in the registration form
- Fill in billing information (optional step)
Registration is available on the following page: https://www.diabetes-m.com/login/ after you view and select a pricing plan.
Pricing plans
You can see more details for the pricing plans here: https://diabetes-m.com/monitor/pricing/
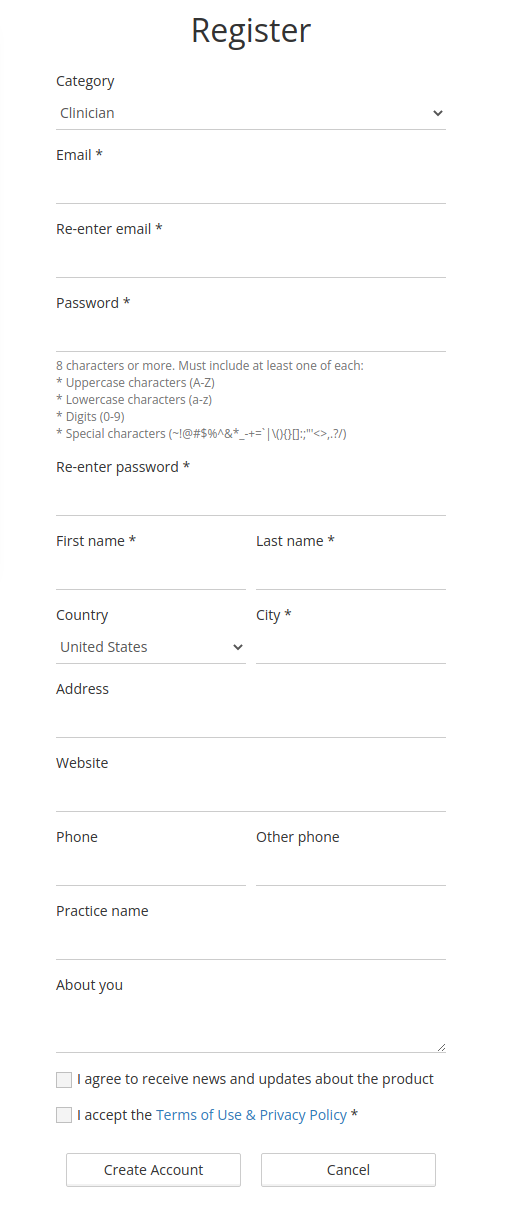
Registration form
After you have selected a pricing plan you should fill in the registration form with the following details:
- Category – clinician or nutritionist
- Email – a valid email to receive official communication from the application such as a two-factor authentication code, additional information (if this option is selected) and if you forget your password
- Password
- Name
- Country
- City
- Address
- Website
- Phone
- Name of the practice
- More information
- Checkbox for receiving emails – check if you want to receive news and updates about the product.
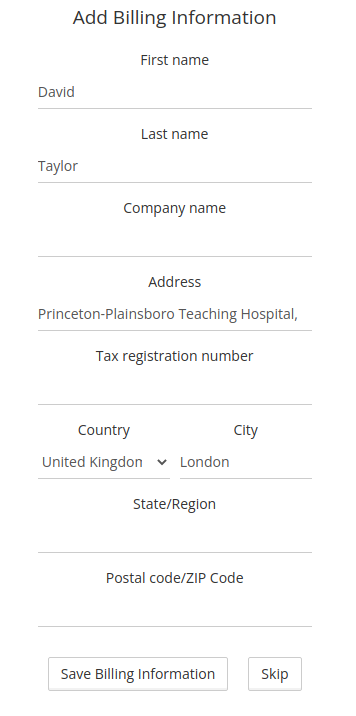
Billing information
If you have selected a paid plan, you can add billing information by entering the following information:
- Name
- Company name
- Address
- Tax registration number
- Country
- City
- State / Region
- Postal code / ZIP code
You can skip this step during registration and edit the information later on the subscription page.
After you have completed the registration process you will receive your clinician code and some instructions via email.
You can now provide this code to your patients. Here is a short instruction on how they can give you access to their data:
How to add a clinician to patient’s account?
- Go to the “Clinician” screen from the left menu on the patient’s mobile device (or online in Diabetes:M Analytics).
- Enter the code and tap/click the “Add Clinician” button.
- The patient will appear in the Requests section in the menu on the left. There you have to “Accept” the request from the patient.
- That’s it – you now have access to monitor the patient’s data in Diabetes:M Monitor.
Need more help with this?
Don’t hesitate to contact us here.