
This section provides a quick walk-through of configuring Azure Active Directory (free tier) (for enabling Microsoft Entra ID/Azure Active Directory-based authentication in Orchid Fusion VMS). Specifically this section will guide you through the following:
- Creating a free Microsoft Account (if needed)
- Creating an Azure Active Directory user
- Creating an Azure Active Directory group
- Registering an Azure Active Directory app
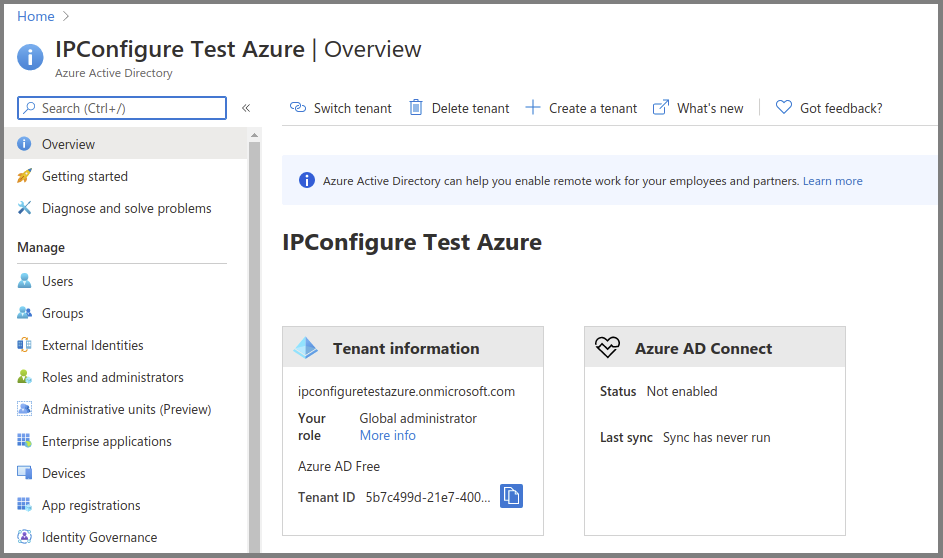
Microsoft Azure Active Directory Account Setup and Portal Login
- If you do not have a Microsoft account, create a free account here: https://account.microsoft.com/account
- Log into the Azure Active Directory (free tier) portal using your Microsoft account: https://portal.azure.com/#blade/Microsoft_AAD_IAM/ActiveDirectoryMenuBlade/Overview
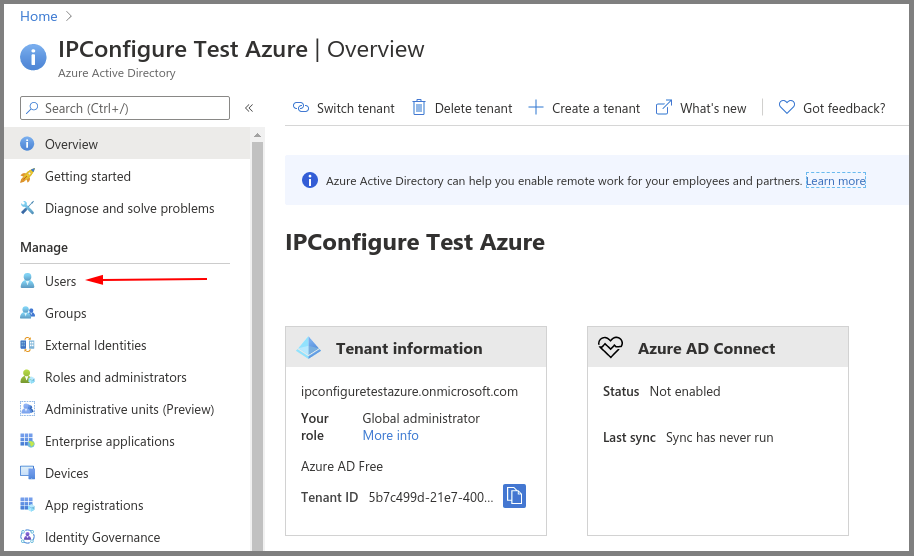
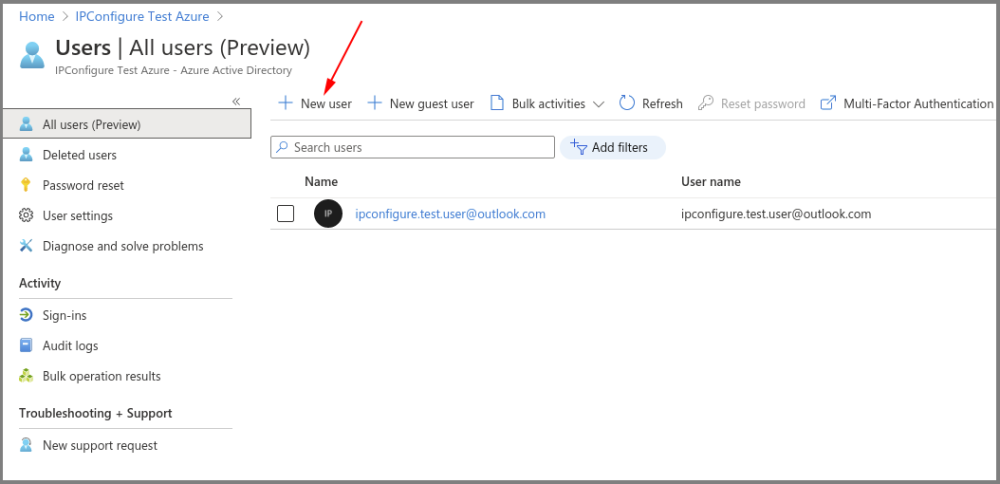
Create an Azure Active Directory User
- Enter a name for the user in the User name field. (This is a short name that you use to sign in, like TJones @ ipconfigure.com.)
- Enter the formal (long) name for the user in the Name field (like Tom Jones).
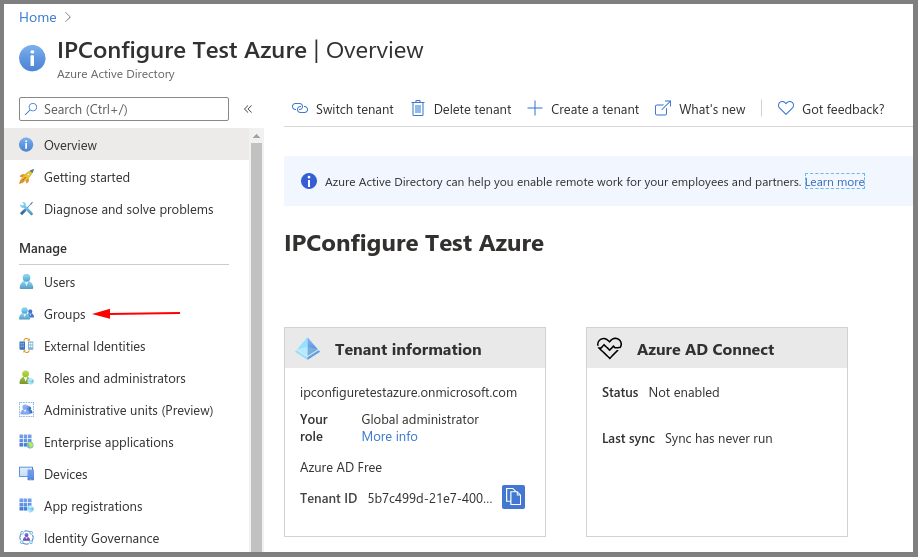
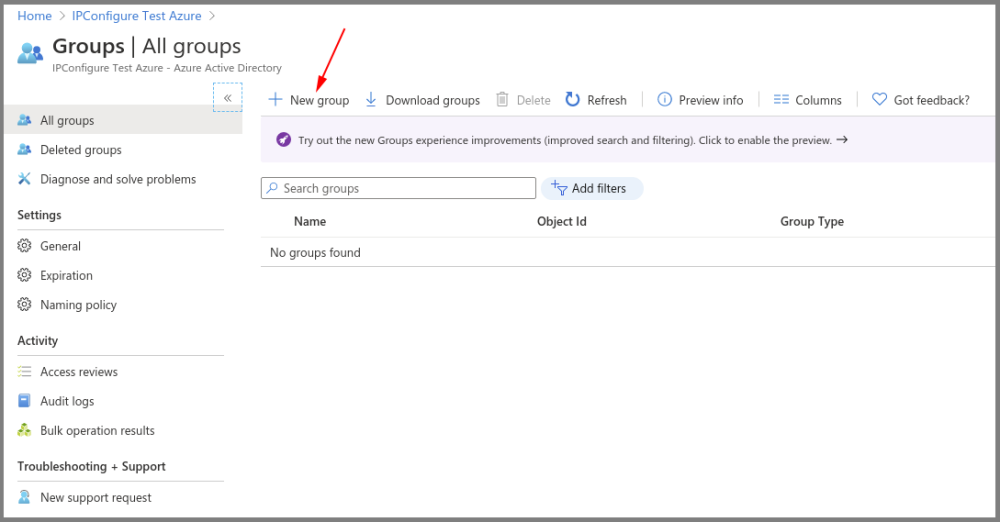
Create an Azure Active Directory Group
- You will need to create at least one Azure Active Directory Group with at least one member.
- Select a type from the Group type drop-down.
- Enter a name for the group in the Group name field.
- Select group members by clicking on the Members link.
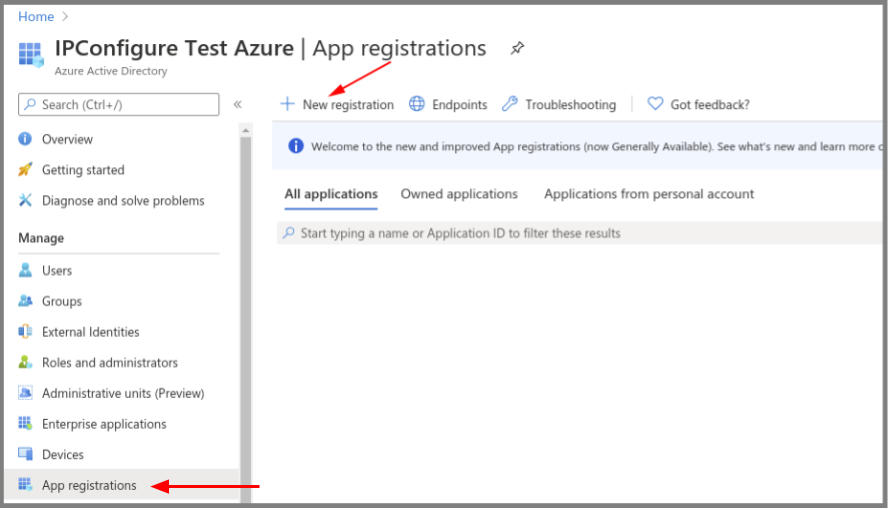
Register an Azure Active Directory App
- To register a New app, be sure to set the following:
- Enter the user-facing display name for this application in the Name field.
- Select the Single Tenant option under Supported Account Types.
- Select the Client Application option under Platform Configuration.
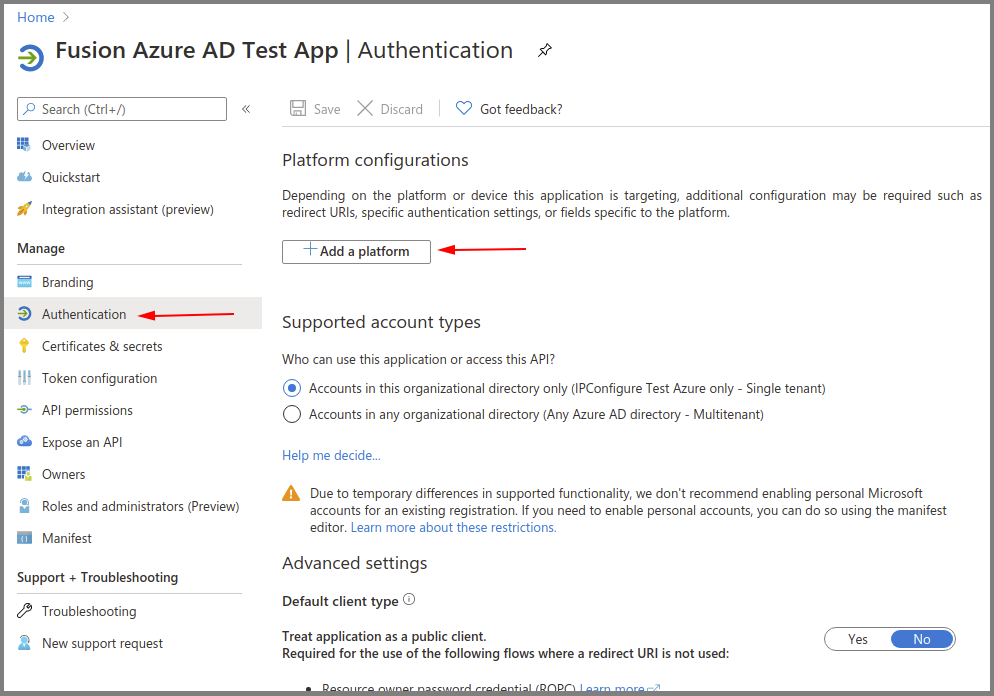
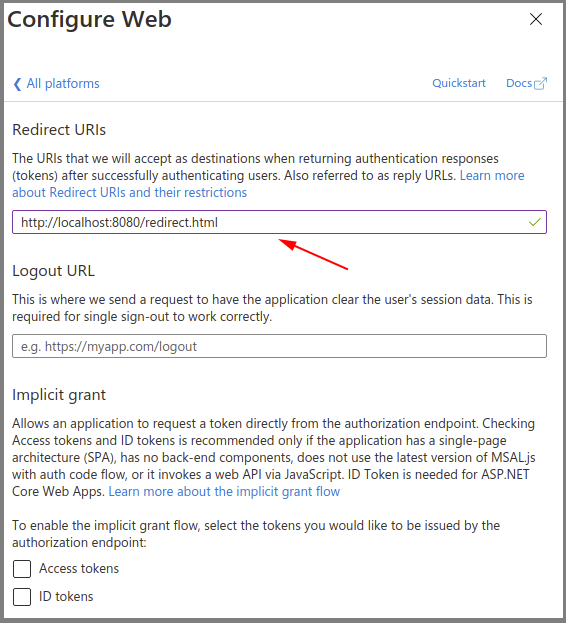
Azure AD App – Authentication – Add a Web Platform
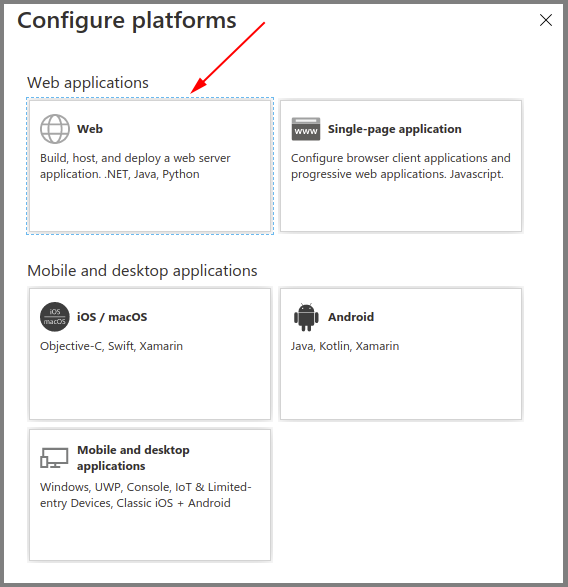
- Go to Authentication, then select Add a platform.
- Select the Web type application.
- Enter the Fusion redirect URL: http(s)://<fusion-url>/redirect.html in the Redirect URIs field (where <fusion-url> is the URL for your Fusion server).
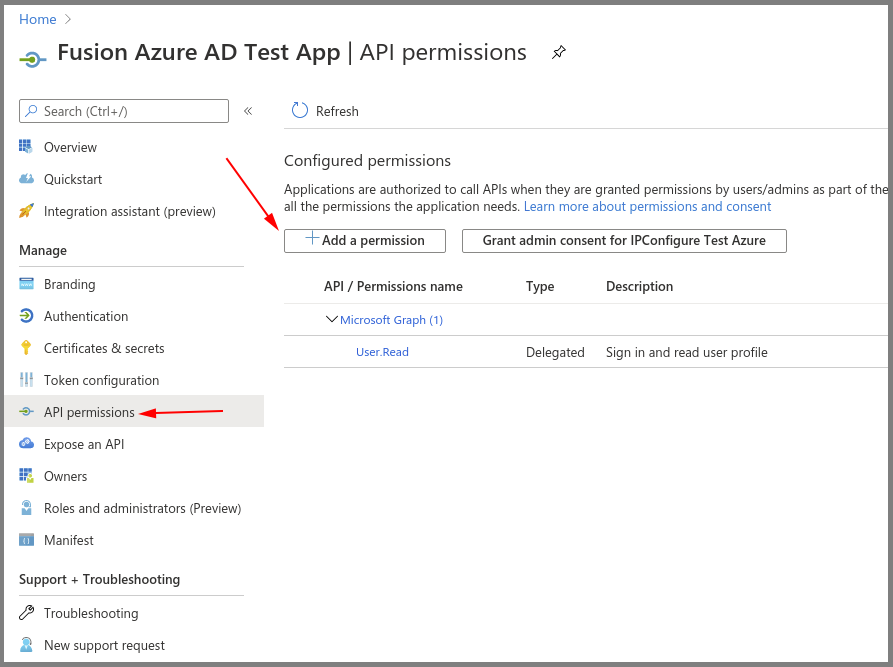
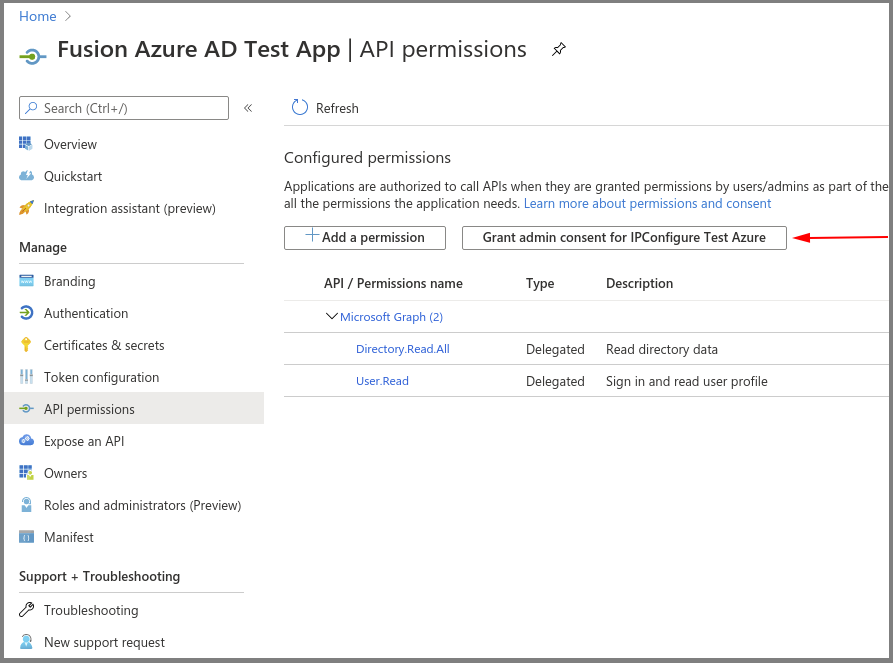
Azure AD App – API Permissions
- Go to API permissions, then select Add a permission.
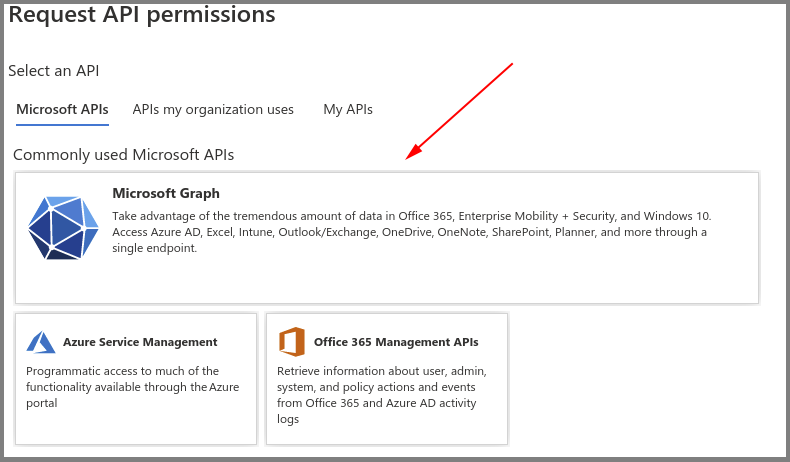
- Select the Microsoft Graph.
- Select the Directory.Read.All delegated permission.
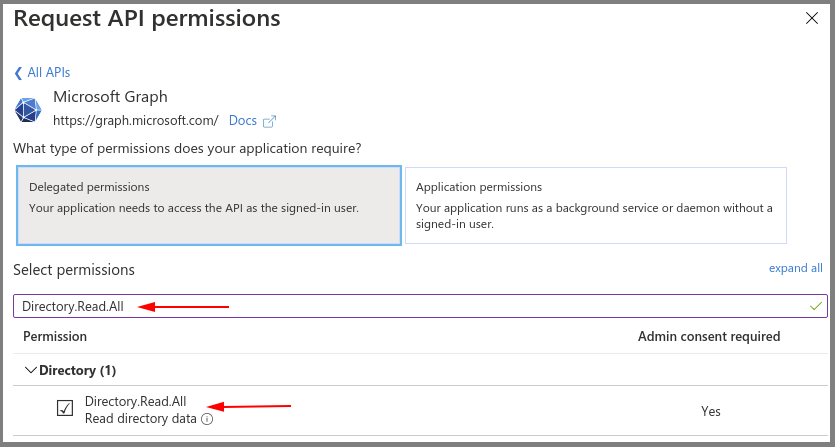
- Select Grant admin consent for your application.
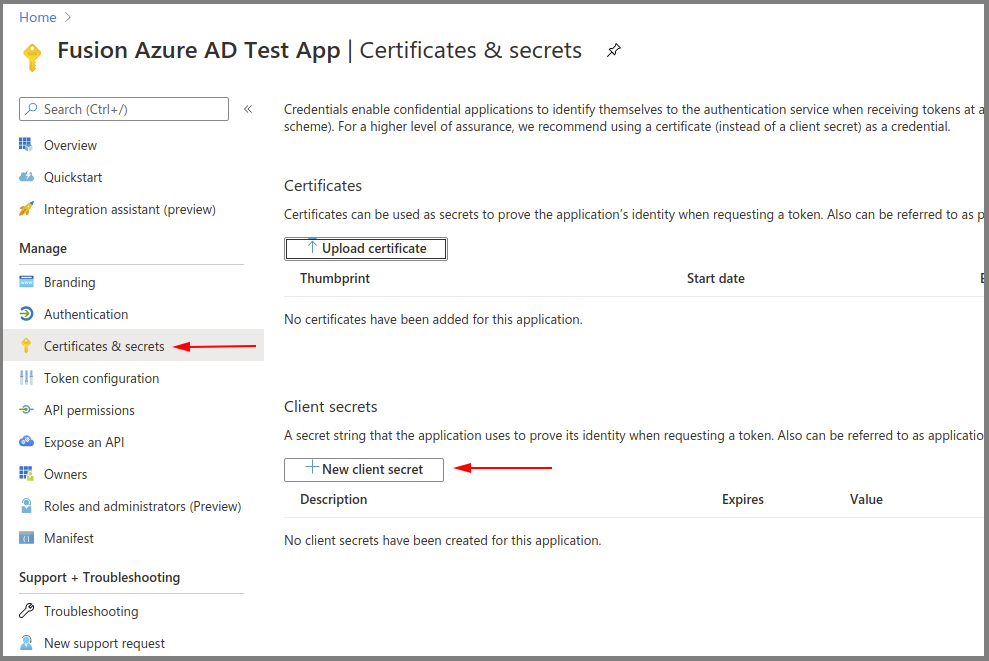
Azure AD App – Certificates & Secrets – Create a New Client Secret
- Select New client secret to create a new secret value.
- Save the secret value because it will not be available later. (Copy the secret value to a secure location.)
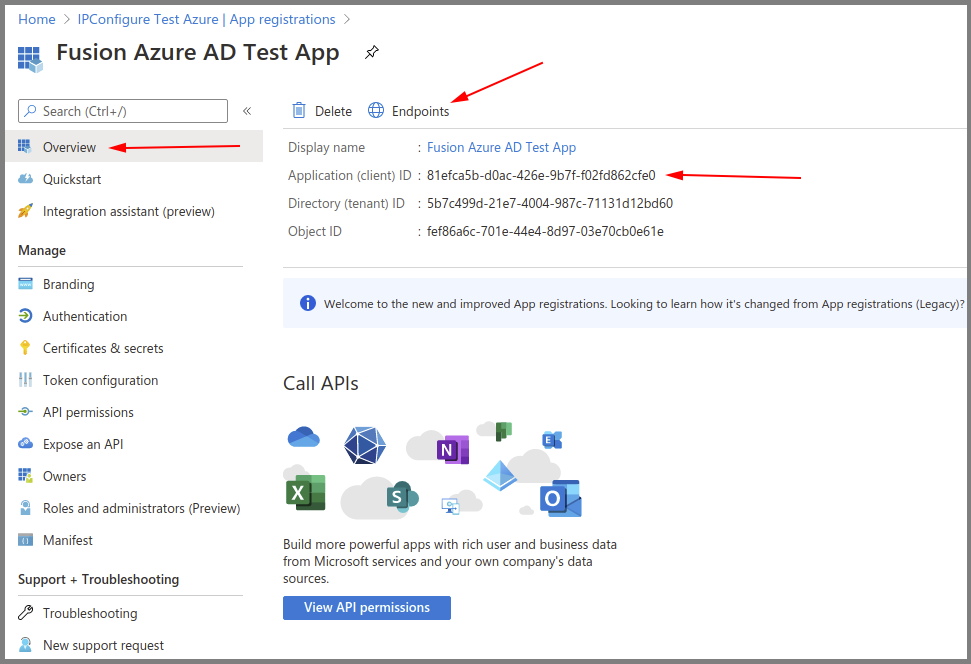
Azure AD App – Save the Client ID and OAuth 2.0 Authorization Endpoint (v1)
- Go to the Overview.
- Make note of the Azure Application (client) ID value for later use.
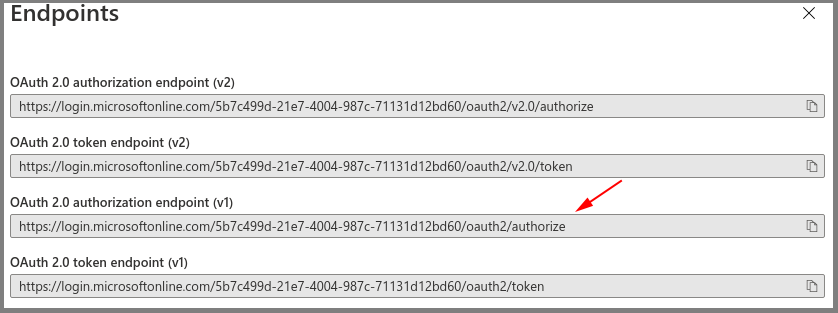
- Select Endpoints.
- Make note of the OAuth 2.0 authorization endpoint (v1) value for later use.
At this point, you should have all of the required values to enable Microsoft Entra ID/Azure Active Directory-based authentication in Orchid Fusion VMS. Return to the previous section (Enabling Microsoft Entra ID/Azure Active Directory) for instructions on modifying the Orchid Fusion VMS configuration file to enable Microsoft Entra ID/Azure Active Directory authentication. Once enabled, you may add one or more Orchid Fusion VMS Permission Groups that pull users from your Microsoft Entra ID/Azure Active Directory. (For details on adding Permission Groups, please refer to the Orchid Fusion VMS Administrator Guide.)
Post your comment on this topic.