
There are a few steps you will need to perform to prepare to install Orchid Fusion VMS.
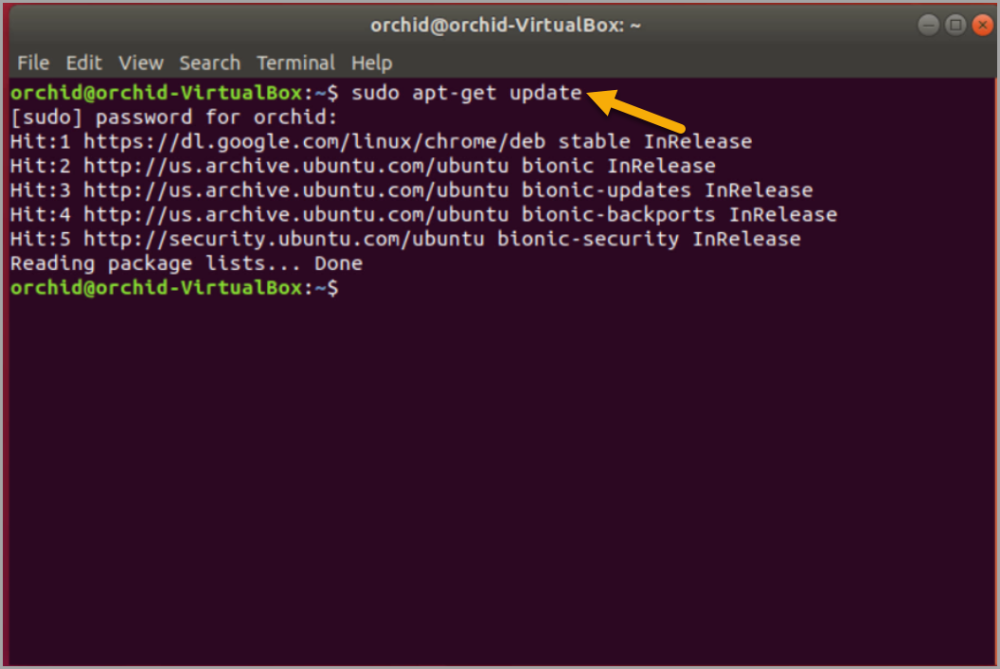
- You will need to install Java 8 before you install Fusion. Type each of the following commands, pressing Enter after each one. (The screenshots that follow show the first couple of commands and the system response.)
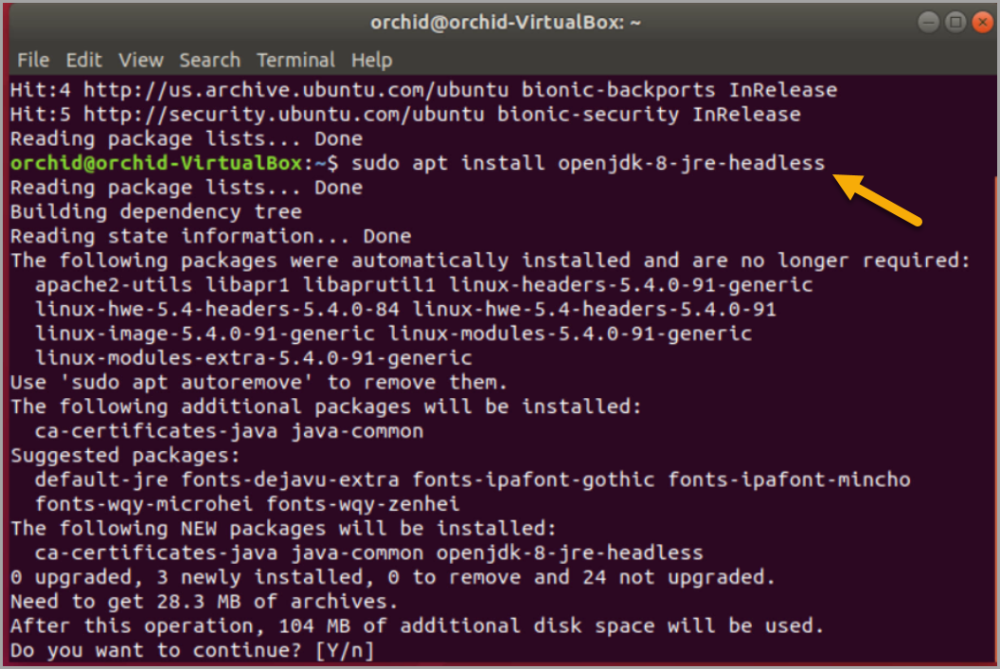
sudo apt-get updatesudo apt install openjdk-8-jre-headless
After this command, if the system is upgrading, you may receive a message that requests if you want to continue and use the additional space required. Respond by pressing Y.
sudo update-alternatives --config java
If only one version of Java is present on your server, the last command above will do nothing. If more than one version is present, select Java 8 when prompted by the last command.
- Download the Fusion .deb file. You can find the latest version of Orchid Fusion VMS (for Ubuntu 16.04, Ubuntu 18.04, Debian Jessie, and Raspbian Jessie) on IPConfigure’s website at http://www.ipconfigure.com/products/fusion#download.
- Once you’ve downloaded the Orchid Fusion VMS installation package, decide whether you want to perform the installation via the Command Line or the GUI.
Installing through the Command Line (Ubuntu Server):
- Open the Terminal program (CTRL+ALT+T) and navigate to the directory where you downloaded the Orchid Fusion VMS installation package. (The package is probably stored in the Downloads folder.)
- Unless GDebi has been installed manually, it will need to be installed. Type the following command:
sudo apt-get install gdebi. Then press Enter.
It may take a few minutes for GDebi to install, depending on the speed of your system. - The GDebi command can now be used to install the Orchid Fusion VMS debian package. The syntax is
sudo gdebi (package-name).deb, where package-name is the complete filename of the Orchid Fusion VMS installation package that you downloaded. For example, if the name of the package is fusion-x86_64_2.10.0-systemd.deb, type the following command:sudo gdebi fusion-x86_64_2.10.0-systemd.deb. Then press Enter.
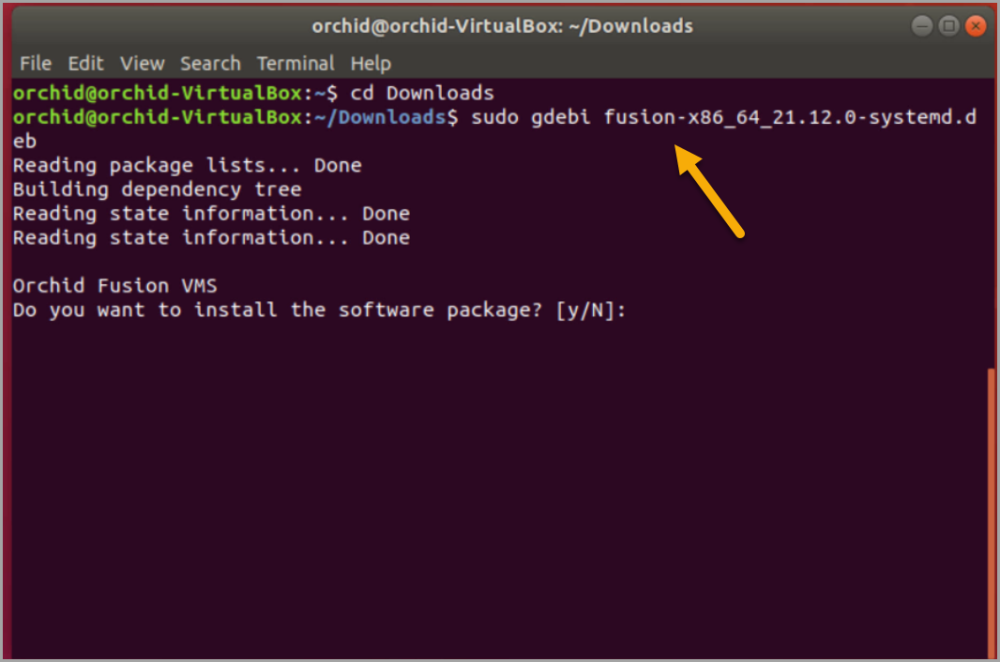
- You will be asked if you want to install the software. Respond by pressing Y and Enter.
- Beginning with Orchid Fusion VMS version 2.10.0, if you are performing an upgrade of your Orchid Fusion VMS, the installer will check the Orchid Core VMS version numbers on each of the registered Orchid Core VMS servers. If any of the registered servers have an Orchid Core VMS version number older than 2.8.0, you will receive a warning message similar to the one pictured here.
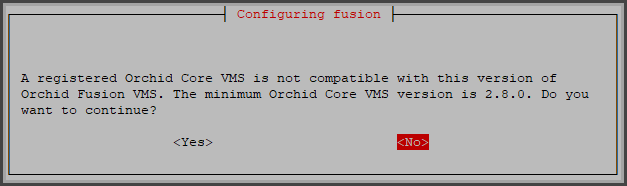
- Orchid Fusion VMS Setup will ask if you want to continue with the installation. IPConfigure recommends that you select No, and upgrade any Orchid Core VMS servers that don’t meet the minimum version requirement. When all of your Orchid Core VMS upgrades are complete, return to step 3 to install the new Orchid Fusion VMS.
- You will be asked to accept the End User License Agreement. After reading the agreement, press the Tab key, then the Enter key to accept it.
- You will then be asked to accept the agreement in a separate prompt. Use the Left Arrow key to select Yes, and press Enter to accept it.
- The installer will then ask for the web server port number to use for Orchid Fusion VMS. By default, it is set to port 8080 (which is the recommended port for most installations). If Orchid Fusion VMS needs to use a different port, update the port then press the Enter key.
- Enter the password you would like to set for the default admin account, then press the Enter key.
The installation will complete automatically without any additional prompts. This process may take a few minutes. The Orchid Fusion VMS service starts automatically once the package installation is done, after which you can access the Orchid Fusion VMS user interface in your web browser. (For more details on signing in, please refer to the Enabling… topics included in the Installation Support Topics section, and the Sign In topic in the Orchid Fusion VMS Administrator Guide.)
You may automatically launch a browser to Orchid Fusion VMS using the link installed on your server:
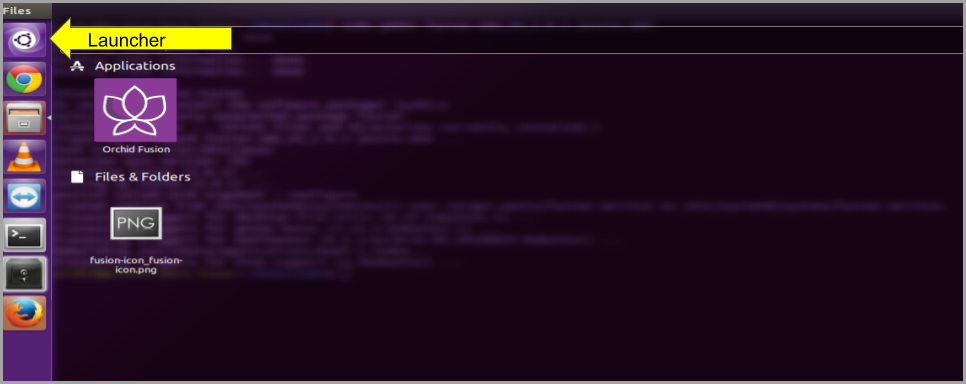
- Click on the Launcher icon in the top left corner of the screen. Then type fusion in the search box, and click the Orchid Fusion icon listed under Applications.

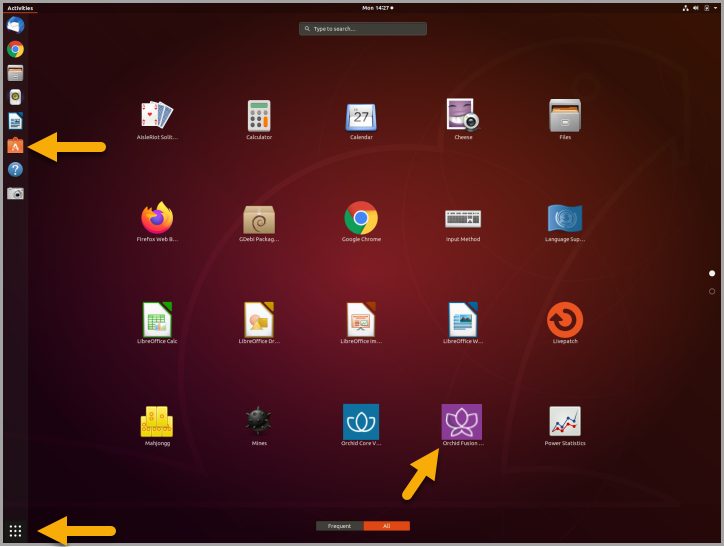
- Or, you can click the Applications icon (in your favorites or the lower-left corner of the screen), then click on the Orchid Fusion icon.
Installing through the GUI (Ubuntu Desktop):
- First, we’ll need to open the Ubuntu Software Center. Here are a couple of ways to do this.
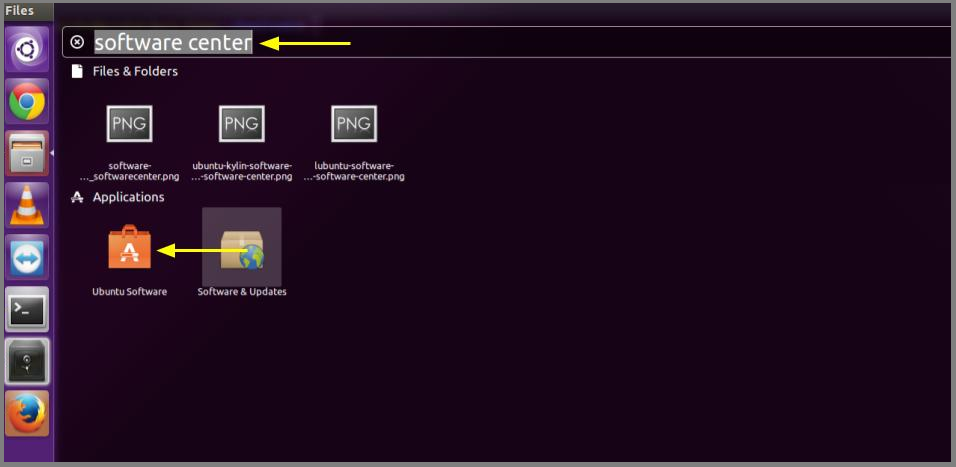
- Click on the Launcher icon in the top left corner of the screen. Then type Software Center in the search box, and click the Ubuntu Software Center icon listed under Applications.
- If it is not available in your favorites, click the Applications icon in the lower-left corner of the screen. Then click on the Ubuntu Software Center icon.
")
- In the Software Center search bar (below), type gdebi.
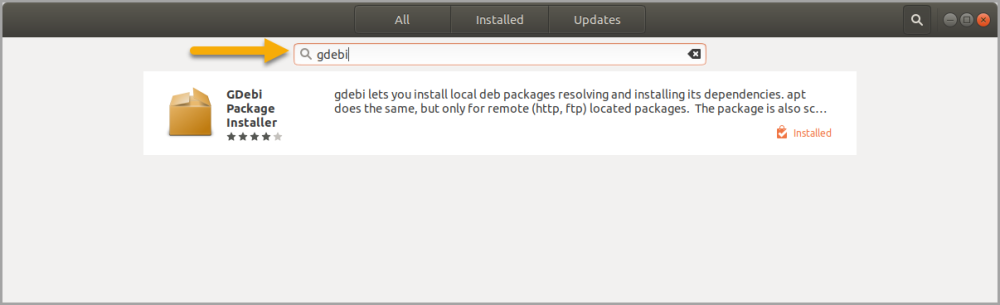
- Select GDebi Package Installer (gdebi), and then click the Install button.
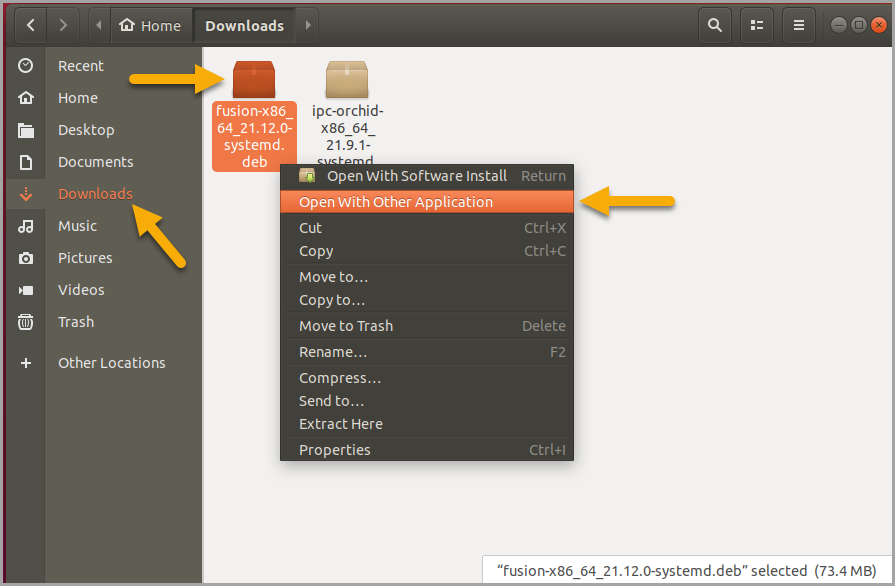
- After GDebi has finished installing, click the Files icon to open the Files Explorer, then navigate to the folder storing your Orchid Fusion VMS package (.deb file). (The package is probably stored in the Downloads folder.)
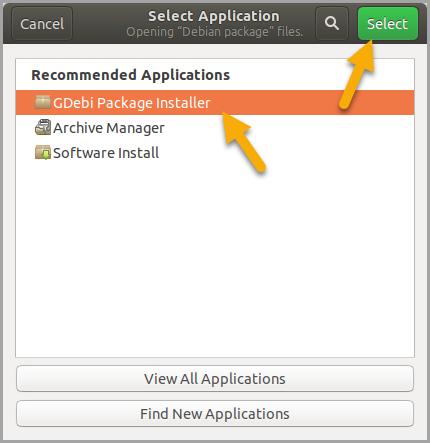
- Right-click on the Orchid Fusion VMS package, hover over Open With with the mouse, then select the GDebi Package Installer option.
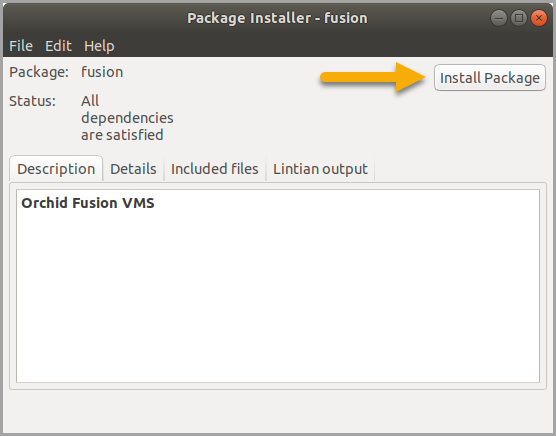
- Once the GDebi package installer loads, click the Install Package button in the top right-hand corner of the window. (You may be asked to enter the administrator password.)
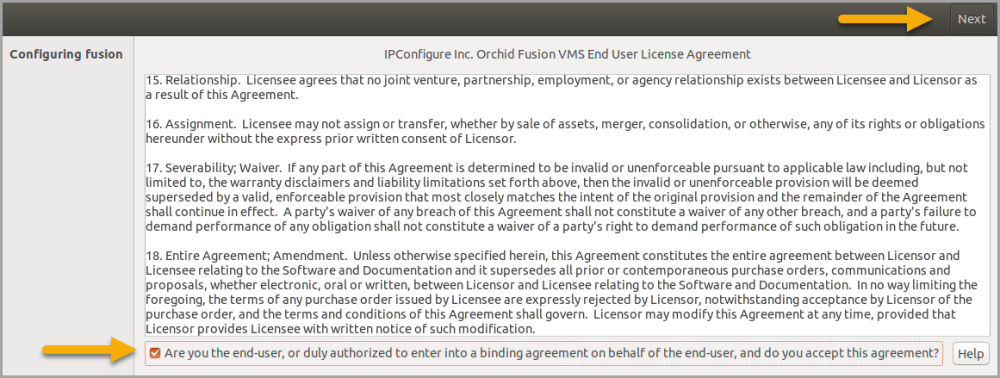
- You will be asked to accept the End User License Agreement. After you read the agreement, mark the Do you accept this agreement checkbox and click the Forward button, or mark the Are you the end user checkbox and click the Next button.
- The installer will ask you to set the web server port and default admin password:
- By default, the web server port is set to port 8080, which is recommended for most installations. Update the port number only if Orchid Fusion VMS needs to use a port other than 8080.
- Enter the password you would like to set for the default admin account.
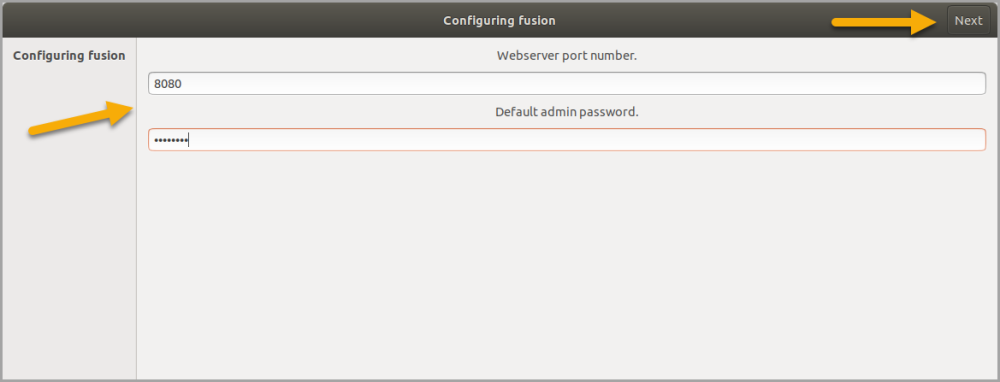
- When finished, click the Forward or the Next button.
The installation will complete automatically without any additional prompts. This may take a few minutes. - Once the package installer displays an “Installation Finished” message at the top of the screen, click the Close button to close the installer and complete the installation. The Orchid Fusion VMS service will start automatically once the package installation is done, after which you can access the Orchid Fusion VMS user interface in your web browser. (For more details on signing in, please refer to the Enabling… topics included in the Installation Support Topics section, and the Sign In topic in the Orchid Fusion VMS Administrator Guide.)
You can automatically launch a browser to Orchid Fusion VMS using the link installed on your server:
- Click on the Launcher icon in the top left corner of the screen. Then type fusion in the search box, and click the Orchid Fusion icon listed under Applications.
- Or, you can click the Applications icon (in your favorites or the lower-left corner of the screen), then click on the Orchid Fusion icon.
Post your comment on this topic.