
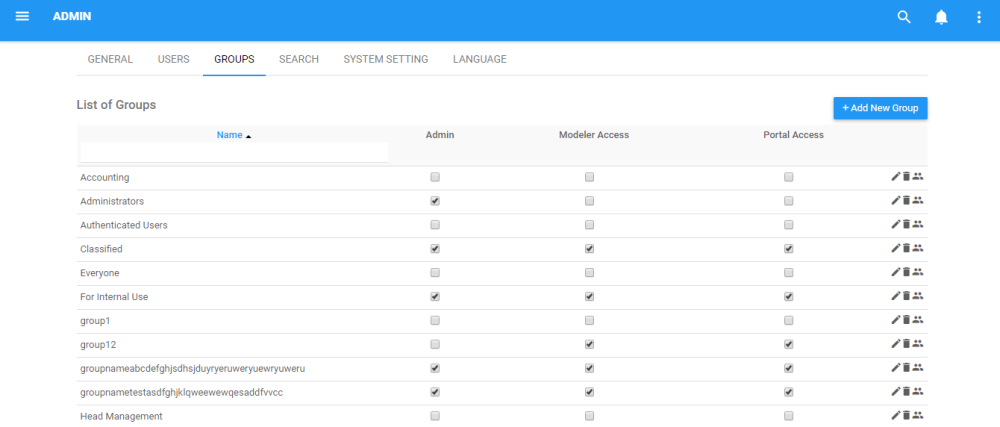
System Administrators can manage groups within the Group’s tab. System Administrators can create and manage groups to assist in user classification and management, as well as control access for different user groups. This allows System Admins to efficiently control and manage different user groups in a consolidated space.
To create a group, please see the steps below:
1. Login to the EPC Web App
2. Navigate to the System Admin section
3. Navigate to the Groups tab
4. Select the  icon
icon
5. A pop-up window will be generated

6. Input the Group Name as well as the access provided to the group.
7. Click the  button and the group will be created.
8. To populate the group, you must select the  icon next to the group you have created. Click on the icon and it will generate a pop-up window

9. Search and select the users you would like to add to the group.
10. Once you have populated the group, select the “Close” button.
Users can edit or delete groups directly with the edit icon  and delete icon
  .
.
Need more help with this?
Visit the Support Portal