
Texture Mapping is the process of applying textures to the surface of a 3d model. In SHAPE we can virtually project textures on a model with various different projection types: perspective, planar, cylindrical, spherical, radial, and UV. Texture mapping allows you to use models without UV Maps and project onto multiple objects.
Perspective
The typical need for perspective texture mapping in SHAPE is when video content has been rendered from a camera. In SHAPE you place the perspective texture mapper in the same place as the camera or (import your .dae or .c4d project file into SHAPE). And then play the content back from that point of view.
To create a perspective texture mapper, go to,
Menu Bar-> Create-> Texture Mapper->  Perspective.
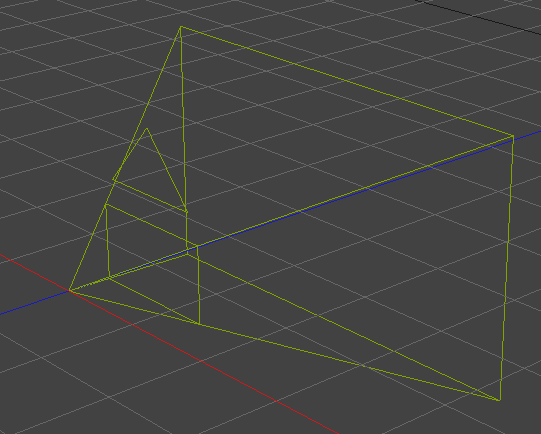
Perspective Mapping Properties
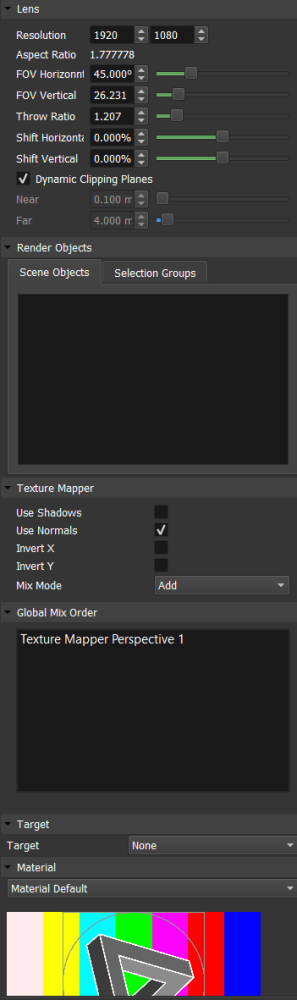
Lens
- Resolution: The resolution of texture being applied to objects. This should match the selected materials resolution.
- Aspect Ratio: The aspect ratio of the texture mapper based on resolution.
- Horizontal and Vertical FOV: This should match the cameras FOV from the application used to create the content.
- Throw Ratio: This should match the cameras Throw Ratio from the application used to create the content.
- Dynamic Clipping Planes: With this enabled, Clipping Planes, Near and Far will automatically set themselves to the region of interest.
- Near: This sets the closest plane the texture mapper will begin to render within.
- Far: This sets the furthest plane the texture mapper will will stop to render within.
Render Objects
These options only work when shadowing is enabled.
- Scene Objects: Decide what objects you want the Texture mapper to render on or be used as a mask.
- Selection Group: Decide what selection group you want the texture mapper to render on or be used as a mask.
Texture Mapper
- Use Shadows: Toggle on / off shadows. With shadows off, content will pass through any object to objects behind it.
- Use Normals: Toggle on / off use of normals.
- Invert X: Inverts X axis of material applied from texture mapper
- Invert Y: Inverts Y axis of material applied from texture mapper
- Mix Mode: Choose the mixmode for that mapper: Add, Sprite, Alpha
Global Mix Order
Allows for re-arranging of mixing order for multiple texture mappers. The last texture mapper in this list will be the last to be rendered, meaning if it is in sprite Mix mode it will appear on top of all other texture mappers.
Target
- Target: Choose an object for the texture mapper to always target.
| TIP: Null objects are a great to use as targets since they will not show on output |
Material
- Material: This is the material that the texture mapper will render.
Here you can clearly see the region of interest that the mapper will show its material in due to clipping planes. 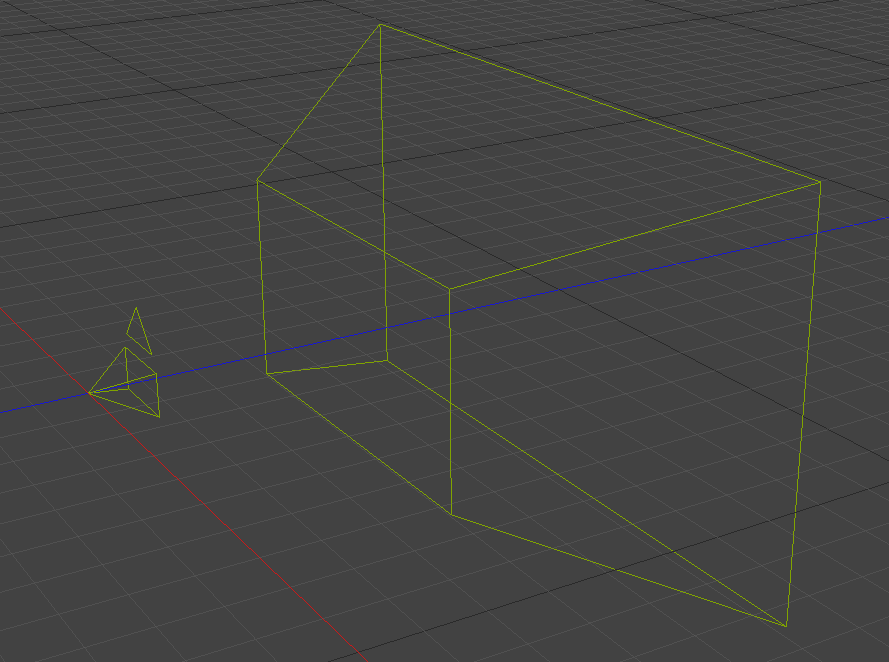 |
Planar
Planar mapping pushes pixels through the world on one plane. It works well on relatively flat objects and can be applied to multiple objects.
To create a planar texture mapper, go to,
Menu Bar-> Create-> Texture Mapper->  Planar
Planar Mapping Properties
Many of the Texture Mapper properties are shared between the different types. However Lens parameters may vary. See Perspective Mapping properties for the shared attributes.

Lens
- Resolution: The resolution of texture being applied to objects. This should match the selected materials resolution.
- Aspect Ratio: The aspect ratio of the texture mapper based on resolution.
- Width: How wide is the planar mapper in physical units of measurement
- Height: How high is the planar mapper in physical units of measurement
- Dynamic Clipping Planes: With this enabled, Clipping Planes, Near and Far will automatically set themselves to the region of interest.
- Near: This sets the closest plane the texture mapper will begin to render within.
- Far: This sets the furthest plane the texture mapper will will stop to render within.
Cylindrical
Cylindrical Mapping pushes pixels out in an arc from an axis.
To create a Cylindrical mapper go to Menu Bar-> Create->  Cylindrical
Cylindrical Mapping Properties

Lens
- Resolution: The resolution of texture being applied to objects. This should match the selected materials resolution.
- Aspect Ratio: The aspect ratio of the texture mapper based on resolution.
- Height: How high is the cylindrical mapper in physical units of measurement
- Angle Horizon: How far around a cylinder content is projected measured in degrees.
- Dynamic Clipping Planes: With this enabled, Clipping Planes, Near and Far will automatically set themselves to the region of interest.
- Near: This sets the closest plane the texture mapper will begin to render within.
- Far: This sets the furthest plane the texture mapper will will stop to render within.
Spherical
Spherical Mapping pushes pixels out in an sphere from a single point.
To create a Spherical mapper go to Menu Bar-> Create->  Spherical
Spherical Mapping Properties

Lens
- Resolution: The resolution of texture being applied to objects. This should match the selected materials resolution.
- Aspect Ratio: The aspect ratio of the texture mapper based on resolution.
- Angle Horizon: How far around horizontally content is projected measured in degrees.
- Angle Vertical: How far around vertically content is projected measured in degrees.
- Dynamic Clipping Planes: With this enabled, Clipping Planes, Near and Far will automatically set themselves to the region of interest.
- Near: This sets the closest plane the texture mapper will begin to render within.
- Far: This sets the furthest plane the texture mapper will will stop to render within.
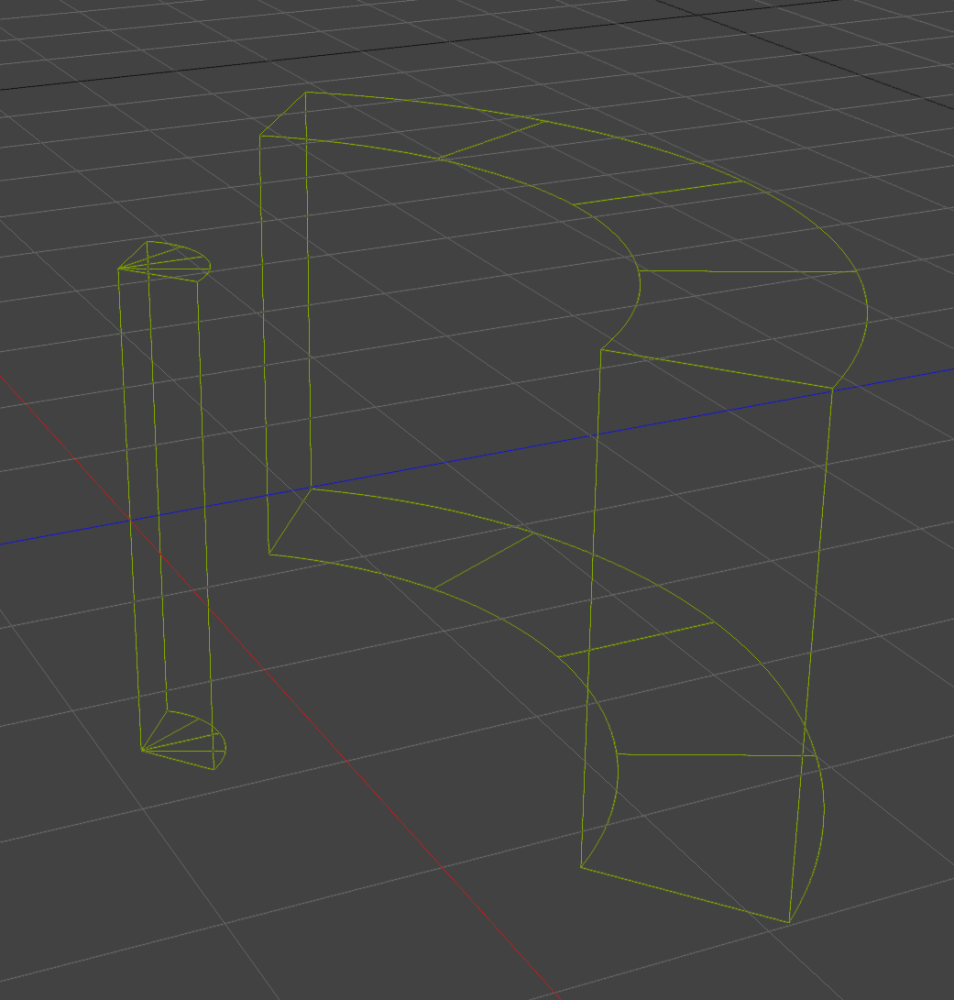
Radial
Radial Mapping pushes a Plane of content around a set radius.
To create a Spherical mapper go to Menu Bar-> Create->  Radial

Radial Mapping Properties

Lens
- Resolution: The resolution of texture being applied to objects. This should match the selected materials resolution.
- Aspect Ratio: The aspect ratio of the texture mapper based on resolution.
- Height: The height of the Radial Mapper
- Angle Horizon: How far around horizontally content is projected measured in degrees.
- Dynamic Clipping Planes: With this enabled, Clipping Planes, Near and Far will automatically set themselves to the region of interest.
- Near: This sets the closest plane the texture mapper will begin to render within.
- Far: This sets the furthest plane the texture mapper will will stop to render within.
UV
UV Mapping uses objects UV map to apply content, it is not directional.
This is mapper is used to allow for re-ordering the mixing structure between other texture mappers and UV content.
To create a UV mapper go to Menu Bar-> Create->  UV
UV
There are no adjustable lens properties for the UV mapper, Resolution will be used from the material applied to the mapper.