
The alignment tool is used to align projectors in SHAPE to the real world projector.
To enter alignment mode,
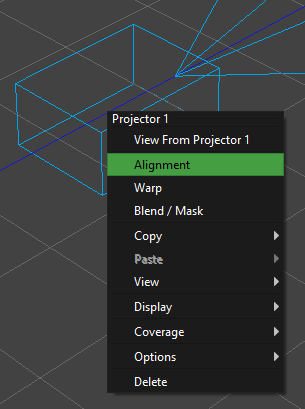
Right Click on a projector-> Alignment
Or choose Alignment in the Layout dropdown
HOW TO USE
- Select a projector to align.
- Use the mouse to select a vertex on the model to align with.
- Press Enter to enable a cross hair on the output.
- Use the Arrow keys to move the cross hair to exactly the same position on the real model.
- When you are happy with the position press Enter again to confirm that point.
- Notice a new correspondence appear in the correspondence panel.
- Repeat steps 2-7 4 times to see your model jump into the correct position.
| Arrow keys alone | 1 pixel movement |
| Ctrl + Arrow Keys | 20 pixels movement |
| Shift + Arrows Keys | 100 pixels movement |
After six points try using the tick boxes in the Alignment Point panel to add and subtract points from the alignment algorithm to see if some combinations are better.
To exit Alignment press the
 Home button or right click-> Home.
Alignment Properties

Correspondences
Here you will see points you have aligned. Its 3D coordinate and its 2D coordinate.

Estimation Input Values
Throw Ratio: If you know exactly your projectors Lens Ratio enter it here and lock it for a very accurate alignment. If you are unsure of its exact ratio due to zoom leave it unlocked. If unlocked SHAPEs algorithm will best guess your Projectors Lens Ratio once you have entered 4 correspondences.
Lens Shift: If you know exactly your projectors Lens Shift enter it here and lock it for a very accurate alignment. If you are unsure of its exact shift leave it unlocked. If unlocked SHAPEs algorithm will best guess your Projectors Lens Ratio once you have entered 4 correspondences.

Alignment Style
Here you can decide what alignment style you would like to align with, Cross Hair or Checkerboard.
Once you have chosen the mode you can customize it for your situation.